Table of Contents >> Show >> Hide
- Before You Start: Pick the Right Bottle and Prepare It
- Tools You May Need
- Method 1: Cut a Plastic Bottle with Scissors
- Method 2: Cut a Plastic Bottle with a Utility Knife
- Method 3: Cut a Plastic Bottle with a Hot Knife or Heated Tool
- How to Smooth Sharp Plastic Edges
- Common Mistakes to Avoid
- Creative Uses for Cut Plastic Bottles
- Which Cutting Method Should You Choose?
- Real-World Experience: What Cutting Plastic Bottles Teaches You
- Conclusion
Plastic bottles are everywhere: in the fridge, the recycling bin, the back seat of the car, and, somehow, under the couch where nobody remembers putting them. Before you toss one away, there is a surprisingly useful skill worth learning: how to cut a plastic bottle cleanly, safely, and without turning your kitchen table into a tiny crime scene of jagged plastic confetti.
Whether you want to make a seed starter, a bird feeder, a funnel, a pencil holder, a scoop, a mini greenhouse, or a last-minute school project that was definitely not assigned three weeks ago, cutting a plastic bottle is a simple DIY technique. The trick is choosing the right method for the bottle and the job. A thin water bottle behaves differently from a thick detergent bottle. A curved soda bottle is not as cooperative as a flat-sided jug. And a dull blade? That is not a tool; that is a tantrum with a handle.
This guide explains 3 simple ways to cut a plastic bottle: with scissors, with a utility knife, and with a heated cutting tool. You will also learn how to mark a straight line, avoid sharp edges, choose safer tools, and finish the cut so your project looks intentional instead of attacked.
Before You Start: Pick the Right Bottle and Prepare It
Not every plastic bottle deserves a starring role in your DIY project. For most home crafts, choose clean plastic drink bottles, soda bottles, milk jugs, or sturdy household containers that did not hold harsh chemicals. Food and beverage bottles are usually easier to rinse, safer to handle, and better suited for craft projects, garden planters, and organizers.
Clean and Dry the Bottle
Empty the bottle completely, rinse it with warm water, and let it dry. Sticky soda residue makes the bottle slippery, attracts ants, and gives your craft table the personality of a carnival floor. Remove labels if they get in the way of your cut line. If the label leaves glue behind, rub it with a little dish soap and warm water, or cover the area with masking tape and mark over it.
Check the Plastic Type
Many clear drink bottles are PET or PETE plastic, marked with a number 1 recycling symbol. Milk jugs and some detergent bottles are often HDPE, marked with a number 2. These plastics are common in household reuse projects. Thinner PET bottles are flexible and easy to cut with scissors, while thicker HDPE containers may need a utility knife or careful scoring.
Set Up a Safe Work Area
Work on a stable table with good lighting. Use a cutting mat, thick cardboard, or a scrap board under the bottle if you are using a blade. Keep your free hand away from the cutting path, and always cut away from your body. If children are helping, let them decorate, mark lines, or hold finished pieces, but an adult should handle sharp blades and heated tools.
Tools You May Need
You do not need a professional workshop to cut a plastic bottle. Most projects can be done with common household tools. A good basic setup includes:
- Sharp scissors or kitchen shears
- A utility knife, craft knife, or box cutter
- Masking tape or painter’s tape
- A permanent marker
- A ruler or flexible measuring tape
- A cutting mat, cardboard, or scrap wood
- Fine-grit sandpaper or a nail file
- Work gloves, especially when cutting thicker plastic
Sharp tools are safer than dull tools because they require less force. When you push too hard, plastic can buckle, the blade can slip, and suddenly your quick craft project becomes a dramatic lesson in first aid. Replace dull utility blades and avoid using scissors that chew the plastic instead of slicing it.
Method 1: Cut a Plastic Bottle with Scissors
The scissors method is the easiest way to cut thin plastic bottles, especially water bottles, soda bottles, and soft drink containers. It is best for simple cuts, curved shapes, planters, funnels, and craft pieces where perfection is welcome but not legally required.
Best For
Use scissors when you are cutting thin plastic, trimming edges, making a bottle planter, removing the top of a water bottle, or cutting decorative shapes. Scissors are also useful after you make a starter hole with another tool.
Step-by-Step Instructions
- Mark your cut line. Wrap masking tape around the bottle where you want to cut. The edge of the tape becomes a simple guide for a straighter line.
- Make a starter hole. Pinch the bottle slightly and poke a small hole near the cut line using the tip of the scissors, a craft knife, or a sharp awl. Be gentle and keep your hand out of the way.
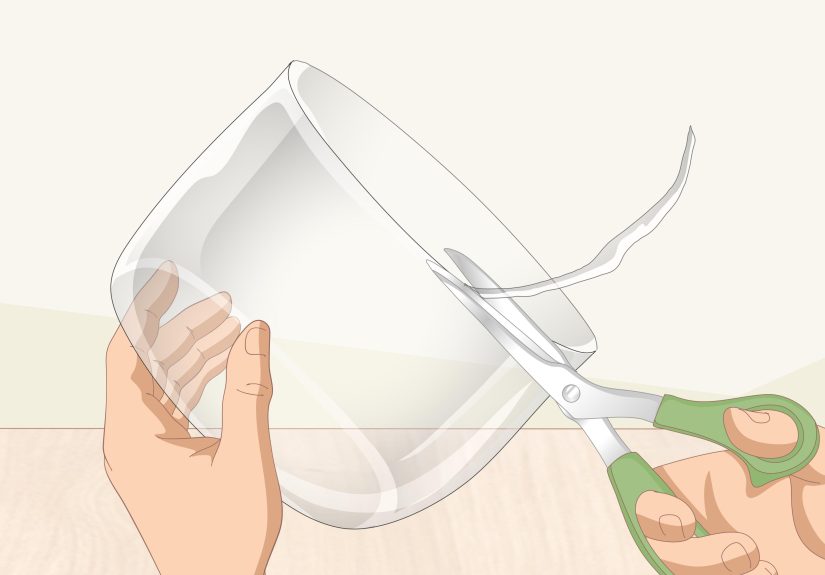
- Insert one scissor blade. Slide one blade into the starter hole and begin cutting slowly along the marked line.
- Rotate the bottle, not your wrist. Keep the scissors steady and turn the bottle as you cut. This gives you better control and helps prevent jagged edges.
- Trim the edge. After the main cut, go back and snip away uneven bumps or sharp points.
Pro Tips for a Cleaner Scissor Cut
Do not start cutting at the stiff bottom of the bottle unless you have to. The middle section is usually easier to control. If the bottle has ridges, choose a line above or below the ridge rather than directly through it. Ridges can pull your scissors off course like tiny plastic speed bumps.
If the bottle collapses while you cut, put the cap back on loosely to add a little structure. Do not tighten it fully if the bottle has moisture inside or has been warmed, because pressure can build. You only need enough firmness to keep the bottle from folding in your hand.
Method 2: Cut a Plastic Bottle with a Utility Knife
A utility knife is the best option when you need precision. It works well for cutting windows in bottles, making straight openings, removing thick sections, or starting a cut that you will finish with scissors. This method gives you more control, but it also requires more patience and respect for the blade.
Best For
Use a utility knife for thicker bottles, square containers, clean rectangular openings, bottle bird feeders, storage bins, and projects where a straight edge matters. It is also helpful when cutting near the shoulder or base of a bottle, where scissors can struggle.
Step-by-Step Instructions
- Place the bottle on a protected surface. Use a cutting mat, scrap board, or thick cardboard.
- Mark the line clearly. Use a permanent marker, ruler, or tape. For a window cut, draw the full shape before touching the blade.
- Score lightly first. Do not try to cut through in one heroic pass. Make a shallow line first to create a track.
- Repeat the cut. Run the blade along the same scored line several times, using steady pressure.
- Finish with scissors if needed. Once the plastic opens, insert scissors and continue cutting around the shape.
How to Keep the Blade from Slipping
The most common mistake is pressing too hard too soon. Plastic bottles are curved and flexible, which means a blade can skate across the surface if you rush. Start with a light scoring pass. Keep the bottle stable with your non-cutting hand, but never place that hand in front of the blade. If the bottle rolls, nest it in a folded towel or between two books to keep it steady.
For straight cuts around a bottle, tape is your best friend. Wrap painter’s tape around the bottle and line up the tape edge. If the tape meets evenly, your cut line will be much straighter. If the tape spirals upward like it is climbing a mountain, adjust it before cutting.
Method 3: Cut a Plastic Bottle with a Hot Knife or Heated Tool
A hot knife, heated craft knife, or soldering iron with a cutting tip can melt through plastic instead of slicing it. This method can create smoother edges and is useful for thicker plastic, small openings, or detailed craft cuts. However, it should be used carefully and only by adults in a well-ventilated area.
Best For
Use a heated cutting tool for thicker plastic bottles, small holes, controlled openings, and projects where a regular knife catches or cracks the plastic. It is especially useful for making drainage holes, hanging holes, and starter slots.
Important Safety Notes
Heating plastic can create fumes. Work outside or in a well-ventilated area, and avoid breathing in smoke or melted-plastic odor. Do not use a hot knife on unknown plastics, PVC containers, or bottles that held chemicals. Keep the tool away from children, pets, paper towels, and anything that thinks catching fire would be an exciting career move.
Step-by-Step Instructions
- Clean the bottle thoroughly. Make sure it is dry before using heat.
- Mark the cut line. Use a marker or tape as a guide.
- Heat the tool according to its instructions. Do not overheat it. You want to melt the plastic, not roast it.
- Touch the tool gently to the plastic. Let heat do the work. Do not force the tip through.
- Move slowly along the line. Keep the motion steady to avoid lumpy melted edges.
- Let the plastic cool. Do not touch the edge immediately after cutting.
When Not to Use Heat
Skip the hot knife method if you are working indoors without ventilation, crafting with young children, cutting a bottle that held cleaning chemicals, or planning to use the finished piece for food or drink. Once plastic has been cut or melted for crafts, it is best reserved for non-food uses such as planters, organizers, scoops for dry garden materials, or decorations.
How to Smooth Sharp Plastic Edges
Freshly cut plastic can be surprisingly sharp. Even a thin water bottle can leave an edge that scratches skin. After cutting, run your finger near the edge without pressing into it. If it feels rough, finish it before using the project.
Simple Edge-Finishing Options
- Sandpaper: Use fine-grit sandpaper to soften the edge.
- Nail file: Great for small curves and tight corners.
- Duct tape or washi tape: Covers sharp edges and adds color.
- Folded rim: On some thin bottles, you can fold a narrow edge inward and tape it down.
- Rubber trim: Useful for larger projects such as organizers or storage bins.
If you are making a planter, toy accessory, or project for kids, cover the edge with tape even after sanding. A colorful rim looks cheerful and prevents accidental scratches. Think of it as giving your bottle a tiny safety sweater.
Common Mistakes to Avoid
Using a Dull Blade
A dull blade forces you to push harder. More pressure means less control. Use a sharp blade and replace it when it drags, skips, or leaves ragged cuts.
Cutting Without a Guide
Freehand cutting can work for casual crafts, but tape gives you a cleaner line. For circles, wrap tape around the bottle. For rectangles, use a ruler and mark all corners before cutting.
Starting on a Ridge or Curve
Bottle ridges, shoulders, and bases are harder to cut. Start on a smoother section when possible, then work toward the tricky area.
Rushing the First Hole
The first puncture is the most awkward part. Go slowly. Support the bottle from behind with a safe surface, not your hand, and make a small starter hole before making a larger cut.
Ignoring the Final Edge
A clean cut is not finished until the edge is safe. Sand it, file it, or cover it. Your future fingertips will thank you.
Creative Uses for Cut Plastic Bottles
Once you know how to cut a plastic bottle, the humble recycling-bin resident becomes a miniature hardware store. Here are a few practical ideas:
- Seed starters: Cut the bottom half of a bottle, add drainage holes, and fill it with potting mix.
- Mini greenhouse: Cut the bottom off a clear bottle and place the top over seedlings.
- DIY funnel: Cut off the bottom and use the top section for pouring liquids into narrow containers.
- Bird feeder: Cut small windows, add perches, and fill with birdseed.
- Desk organizer: Cut bottles at different heights for pens, scissors, and craft supplies.
- Garden scoop: Cut a handle shape into a sturdy detergent bottle for scooping soil or birdseed.
- Cord holder: Cut rings from a bottle and use them to organize cables.
For garden projects, remember to add drainage holes. A planter without drainage is not a planter; it is a tiny swamp with leaves.
Which Cutting Method Should You Choose?
If you are cutting a thin water bottle, start with scissors. If you need a straight opening or a more controlled shape, use a utility knife to score the plastic first. If the bottle is thick or you need small holes, a heated tool can help, but only with ventilation and adult handling.
For most beginners, the best combination is simple: mark with tape, make a starter hole with a utility knife, and finish with scissors. This gives you the precision of a blade and the control of scissors without making the job more complicated than it needs to be.
Real-World Experience: What Cutting Plastic Bottles Teaches You
After cutting more plastic bottles than most people would proudly admit at dinner, one thing becomes clear: the bottle is always more flexible than you think, and your line is never as straight as you imagined. That is not a failure. That is the bottle reminding you it used to hold sparkling water and still has a dramatic personality.
The biggest lesson is that preparation matters more than strength. The first time many people try to cut a plastic bottle, they grab scissors, squeeze the bottle, and start hacking near the middle. The result is usually a wavy edge that looks like it was designed by a nervous raccoon. But when you wrap tape around the bottle first, everything changes. Tape gives your eyes a track to follow. It also slightly stiffens the plastic, which helps the scissors glide instead of wobble.
Another useful experience is learning where the bottle wants to be cut. Smooth middle sections are friendly. They bend, rotate, and cooperate. The bottom of the bottle is stubborn. The shoulder near the cap can be slippery and thick. If you are making a planter, cut around the middle first and save the difficult shaping for later. If you are making a scoop from a detergent bottle, draw the handle and opening before cutting anything. Once a big piece is removed, the container loses structure and becomes harder to control.
Scissors are wonderful for thin bottles, but they need a starter hole. Trying to stab through plastic with scissors is possible, but it is not elegant and can be unsafe. A small craft knife puncture makes the whole process calmer. Think of it as knocking on the door before entering instead of charging through like a superhero with poor planning skills.
Utility knives are excellent, but they reward patience. A light first pass is better than one aggressive cut. The first score line acts like a groove, and the next passes follow it. If you press too hard, the blade may jump. If you go slowly, the cut becomes cleaner. This is especially true for rectangular windows, such as those used for bird feeders or hanging planters.
The hot knife method feels almost magical the first time you use it, but it also teaches respect. Melted plastic can smell unpleasant, and the edge stays hot longer than expected. It is useful for drainage holes and thick plastic, but it is not the everyday choice for quick crafts. For most home projects, scissors and a utility knife are cleaner, simpler, and easier to manage.
One final tip from experience: always finish the edge. Even if the project looks good, the rim can still scratch. Sandpaper, tape, or a nail file takes only a minute and makes the finished piece feel much more polished. If you are making something for kids, plants, or frequent handling, edge finishing is not optional. It is the difference between a clever reuse project and a plastic paper cut waiting to happen.
Cutting plastic bottles is a small skill, but it opens the door to dozens of useful projects. It also makes you look at everyday waste differently. That empty bottle is not just trash. With a clean cut and a little imagination, it can become a planter, scoop, funnel, organizer, or weekend craft victory.
Conclusion
Learning how to cut a plastic bottle is simple once you match the method to the material. Use scissors for thin bottles, a utility knife for controlled cuts, and a hot knife only when you need heat-assisted cutting and can work safely with ventilation. The best results come from marking your line, cutting slowly, keeping your hands out of the blade path, and smoothing the final edge.
The next time you finish a water bottle or soda bottle, pause before tossing it away. With a clean cut, that ordinary container can become something useful, clever, and surprisingly good-looking. Not bad for an object that started the day holding lemonade.