
Table of Contents >> Show >> Hide
- Why a DIY Wine Bar With a Concrete Countertop Is Worth the Weekend
- Planning Your DIY Wine Bar Layout
- Why Concrete Makes a Great Wine Bar Countertop
- Materials and Tools You Will Need
- Step-by-Step: How to Build a DIY Wine Bar With Concrete Countertop
- Step 1: Build or Install the Bar Base
- Step 2: Create the Concrete Countertop Form
- Step 3: Plan Cutouts Before You Pour
- Step 4: Mix the Concrete Correctly
- Step 5: Pour, Reinforce, and Vibrate
- Step 6: Cure With Patience
- Step 7: Remove the Form and Finish the Surface
- Step 8: Seal the Concrete Countertop
- Step 9: Install the Countertop
- Wine Bar Design Ideas That Actually Work
- Common Mistakes to Avoid
- Maintenance Tips for a Concrete Wine Bar Countertop
- Budget-Friendly Ways to Make It Look Custom
- Real-World Experience: What You Learn While Building a DIY Wine Bar With Concrete Countertop
- Conclusion
- SEO Tags
Note: This article synthesizes practical DIY guidance from reputable U.S. home-improvement, concrete, electrical-safety, countertop-care, and wine-storage resources. It is written as original, web-ready content without source links.
Why a DIY Wine Bar With a Concrete Countertop Is Worth the Weekend
A DIY wine bar with a concrete countertop is one of those home projects that looks expensive, feels custom, and secretly lets you say, “Oh, I made that,” with the casual confidence of a person who owns at least one level and knows where it is. Concrete brings the cool, modern attitude. Wine storage brings the grown-up hospitality. Put them together and you get a small home bar that can turn an empty wall, basement corner, dining room nook, or covered patio into the most visited square footage in your house.
The beauty of this project is flexibility. You can build a compact dry bar with base cabinets, floating shelves, and a slab-style concrete top. You can upgrade it into a wet bar with a sink, beverage fridge, and tile backsplash. You can make it rustic, industrial, modern farmhouse, minimalist, or “I saw this in a boutique hotel and now my personality has changed.” Concrete works with nearly every style because it can be tinted, polished, sealed, rounded, squared, or left with a lightly imperfect handmade finish.
This guide covers planning, materials, construction steps, wine-storage details, safety notes, and real-world lessons from the kind of project where patience matters more than brute force. Concrete is tough, but the process rewards careful measuring, clean formwork, and not deciding to “wing it” halfway through the pour. That is how countertops become abstract sculpture.
Planning Your DIY Wine Bar Layout
Before buying concrete mix or cabinets, decide what your wine bar needs to do. A decorative serving station has different requirements than a full wet bar with plumbing and electrical. A small wine bar may only need a 36-inch base cabinet, a short concrete countertop, a few bottle cubbies, and a rail for stemware. A larger home wine bar may include a wine fridge, drawers for tools, open shelves, lighting, a sink, and seating.
Choose the Right Location
Look for a space that is convenient but not in the way. Popular spots include a dining room wall, an unused kitchen corner, a basement lounge, a hallway alcove, or a covered outdoor entertaining area. If you plan to install a wine refrigerator, choose a location near power and leave space for ventilation according to the appliance manual. Built-in wine fridges are designed to vent differently than freestanding models, so do not trap a freestanding fridge inside tight cabinetry unless you enjoy replacing appliances as a hobby.
If you are adding a sink, check plumbing access early. Running water and drains can turn a simple weekend project into a permit-and-professional situation. For electrical outlets near sinks or wet areas, use GFCI protection and follow local code. When in doubt, hire a licensed electrician. Wine is fun; electrical shock is not a tasting note.
Measure Like You Mean It
Measure the wall, floor, cabinet depth, ceiling height, and appliance openings. Standard base cabinets are often around 24 inches deep, but wine bars can be shallower if you are working with a tight space. A comfortable counter height is typically similar to kitchen-counter height, while bar-height counters are taller and usually pair with bar stools. For most DIY wine bars, a kitchen-height counter is easier to use for pouring, opening bottles, mixing drinks, and setting out snacks.
Sketch the layout before buying materials. Include cabinet width, countertop overhang, bottle storage, glass storage, lighting, outlets, backsplash, and any appliance clearances. A simple drawing can prevent the classic DIY tragedy: discovering your wine fridge door cannot open because it is trapped by a wall. That is not a wine bar; that is a sad metal box.
Why Concrete Makes a Great Wine Bar Countertop
Concrete countertops have a handmade, architectural look that pairs beautifully with wine storage. Unlike laminate or stock stone slabs, concrete can be poured to the exact size of your bar. It can be formed with crisp edges, softened corners, integral color, decorative aggregates, or a natural gray finish. It also has enough visual weight to make a small wine bar feel built-in rather than temporary.
Concrete is not maintenance-free, though. It is naturally porous and must be sealed, especially around wine, citrus, coffee, and cocktail ingredients. Red wine looks charming in a glass and much less charming as a permanent countertop memory. A quality food-safe countertop sealer helps protect against stains, moisture, and everyday use. You should still wipe spills quickly, use cutting boards, and avoid placing hot pans or sharp tools directly on the surface.
Materials and Tools You Will Need
Your exact list depends on the size and design of the wine bar, but most DIY concrete countertop projects use a similar set of supplies. For the bar base, you may use stock cabinets, custom plywood boxes, open shelving, or a framed structure. Stock kitchen cabinets are often the simplest route because they are square, sturdy, and already built to support countertop use when installed correctly.
Basic Materials
- Base cabinets or a custom-built bar frame
- Countertop-specific concrete mix
- Melamine board or smooth form material
- Silicone caulk for form seams
- Reinforcement such as wire mesh or appropriate countertop reinforcement
- Concrete pigment, if desired
- Concrete sealer rated for countertop use
- Plywood support or cabinet blocking, if needed
- Backsplash tile, wood paneling, or wall finish
- Wine rack inserts, shelves, glass racks, or bottle cubbies
- Optional wine fridge, beverage fridge, sink, faucet, and lighting
Useful Tools
- Tape measure, level, square, and pencil
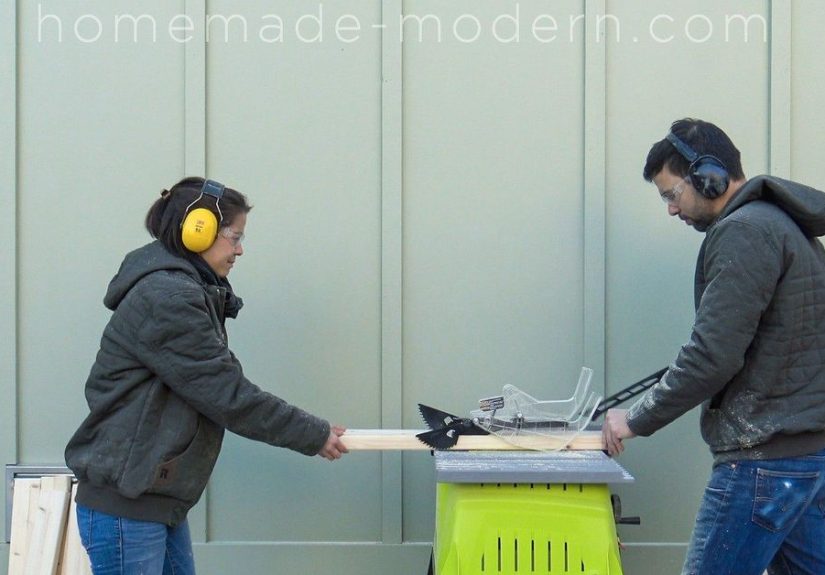
- Circular saw or table saw for form pieces
- Drill and driver bits
- Mixing paddle and heavy-duty drill or concrete mixer
- Concrete trowel, margin trowel, and screed board
- Orbital sander or palm sander to help release air bubbles
- Diamond sanding pads or wet-polishing pads
- Gloves, eye protection, dust mask or respirator, and hearing protection
Use countertop-specific concrete mix rather than ordinary bagged concrete. Countertop mixes are generally designed with finer aggregates, improved flow, reduced shrinkage, and higher strength. That matters when you are pouring a relatively thin slab that needs to look smooth and hold up to real use.
Step-by-Step: How to Build a DIY Wine Bar With Concrete Countertop
Step 1: Build or Install the Bar Base
Start with a strong, level base. If you are using cabinets, fasten them securely to wall studs and to each other. Shim where needed so the top is perfectly level from side to side and front to back. Concrete is heavy, and it is not forgiving of wobbly support. If the base flexes, the countertop may crack later.
For a custom wine bar, include practical storage zones. Use closed cabinets for less attractive items like napkins, openers, cleaning supplies, and backup snacks. Add open cubbies for bottles you plan to drink soon. Include a drawer for corkscrews, foil cutters, pour spouts, cocktail picks, and those tiny napkins that make everyone feel slightly more elegant.
Step 2: Create the Concrete Countertop Form
Most DIYers pour the concrete countertop upside down in a mold, then flip it after curing. Melamine is commonly used because its smooth surface helps create a cleaner finish. Build the form to the exact outside dimensions of your countertop, including any overhang. A 1-inch to 1 1/2-inch overhang often looks good on a bar, but adjust based on cabinet style and space.
Cut the form base and side strips accurately. Screw the sides into place, then run a neat bead of silicone caulk along the inside seams. Smooth the caulk with a rounded tool or a gloved finger to create slightly eased edges. This small detail makes the finished concrete look intentional instead of sharp enough to judge your life choices.
Step 3: Plan Cutouts Before You Pour
If your wine bar includes a sink, faucet, ice bin, or pop-up outlet, create cutouts in the form before mixing concrete. Use rigid foam, melamine blocks, or manufacturer templates to reserve openings. Double-check measurements with the actual fixtures. A sink template is not a suggestion; it is the difference between “perfect fit” and “creative problem-solving at midnight.”
For a dry wine bar, you may only need a simple rectangular slab. That is the best option for a first concrete countertop project. Fewer cutouts mean fewer weak points and fewer opportunities for panic.
Step 4: Mix the Concrete Correctly
Follow the instructions on the concrete mix bag. Add water gradually and mix thoroughly. More water may make the mix easier to pour, but too much water can weaken the slab and increase cracking or surface dusting. Aim for a workable, flowable consistency without turning the mix into soup.
Wear gloves, eye protection, and a dust mask while mixing. Dry cement dust is harsh, and wet concrete can irritate skin. Mix long enough for the material to become consistent in color and texture. If you are adding pigment, blend it evenly with the water or mix according to the pigment manufacturer’s instructions.
Step 5: Pour, Reinforce, and Vibrate
Pour the first layer of concrete into the form, working it into corners and along edges. Add reinforcement after part of the form is filled, keeping it centered within the slab rather than pressed against the surface. Reinforcement helps reduce the chance of cracking, especially around longer spans or cutouts.
Continue filling the form, then screed off the excess with a straight board. Tap the sides with a rubber mallet or run an orbital sander along the outside of the form to help release trapped air bubbles. Do not go wild here. The goal is to encourage air out of the mix, not vibrate the entire project into another zip code.
Step 6: Cure With Patience
Concrete does not dry like paint; it cures through a chemical process. Cover the slab with plastic to retain moisture and let it cure according to the mix instructions. Many countertop mixes can be stripped from the form after the initial cure, but the concrete continues gaining strength over time. Give it several days before heavy handling, sanding, sealing, or installation. If the slab still feels soft or marks easily, wait longer.
Patience is one of the cheapest materials in this project, and also the one most likely to be forgotten. Rushing the cure can lead to chipped edges, weak corners, and words your neighbors may learn through the wall.
Step 7: Remove the Form and Finish the Surface
Carefully remove the screws and separate the form pieces. If you built the form cleanly, the concrete should release with minimal drama. Sand rough edges with diamond pads or appropriate concrete abrasives. For a smooth bar top, progressively polish the surface, cleaning away slurry and dust between passes.
You can leave small pinholes for a natural handmade look, or fill them with a slurry made for concrete countertops. A perfectly glassy finish is possible, but for a DIY wine bar, a slightly organic surface often looks more authentic and forgiving. It says “crafted,” not “factory showroom.”
Step 8: Seal the Concrete Countertop
Sealing is not optional. Choose a sealer designed for concrete countertops and appropriate for food-contact areas if the bar will be used for serving. Follow the manufacturer’s timing, surface-prep, temperature, and application instructions. Some sealers require multiple thin coats and a curing period before use.
After sealing, test water resistance in an inconspicuous area. Water should bead rather than soak in. Even with a good sealer, clean wine, citrus juice, vinegar, and cocktail mixers quickly. Concrete is tough, but sealers have limits. Think of the sealer as a good raincoat, not a submarine.
Step 9: Install the Countertop
Get help lifting the slab. Concrete countertops are heavy and awkward, which is a terrible combination for heroic solo behavior. Dry-fit the slab first, checking overhangs and alignment. Use appropriate adhesive or silicone between the cabinet base and slab, depending on your design and local best practices. Make sure the countertop is fully supported, especially near corners and appliance openings.
If you cast the countertop in place instead of precasting it, protect cabinets and floors carefully before pouring. Cast-in-place concrete avoids flipping a heavy slab, but it requires excellent masking, edge forms, and finishing skills because the visible surface is the top you trowel.
Wine Bar Design Ideas That Actually Work
Add Smart Wine Storage
Wine likes cool, dark, stable conditions. For everyday bottles, keep them away from direct sunlight, heat sources, and constant vibration. Store cork-finished bottles on their sides if they will sit for a while, which helps keep corks from drying out. A small wine fridge is a smart upgrade if your home gets warm or you collect bottles beyond “whatever was on sale and had a nice label.”
Open wine cubbies look beautiful, but they are best for short-term storage. For long-term storage, choose a temperature-controlled unit or a cool interior cabinet. A wine bar should make bottles accessible, but it should not cook them under bright lights.
Use Lighting for Mood and Function
Good lighting can make a DIY wine bar look professionally designed. Install warm under-shelf lighting, small sconces, or LED strips under floating shelves. Keep task lighting bright enough for reading labels and mixing drinks, but soft enough that the bar feels inviting. Avoid hot bulbs near wine storage. LED lighting is typically a better choice because it runs cooler and uses less energy.
Choose a Backsplash With Personality
A concrete countertop pairs well with many backsplash materials. Subway tile keeps the look classic. Zellige-style tile adds texture. Wood slats warm up the concrete. Brick veneer creates an old-cellar feel. Mirrored tile can make a small bar look larger and more glamorous. If the countertop is simple gray concrete, the backsplash is your chance to add color, pattern, or shine.
Mix Open and Closed Storage
Not every bar item deserves to be on display. Show off attractive bottles, stemware, decanters, and a few decorative pieces. Hide the plastic cups, extra paper towels, and that one bottle of mystery liqueur nobody remembers buying. A balanced wine bar feels styled but still practical.
Common Mistakes to Avoid
Using the Wrong Concrete Mix
Regular concrete mix may contain larger aggregate that makes it harder to achieve a refined countertop surface. A countertop-specific mix improves workability and finish quality. It is usually worth the extra cost for a project that will live at eye level and host drinks.
Skipping Reinforcement
Concrete can crack, especially in thin slabs, long spans, and areas around cutouts. Proper reinforcement helps control cracking and strengthens the slab. Keep reinforcement positioned correctly within the concrete rather than letting it sink to the bottom of the form.
Forgetting Appliance Clearance
Wine fridges and beverage centers need breathing room. Follow the appliance installation guide for side, rear, top, and front ventilation requirements. A fridge that overheats will run poorly, waste energy, and age faster than a bargain cabernet left in a sunny window.
Installing the Countertop Before It Is Ready
Concrete gains strength over time. Moving, sanding, or sealing too early can damage the surface. Build curing time into your schedule. A DIY wine bar is a project, not a race. Besides, anticipation makes the first pour at the finished bar taste better.
Maintenance Tips for a Concrete Wine Bar Countertop
Clean the countertop with mild dish soap, warm water, and a soft cloth. Avoid harsh abrasives, acidic cleaners, bleach-heavy products, and aggressive scrubbing pads that can damage the sealer. Use coasters under glasses, trivets under hot items, and cutting boards for garnishes. Reseal as recommended by the sealer manufacturer or when the surface stops repelling water effectively.
For wine bars, pay special attention to acidic and staining liquids. Red wine, lemon juice, lime juice, bitters, coffee, and colored mixers should be wiped up quickly. This does not mean the bar is delicate. It simply means your concrete countertop deserves the same respect as a good cutting board or leather sofa: use it, enjoy it, and do not abuse it for sport.
Budget-Friendly Ways to Make It Look Custom
You do not need a mansion budget to build a polished wine bar. Start with unfinished stock cabinets and paint them a rich color like deep green, charcoal, navy, or warm white. Add brass pulls, matte black hardware, or vintage-style knobs. Use floating shelves above the bar for glassware and décor. Install an inexpensive tile backsplash in a stacked or herringbone pattern. Add a framed mirror or artwork to create height.
The concrete countertop itself becomes the custom feature. Even a simple rectangular slab feels special because it is made for the space. Add a slightly thicker edge profile if you want a bold look, or keep the slab slim and modern for a cleaner design. A small detail, such as rounded front corners or a softly polished surface, can make the bar feel more expensive than it was.
Real-World Experience: What You Learn While Building a DIY Wine Bar With Concrete Countertop
The first thing you learn while building a DIY wine bar with a concrete countertop is that concrete respects preparation. It does not care how inspired you feel. It does not care that you have a playlist, a vision board, and a strong emotional attachment to the word “industrial.” If the form is crooked, the countertop will be crooked. If the base is not level, the slab will make sure everyone knows. The project rewards slow, careful work before the dramatic part begins.
One useful experience is to dry-fit everything before mixing concrete. Put the cabinets in place. Set the wine fridge in its opening. Test the door swing. Hold up the shelves. Place the sink template on the counter area. Pretend you are making a drink and reaching for a glass. These little rehearsals reveal awkward details before they become permanent. For example, a shelf that looks perfect on paper may be too low for tall bottles. A fridge handle may hit adjacent trim. A beautiful bottle rack may block the outlet you forgot you needed. The best time to discover these problems is while you are still holding a pencil, not a wet trowel.
Another lesson is that concrete finishing is part craft and part humility exercise. Tiny air bubbles may appear. Edges may need extra sanding. The color may dry slightly different than expected. Instead of fighting every small variation, embrace the handmade character. A concrete wine bar should not look like plastic. Its subtle movement, small pores, and natural tone are part of the charm. The goal is not sterile perfection; the goal is a strong, smooth, sealed surface that looks intentional and feels good under your hand.
Sealing teaches patience, too. Many DIYers want to install the slab, stock the shelves, and invite friends over immediately. But sealers often need curing time before full use. Respect that waiting period. A properly sealed countertop is much easier to live with, especially in a wine bar where spills are practically part of the job description. Keep a soft cloth nearby during the first few gatherings. Guests will spill. You will spill. Someone will set down a glass with a dramatic red ring. Wipe it up and continue being charming.
The final experience is the best one: a DIY wine bar changes how you use your home. It creates a natural gathering point. People lean against it, ask about the concrete, admire the shelves, and suddenly the room feels more social. Even a small bar can make dinner feel more relaxed and weekends feel more intentional. The project is not just about building a countertop. It is about creating a place where bottles are opened, snacks appear, stories get better, and everyone somehow ends up standing in the same corner of the room. That is when you know the project worked.
Conclusion
A DIY wine bar with a concrete countertop is a smart project for homeowners who want a custom feature without ordering a fully custom bar. The key is planning the layout carefully, using the right countertop mix, building a clean form, reinforcing the slab, curing patiently, sealing properly, and designing storage around how you actually use wine and barware. Concrete brings durability and character, while thoughtful cabinetry, lighting, and wine storage turn the project into a functional entertaining zone.
Whether you build a compact dry bar in the dining room or a full wet bar in the basement, this project can add style, convenience, and personality to your home. Just remember: measure twice, pour once, seal well, and never underestimate the power of good lighting and a well-placed corkscrew.