Table of Contents >> Show >> Hide
- What Is a French Braid?
- What Is a Dutch Braid?
- Dutch Braid Vs. French Braid: The Main Difference
- Which Braid Is Easier for Beginners?
- Which Braid Looks Better?
- French Braid Benefits
- Dutch Braid Benefits
- Which Braid Is Better for Thick Hair?
- Which Braid Is Better for Thin or Fine Hair?
- Which Braid Is Better for Curly or Textured Hair?
- Common Mistakes When Braiding
- Styling Ideas for French Braids
- Styling Ideas for Dutch Braids
- How to Make Either Braid Look Better
- Experience-Based Tips: What It Feels Like to Learn Both Braids
- Final Verdict: Dutch Braid Vs. French Braid
If braids had a family reunion, the French braid would arrive polished, timeless, and wearing a pearl earring, while the Dutch braid would show up with extra volume, dramatic texture, and the confidence of someone who knows their selfie angle. They are closely related, but they do not create the same look. The biggest difference between a Dutch braid and a French braid is the direction you cross the hair sections: a French braid crosses strands over the middle, while a Dutch braid crosses strands under the middle. That tiny switch changes everything.
Both styles start with three sections of hair and gradually add more hair as you braid down the head. Both can be worn casually, professionally, romantically, athletically, or in that “I definitely did not wake up five minutes ago” emergency hairstyle category. But one lies flatter against the scalp, and the other pops up like a raised, 3D braid. Once you understand the technique, choosing between a Dutch braid vs. French braid becomes much easier.
Below, we will break down what each braid is, how they differ, which one is easier for beginners, which works best for different hair types, and how to style them without turning your arms into cooked spaghetti.
What Is a French Braid?
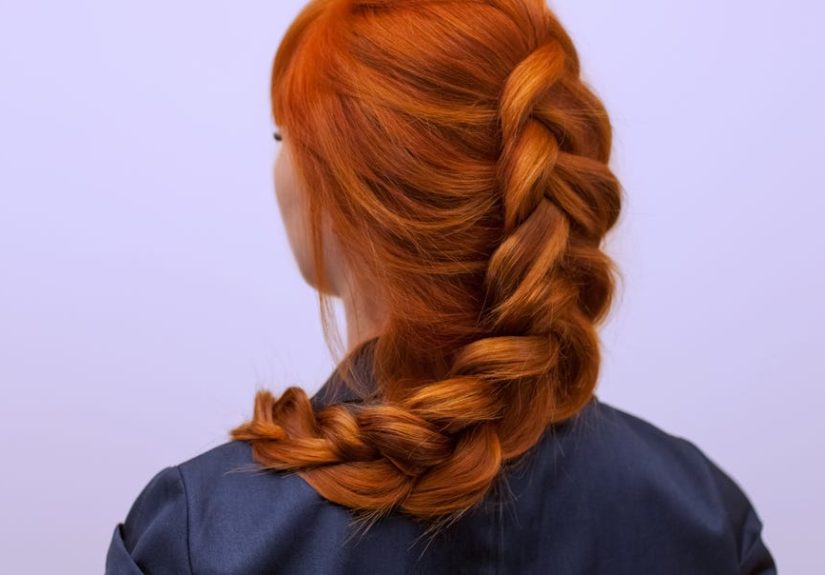
A French braid is a classic three-strand braid that incorporates new hair as it moves along the scalp. Instead of simply braiding loose hair from the nape down, you start near the crown or hairline, divide a section into three parts, and cross the outer strands over the middle strand while adding small pieces of hair from each side.
The result is smooth, elegant, and slightly tucked into the hair. A French braid looks like it is woven into the head rather than sitting on top of it. That is why it is often used for polished everyday looks, school hairstyles, work-friendly styles, bridal updos, and soft romantic braids.
How a French Braid Works
The basic French braid technique is simple in theory:
- Brush or detangle the hair so the strands move easily.
- Take a section of hair near the top of the head.
- Divide it into three equal strands.
- Cross the right strand over the middle strand.
- Cross the left strand over the middle strand.
- Add a small section of loose hair to the next outside strand before crossing it over.
- Repeat until all hair is incorporated.
- Finish with a regular three-strand braid and secure with an elastic.
Think of it as a regular braid that collects passengers along the way. By the time it reaches the nape of the neck, everybody is on the braid bus.
What Is a Dutch Braid?
A Dutch braid is often called a reverse French braid or inside-out braid. It uses the same three-strand structure as a French braid, but instead of crossing each outside strand over the middle, you cross it under the middle. This underhand technique pushes the braid outward, creating a raised, dimensional effect.
That raised shape is the reason Dutch braids are popular for sporty hairstyles, festival looks, double braids, boxer braids, crown braids, and bold everyday styles. If the French braid whispers, the Dutch braid raises its hand and says, “Actually, I have a point to make.”
How a Dutch Braid Works
The Dutch braid method follows this pattern:
- Detangle the hair and decide where the braid will begin.
- Take a small section near the hairline or crown.
- Divide it into three equal strands.
- Cross the right strand under the middle strand.
- Cross the left strand under the middle strand.
- Add a new section of hair to the outside strand before crossing it under.
- Continue adding hair and braiding under until you reach the nape.
- Braid the remaining length normally, still crossing under, and secure it.
The secret is remembering one word: under. When in doubt, tuck the outside strand underneath the center strand. That single movement is what gives the Dutch braid its signature pop-up effect.
Dutch Braid Vs. French Braid: The Main Difference
The main difference between a Dutch braid and a French braid is the direction of the weave. A French braid crosses hair over the center strand. A Dutch braid crosses hair under the center strand.
That may sound like a small detail, but it changes the final appearance. A French braid blends into the hair and creates a smoother, flatter finish. A Dutch braid sits on top of the hair and looks more textured, raised, and bold.
Quick Comparison Table
| Feature | French Braid | Dutch Braid |
|---|---|---|
| Technique | Cross strands over the middle | Cross strands under the middle |
| Appearance | Smooth and tucked in | Raised and 3D |
| Best For | Classic, elegant, soft styles | Bold, sporty, voluminous styles |
| Beginner Difficulty | Usually easier to learn first | May feel awkward at first |
| Volume | Subtle | More noticeable |
| Common Names | Classic French braid | Reverse French braid, inside-out braid |
Which Braid Is Easier for Beginners?
For many beginners, the French braid feels easier because the overhand motion is similar to a traditional three-strand braid. If you already know how to make a regular braid, your hands may naturally want to cross the hair over the middle.
The Dutch braid is not necessarily harder, but it can feel backwards at first. Your fingers may stage a small protest. You might start with a Dutch braid and accidentally create a French braid halfway down. This is normal. Hairstyling is a journey, and sometimes that journey includes muttering into the bathroom mirror.
If you are brand new to braiding, start with a French braid to understand how to add hair evenly. Once that feels comfortable, try the Dutch braid by changing only one thing: cross under instead of over.
Which Braid Looks Better?
Neither braid is better overall. The best choice depends on the look you want.
Choose a French Braid If You Want:
- A soft, classic hairstyle
- A braid that looks polished but not too dramatic
- A practical style for work, school, or casual days
- A good base for buns, chignons, and romantic updos
- A braid that blends smoothly into the hair
Choose a Dutch Braid If You Want:
- A bold braid that stands out
- More visible texture and volume
- A sporty style that keeps hair secure
- Double braids, boxer braids, or festival hair
- A braid that photographs well from every angle
A French braid is the “quiet luxury” braid. A Dutch braid is the “main character walking through a wind machine” braid. Both have their moment.
French Braid Benefits
The French braid has remained popular for good reason. It is neat, practical, and works in many situations. You can wear it to a workout, a wedding, a study session, a date, or a grocery run where you promise yourself you will buy only five things and leave with seventeen.
1. It Looks Timeless
French braids have a clean, traditional look that rarely feels outdated. They can be tight and sleek or loose and romantic, depending on how much you pull the braid apart after securing it.
2. It Works for Many Hair Lengths
Medium to long hair is easiest for French braiding, but shorter layers can also be incorporated with styling cream, bobby pins, or a little patience. Shoulder-length hair can often hold a French braid if the sections are added carefully.
3. It Is Great for Second-Day Hair
Freshly washed hair can be slippery, while second-day hair usually has more grip. A French braid can make slightly oily roots look intentional, which is basically hair magic.
4. It Can Be Dressed Up or Down
A single French braid feels classic. A side French braid feels relaxed. A French braid tucked into a low bun feels elegant. One technique gives you several styling options.
Dutch Braid Benefits
The Dutch braid is loved for its bold shape and secure hold. Because it sits on top of the hair, it creates a fuller visual effect, even when the hair itself is not especially thick.
1. It Creates More Volume
The raised structure makes the braid look bigger. You can also gently tug on the outer loops, a technique often called pancaking, to make the braid appear wider and softer.
2. It Holds Hair Securely
Dutch braids are excellent for active days. Double Dutch braids are especially useful for workouts, sports, hiking, travel, or any day when your hair needs to stay put instead of joining the chaos.
3. It Works Beautifully for Double Braids
Two Dutch braids create a defined, symmetrical style. This look is often seen in athletic hairstyles, street-style looks, and protective-inspired styling routines.
4. It Makes Details More Visible
Because the braid sits above the rest of the hair, highlights, balayage, vivid color, and dimensional tones often show beautifully in a Dutch braid.
Which Braid Is Better for Thick Hair?
Both Dutch and French braids can work well for thick hair, but the Dutch braid often shows off thickness more dramatically. A raised braid gives dense hair a sculpted look and can prevent the style from disappearing into the rest of the hair.
For very thick hair, use slightly larger sections and keep the tension consistent. Too-small sections can make the process take forever, and unless you are training for the Braid Olympics, nobody needs that level of arm endurance.
Which Braid Is Better for Thin or Fine Hair?
Fine hair can look beautiful in both styles, but Dutch braids may create the illusion of more volume. After braiding, gently loosen the outer edges to make the braid appear fuller. Texturizing spray, dry shampoo, or light mousse can help fine hair grip better.
A French braid, on the other hand, can look sleek and delicate on fine hair. If you prefer a tidy, understated result, the French braid may be more flattering. If you want the braid to look bigger, go Dutch.
Which Braid Is Better for Curly or Textured Hair?
Curly and textured hair can hold braids beautifully because the natural texture gives the strands grip. Both French and Dutch braids can help keep curls organized, reduce tangling during the day, and create pretty waves or curl definition when taken down.
For curly hair, avoid forcing the hair into tiny sections if it causes frizz or tension. Work with detangled, moisturized hair, and use a cream or gel that gives slip without making the hair too slippery. Dutch braids can create a bold raised look, while French braids offer a smoother finish.
Common Mistakes When Braiding
Adding Uneven Sections
If one side gets larger pieces than the other, the braid may curve or look lopsided. Try adding similar amounts of hair each time.
Losing Tension
Loose tension can make the braid sag. Keep each strand snug as you work, then loosen the braid afterward if you want a softer look.
Starting Too Low
If you begin too far back on the head, the braid may not frame the face or hold shorter layers well. Start near the hairline or crown for better control.
Using Freshly Washed, Slippery Hair
Clean hair is lovely, but it can slide out of braids. Add dry shampoo or texture spray if your hair feels too soft to grip.
Styling Ideas for French Braids
Classic Single French Braid
This is the go-to style for everyday wear. It keeps hair controlled, looks polished, and works for casual or professional settings.
Side French Braid
A side French braid feels softer and more romantic. It is great for layered hair because shorter pieces can blend into the braid naturally.
French Braid Bun
Braid the hair down to the nape, then twist the remaining length into a bun. This creates an elegant style for weddings, dinners, or days when you want to look like you made an effort without actually hiring a glam squad.
Styling Ideas for Dutch Braids
Double Dutch Braids
Part the hair down the middle and create one Dutch braid on each side. This style is secure, sporty, and especially good for long days.
Dutch Braid Crown
Braid around the head to create a crown effect. This style looks intricate but is based on the same underhand technique.
Half-Up Dutch Braid
Create a Dutch braid using only the top section of hair, then leave the rest loose. This is a great compromise when you want detail without pulling all your hair back.
How to Make Either Braid Look Better
Good braids are not just about technique. Prep matters. Start with detangled hair, but do not make it so silky that it refuses to cooperate. Add a little styling cream for smoothness, dry shampoo for grip, or texturizing spray for volume.
After securing the braid, gently tug the edges to loosen it. This makes the braid look fuller and more relaxed. For a sleek look, smooth flyaways with a light serum or pomade. For a soft, romantic finish, pull out a few face-framing pieces.
And remember: your first braid of the day may look suspicious. Your second will be better. Your third might convince you to start a hair tutorial channel. Practice is the real styling product.
Experience-Based Tips: What It Feels Like to Learn Both Braids
Learning the difference between a Dutch braid and a French braid is one thing. Actually doing them on your own head is another adventure entirely. The first time many people try a French braid, they understand the concept immediately but struggle with hand placement. You are holding three strands, adding new hair, keeping tension, checking the mirror, and wondering why your elbows suddenly feel like they belong to someone else.
In practice, the French braid usually feels more intuitive. The motion of crossing hair over the center resembles a regular braid, so the brain accepts it faster. The biggest challenge is learning how to add hair evenly from both sides. If the sections are too large, the braid may look chunky. If they are too small, the braid can become tight and time-consuming. A helpful trick is to add hair from the hairline with your index finger, smooth it into the outside strand, and then cross over. Once that rhythm clicks, the French braid becomes much less intimidating.
The Dutch braid, however, often feels strange at the beginning. Because the strands move under instead of over, your hands may want to reverse themselves. Many beginners accidentally switch back to French braiding halfway down. That is not failure; that is your muscle memory being dramatic. Practicing on someone else’s hair first can help because you can clearly see the underhand motion. When practicing on your own hair, it helps to say “under, add, under, add” quietly as you braid. Yes, you may sound like a wizard casting a hair spell, but it works.
Another real-life difference is how each braid behaves throughout the day. A French braid tends to feel smooth and compact. It is comfortable when leaning against a chair, wearing a hat, or lying down. A Dutch braid feels more raised, so it may be more noticeable against the scalp, but it also gives a stronger visual payoff. If you are going to an event where photos matter, a Dutch braid often shows up better on camera.
For active days, double Dutch braids are hard to beat. They keep hair divided, secure, and controlled. For softer everyday styling, a French braid is often easier to wear from morning to night. If your hair has layers, the French braid may hide shorter pieces more smoothly, while a Dutch braid may need extra pins or product to keep little ends from popping out like tiny rebellious flags.
One of the best discoveries is that both braids improve with imperfect texture. Hair that is too clean can slip, while hair with a little grip behaves better. This is why braids often look best on second-day hair. Add dry shampoo at the roots, brush through the length, and the braid will usually hold better. For fine hair, pancaking the braid makes a huge difference. For thick hair, keeping sections consistent prevents the braid from becoming bulky in one area and skinny in another.
The biggest lesson from experience is this: do not judge the braid too early. A braid can look messy halfway through and still turn out cute after it is secured, loosened, and adjusted. The elastic, a few bobby pins, and a gentle tug on the braid loops can transform “what happened here?” into “I meant to do that.” Both Dutch and French braids reward patience, and both become easier once your hands stop panicking.
Final Verdict: Dutch Braid Vs. French Braid
The Dutch braid and French braid are built from the same basic idea, but the weaving direction creates two different results. A French braid crosses hair over the middle, giving a smooth, classic, tucked-in look. A Dutch braid crosses hair under the middle, creating a raised, bold, 3D effect.
If you want something elegant and timeless, choose a French braid. If you want something dramatic, sporty, or extra visible, choose a Dutch braid. If you want to become truly powerful, learn both. Then you can choose your braid based on your outfit, your mood, your schedule, or how cooperative your hair feels before coffee.
Note: This article was created for web publishing and synthesizes practical braid guidance from reputable beauty, hair-care, and styling education sources.