Table of Contents >> Show >> Hide
- Why the Curtain Rod Matters More Than Most People Think
- How to Choose a Curtain Rod for Your Window Decor: 10 Steps
- Step 1: Measure the Window, Not Just the Glass
- Step 2: Decide What the Curtains Need to Do
- Step 3: Choose the Right Mounting Style
- Step 4: Get the Rod Width Right
- Step 5: Hang It at the Right Height
- Step 6: Match Rod Diameter to Curtain Weight
- Step 7: Check Projection and Clearance
- Step 8: Pick the Best Rod Type for the Look
- Step 9: Coordinate the Finish and Finials with Your Decor
- Step 10: Test the Whole Picture Before You Buy
- Common Curtain Rod Mistakes to Avoid
- A Simple Example: Choosing a Curtain Rod for a Living Room Window
- Extra Insights: Real-World Experiences with Choosing Curtain Rods
- Final Thoughts
- SEO Tags
Choosing a curtain rod sounds like one of those easy, five-minute home tasks. You walk into a store, spot something shiny, toss it in the cart, and head home feeling wildly productive. Then reality arrives with a tape measure, heavy drapes, awkward trim, and a rod that somehow looks both too short and too dramatic. Amazing.
The truth is, curtain rods do more than hold fabric. They affect how tall your ceilings look, how wide your windows feel, how smoothly your curtains open, and whether the whole setup feels polished or painfully improvised. The right rod can make budget panels look custom. The wrong one can make a lovely room look like it got dressed in the dark.
If you want your window decor to look intentional, balanced, and stylish, this guide will walk you through exactly how to choose a curtain rod in ten smart steps. Along the way, you will also learn how to avoid the classic mistakes that make curtains look skimpy, droopy, or weirdly angry at the wall.
Why the Curtain Rod Matters More Than Most People Think
Most people focus on the curtains first. That makes sense because fabric is the star of the show. But the rod is the stage, the lighting rig, and the backup dancer all at once. It controls placement, proportion, support, and style. A thin rod with bulky velvet curtains can sag like it just gave up on life. A chunky industrial rod in a delicate coastal bedroom can feel like it wandered in from another house.
Good curtain hardware should match three things at once: your window size, your curtain weight, and your room’s design style. Once those three line up, everything gets easier. Your curtains hang better, your room looks taller, and your decor starts making sense instead of starting arguments.
How to Choose a Curtain Rod for Your Window Decor: 10 Steps
Step 1: Measure the Window, Not Just the Glass
Start with the full width of the window area, including trim if the trim is visually part of the opening. This is the number that should guide your rod size, not just the visible glass. Many people measure the pane, buy a rod that barely fits, and end up with curtains that block light even when open.
Take three measurements: width, height from the top of the frame to the floor, and the space between the top of the window and the ceiling. Also look at what sits nearby. Air vents, crown molding, light switches, built-ins, and furniture can all affect how far your rod should extend and where brackets can go.
If your room has multiple windows, measure each one separately. Windows in the same room are often close in size, but “close” is not the same as “actually identical.” Your tape measure is more trustworthy than your optimism.
Step 2: Decide What the Curtains Need to Do
Before choosing rod style, ask what your curtains are supposed to accomplish. Are they mainly decorative? Do they need to block light in a bedroom? Add privacy in a street-facing living room? Soften a modern office? Hide blinds that are doing the practical work while your drapes just show up looking pretty?
If your curtains are lightweight and mostly decorative, you can often use a slimmer rod and simpler hardware. If you are hanging lined drapes, blackout panels, or thick fabric for insulation and privacy, you need a sturdier rod with stronger brackets. Function should come first because a rod that fits your design but cannot support your panels is basically a shiny little liar.
This is also the moment to decide whether you want a single rod or a double rod. A double curtain rod is ideal if you want sheers for daytime light and heavier drapes for privacy at night. It gives you flexibility without making your window decor look overworked.
Step 3: Choose the Right Mounting Style
Most curtain rods are mounted outside the window frame, which is usually the best choice for a fuller, more designer-looking result. Outside mounting lets you hang curtains higher and wider than the window, which visually enlarges the opening.
Inside mounting is more common for shades and certain specialty treatments, but for standard curtain panels, it can look tighter and less dramatic. If your goal is to make the room feel taller and the window feel more generous, outside mount wins almost every time.
You can also choose between wall-mounted rods and ceiling-mounted rods. Ceiling-mounted rods work especially well in modern spaces, rooms with short wall space above the window, or dramatic floor-to-ceiling curtain designs. They are also useful when you want to fake taller walls without knocking anything down. Home improvement magic is rarely this polite.
Step 4: Get the Rod Width Right
A curtain rod should usually extend beyond the window on both sides so the panels can stack back neatly when open. This allows more natural light into the room and keeps the curtains from covering too much glass. It also makes the window look wider, which is one of the easiest visual upgrades in home decor.
A practical rule is to choose a rod that extends several inches past each side of the frame. In many rooms, anywhere from about 4 to 12 inches per side can work depending on wall space, panel fullness, and the size of the window. Larger windows and dramatic drapery often benefit from more width. Small windows in tight corners may need a more restrained approach.
Think of the rod width as both a measurement and a styling decision. If the rod is too narrow, the curtains crowd the glass and look stingy. If it is too wide for the wall, the window starts looking like it borrowed someone else’s jacket.
Step 5: Hang It at the Right Height
Height changes everything. Mounting the rod too low is one of the fastest ways to make a room feel shorter and more cramped. In many spaces, the sweet spot is several inches above the window frame, but the exact placement depends on ceiling height, molding, and the look you want.
For standard rooms, hanging the rod around 4 to 6 inches above the frame is a reliable starting point. In rooms where you want more drama, mount the rod closer to the ceiling. This draws the eye upward and makes the wall appear taller. It is one of the oldest designer tricks in the book because it works almost embarrassingly well.
Just make sure the height still feels connected to the window rather than floating awkwardly above it. Curtain rods should create elegance, not confusion.
Step 6: Match Rod Diameter to Curtain Weight
This step is where style meets physics. A rod needs to look right, but it also needs to support the fabric without bowing. Thin rods are fine for lightweight sheers, café curtains, and breezy linen panels. Heavier fabrics like velvet, blackout curtains, and lined drapes typically need thicker rods and sturdier mounting hardware.
If you are choosing between two rod diameters and your curtains are heavy, go thicker. A more substantial rod usually looks more balanced with fuller panels anyway. On the other hand, a giant rod on dainty curtains can look a bit like giving a teacup its own bridge support system.
Also pay attention to the material. Steel and iron rods usually offer more strength than lighter decorative options. If the window is wide, you may also need a center support bracket to prevent sagging. Not glamorous, but very helpful if you would like your rod to remain mostly horizontal.
Step 7: Check Projection and Clearance
Projection is the distance the rod extends from the wall. People forget this all the time, and then the curtains rub against trim, blinds, or window cranks like two roommates with unresolved issues.
Look at the depth of your window casing, any existing blinds or shades, and the fullness of your curtain fabric. If the projection is too shallow, the panels may not hang properly. They can bunch awkwardly, refuse to close, or lean forward in a way that feels unreasonably dramatic.
If you are layering sheers with drapes, this matters even more. A double rod needs enough depth between the front and back rods so both layers can move comfortably. And if you want better light control or fewer edge gaps, return rods can help wrap the curtain closer to the wall.
Step 8: Pick the Best Rod Type for the Look
Not all curtain rods do the same job. A single rod is the most common choice and works well for one layer of panels. A double rod is better for layered treatments. A tension rod is useful for lightweight curtains in smaller spaces or rental-friendly setups. A French return rod curves back toward the wall, which can create a cleaner look and improve privacy and light blocking.
You can also find traverse rods for curtains that need to open and close often, especially in formal or wide-window setups. Decorative rods are great when you want the hardware to be part of the room’s style. Hidden or minimalist rods make more sense when you want the fabric to be the main event.
Choose the type that supports your curtains and matches how you live. A rod that looks gorgeous but fights you every morning is still a bad relationship.
Step 9: Coordinate the Finish and Finials with Your Decor
Now for the fun part. Curtain rod finishes and finials should relate to the rest of the room. They do not have to match every metal exactly, but they should feel like they belong. Black rods look crisp and modern. Brass adds warmth and polish. Brushed nickel feels classic and versatile. Wood rods can soften traditional or rustic interiors.
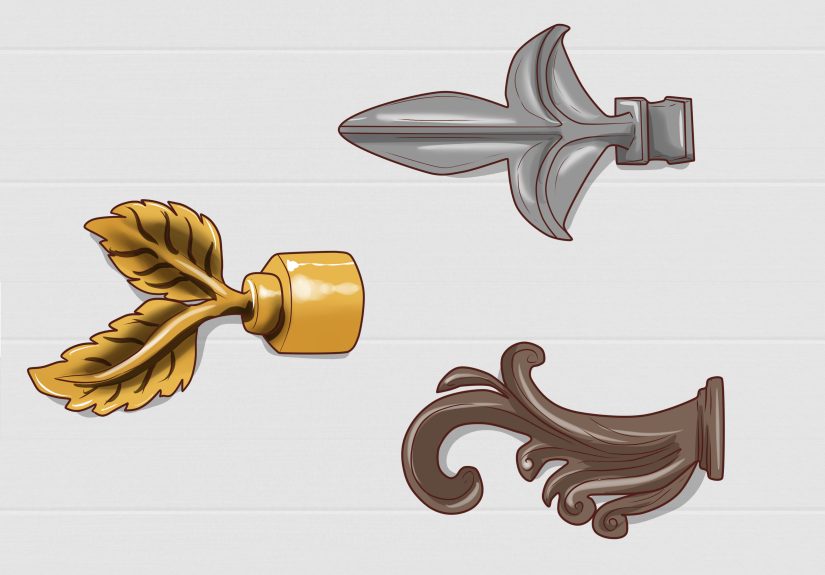
Finials matter too. Sleek end caps are perfect for modern, minimalist, or Scandinavian rooms. Ball finials, faceted ends, or sculptural details can work beautifully in traditional, transitional, or glam interiors. If your curtains are already patterned or dramatic, simpler finials may create better balance. If the curtains are plain, decorative rod ends can add personality without screaming for attention.
Think of hardware as jewelry for the window. You want it noticeable enough to elevate the outfit, not so distracting that it starts introducing itself to guests.
Step 10: Test the Whole Picture Before You Buy
Before checking out, step back and review everything together: window width, mounting height, curtain length, rod diameter, finish, finials, support brackets, and projection. This is where smart choices become a cohesive plan.
Ask yourself a few practical questions. Will the curtains clear the floor nicely? Will the rod be wide enough for proper stack-back? Will the finish work with nearby lighting, drawer pulls, or furniture legs? Will the rod hold the actual fabric you plan to use, not the imaginary weightless curtains from your best-case fantasy?
If possible, hold samples together or lay the curtain fabric next to other room materials. It is much easier to adjust before the wall has holes in it. Drywall remembers everything.
Common Curtain Rod Mistakes to Avoid
- Buying the rod before measuring the window: optimism is not a sizing system.
- Choosing a rod that is too narrow: your curtains need room to stack off the glass.
- Hanging the rod too low: this instantly shortens the room visually.
- Ignoring curtain weight: heavy panels need heavier-duty rods and brackets.
- Skipping center support on wide spans: sagging is not a design style.
- Forgetting projection: trim, blinds, and layered panels need clearance.
- Overdecorating the hardware: bold finials and bold fabric can compete instead of complement.
A Simple Example: Choosing a Curtain Rod for a Living Room Window
Let’s say your window is 60 inches wide with room on both sides. You are hanging lined linen drapes in a transitional living room with brass accents and a medium-tone wood floor. In that case, you might choose a rod that extends several inches beyond each side of the frame, mount it a few inches above the top trim, select a sturdier rod diameter for the lined fabric, and finish it in warm brass with understated end caps. That combination would feel polished, functional, and proportional.
Now imagine choosing a super-thin chrome rod with oversized crystal finials for the same space. Could it technically work? Sure. Would it look like it wandered in from another decorating storyline? Also yes.
Extra Insights: Real-World Experiences with Choosing Curtain Rods
One of the most common real-life experiences homeowners talk about is how different curtain rods look once they are actually on the wall. A rod that seemed perfectly normal in a store or online can suddenly feel too flimsy, too chunky, too shiny, or too short in the room itself. That usually happens because people shop for curtain rods as isolated objects instead of as part of the full window composition. The more helpful approach is to think in layers: wall, window trim, blinds or shades, curtain fabric, rod finish, and nearby furniture. When those layers are considered together, the final result almost always looks more custom.
Another common experience is learning that curtain rods can dramatically change how expensive a room feels. Many people have had the pleasant surprise of hanging affordable curtain panels on a well-sized rod and watching the whole room look more refined almost instantly. The reverse is true too. Even beautiful drapes can look underwhelming when they are squeezed onto a short rod, mounted too low, or paired with hardware that cannot support their shape. In other words, the rod is not just an accessory. It is part of the architecture of the room.
There is also the very familiar lesson of underestimating curtain weight. This happens all the time with blackout drapes, velvet panels, and lined curtains. A rod may appear strong enough in the packaging, but once the fabric is hung, the middle begins to dip and the brackets start working overtime. That experience teaches most people to never ignore load, span, or support brackets again. Wide windows almost always reward a sturdier setup.
Many renters and first-time decorators also discover that the easiest-looking solution is not always the best-looking one. Tension rods are convenient, but they often work best for lightweight or temporary treatments rather than statement drapery in a main room. Decorative rods with proper height and width usually deliver a much more finished effect. That said, renter-friendly spaces can still look stylish when the rod is chosen with proportion in mind and paired with fabric that suits the room.
A final real-world experience worth mentioning is how much confidence comes from getting one window right. Once someone figures out the right rod width, height, finish, and curtain length in one room, the rest of the house becomes much easier. The process stops feeling mysterious and starts feeling strategic. And that is really the goal here: not just buying a curtain rod, but understanding how to choose one that makes your window decor look thoughtful, balanced, and beautifully pulled together.
Final Thoughts
If you want your windows to look polished, the best curtain rod choice comes down to proportion, function, and style. Measure carefully, hang high and wide when the room allows, match the rod’s strength to the curtain weight, and pick a finish that supports the decor instead of competing with it. Do that, and your curtains will not just cover a window. They will finish the room.