Table of Contents >> Show >> Hide
- Before You Start: Is Laminate Flooring Good for Stairs?
- Tools and Materials You’ll Need
- How to Install Laminate Flooring on Stairs: 13 Steps
- Step 1: Check the Staircase Condition
- Step 2: Remove Old Flooring, Carpet, Padding, and Staples
- Step 3: Clean and Level the Stairs
- Step 4: Remove or Modify the Existing Stair Nosing
- Step 5: Acclimate the Laminate Flooring
- Step 6: Plan the Layout and Match the Stair Nose
- Step 7: Measure Each Stair Separately
- Step 8: Cut the Laminate Tread Pieces
- Step 9: Cut and Prepare the Risers
- Step 10: Install the First Riser
- Step 11: Glue Down the Laminate Tread
- Step 12: Install the Stair Nose Molding
- Step 13: Fill Gaps, Clean Up, and Let the Adhesive Cure
- Common Mistakes to Avoid
- Maintenance Tips After Installation
- Extra Experience: Real-World Lessons for Installing Laminate Flooring on Stairs
- Conclusion
Installing laminate flooring on stairs is one of those DIY projects that can make your home look dramatically more polished without requiring a total staircase rebuild. A plain carpeted staircase can suddenly look modern, clean, and intentional. A scuffed old wood staircase can get a fresh surface. And yes, your stairs can finally stop looking like they lost a fight with muddy sneakers, pet claws, and ten years of “I’ll fix that later.”
That said, stairs are not the same as a flat living room floor. On a floor, laminate planks usually float. On stairs, the pieces must be securely attached because each step takes direct pressure, impact, and repeated foot traffic. That means careful measuring, strong adhesive, proper stair nosing, and a lot of patience. The good news? With the right prep and a step-by-step plan, a confident DIYer can install laminate flooring on stairs and get a clean, durable result.
This guide explains how to install laminate flooring on stairs in 13 practical steps, including how to prepare the staircase, cut laminate treads and risers, install stair nose molding, avoid common mistakes, and finish the project like someone who owns more than one tape measure.
Before You Start: Is Laminate Flooring Good for Stairs?
Laminate flooring can work beautifully on stairs when it is installed correctly. It is affordable, widely available, easy to clean, and comes in realistic wood-look styles that coordinate with the rest of your flooring. Many laminate brands also offer matching stair nose molding, which helps create a finished edge at the front of each tread.
However, stairs need extra attention. The laminate must be glued down, not floated. The stair nose must be secure. The surface underneath must be clean, flat, dry, and structurally sound. If your staircase has loose treads, squeaks, rot, water damage, or major unevenness, repair those problems before installing laminate. A pretty staircase is nice; a safe staircase is non-negotiable.
Tools and Materials You’ll Need
Gather everything before you begin. Nothing kills DIY momentum like standing on a half-finished staircase while realizing the saw blade is dull, the adhesive tube is empty, and your pencil has somehow joined witness protection.
Tools
- Tape measure
- Carpenter’s square or speed square
- Pencil
- Jigsaw, circular saw, miter saw, or table saw
- Oscillating multi-tool, if trimming door jambs or old nosing
- Caulk gun
- Utility knife
- Pry bar
- Hammer
- Level
- Construction adhesive rated for flooring or stair applications
- Clamps or weights
- Safety glasses, knee pads, dust mask, and hearing protection
Materials
- Laminate flooring planks
- Matching laminate stair nose molding
- Laminate or painted riser material
- Construction adhesive
- Finishing nails or screws, if approved by the manufacturer
- Wood filler, color-matched putty, or caulk
- Painter’s tape
- Sandpaper or sanding block
- Cleaning supplies
How to Install Laminate Flooring on Stairs: 13 Steps
Step 1: Check the Staircase Condition
Start by inspecting every tread, riser, side edge, and landing. Look for loose boards, squeaks, cracks, nails sticking up, old staples, uneven spots, and soft areas. Press down on each step and listen. If a tread moves, flexes, or sounds like a haunted porch, repair it before continuing.
Laminate flooring is a finish layer, not a structural repair. It will not magically stabilize a damaged staircase. Tighten loose treads with screws, replace damaged wood, and make sure each step feels solid. Also confirm that the stairs meet local safety expectations for consistent step height and depth. When in doubt, call a flooring professional or contractor.
Step 2: Remove Old Flooring, Carpet, Padding, and Staples
If the stairs are carpeted, pull up the carpet, padding, tack strips, and every staple you can find. Then find the staples you missed, because there are always more. Use pliers, a pry bar, and a scraper to clean the surface thoroughly.
Old adhesive, paint globs, tack-strip fragments, and debris can prevent the laminate from sitting flat. A small bump under laminate on a stair tread may not seem like a big deal, but it can create movement, gaps, or an annoying clicking sound every time someone walks upstairs for a midnight snack.
Step 3: Clean and Level the Stairs
Vacuum each step carefully. Wipe away dust, grease, wax, and old residue. Adhesive bonds best to clean surfaces. If your stairs have high spots, sand them down. If there are small dips or damaged areas, patch them with an appropriate wood filler or leveling compound suitable for the stair material.
Use a level or straightedge to check each tread. Laminate planks need a stable, flat base. A slightly imperfect stair can often be corrected with careful prep, but a badly sloped or warped tread should be repaired before installation.
Step 4: Remove or Modify the Existing Stair Nosing
Many stairs have a rounded overhang at the front of each tread. Depending on your laminate stair nose system, you may need to cut off the existing overhang so the new stair nose fits flush. Some stair-nose products are designed to cover or overlap existing edges, while others require a squared-off tread.
Follow the instructions for your specific laminate and stair nose. This is not the moment to freestyle like a jazz musician with a circular saw. If the manufacturer says the tread must be flush, trim it carefully. If the system uses a shim or track, install it exactly as directed.
Step 5: Acclimate the Laminate Flooring
Bring the laminate flooring and stair nose pieces into the home before installation and let them adjust to the indoor temperature and humidity. Most laminate products need time to acclimate in a climate-controlled space. Keep the boxes flat and follow the manufacturer’s recommended acclimation period.
This step matters because laminate can expand or contract with environmental changes. Installing it immediately after bringing it in from a cold garage or hot truck can increase the chance of gaps, movement, or poor fit later.
Step 6: Plan the Layout and Match the Stair Nose
Lay out your planks and stair nose molding before cutting. Choose pieces that coordinate well in color and grain pattern. Since stair noses are highly visible, try to pair each nosing with a tread plank that looks natural beside it.
If your laminate has a strong wood pattern, avoid placing wildly different tones next to each other. One step should not look like rustic oak while the next looks like it came from a driftwood pirate ship. Blend planks from multiple boxes for a more natural appearance.
Step 7: Measure Each Stair Separately
Measure the width and depth of each tread, then measure the height and width of each riser. Do not assume every stair is the same size. In many homes, especially older ones, stairs can vary slightly. A difference of even 1/8 inch can leave a visible gap.
Label your measurements by step number. For example, “Step 1 tread,” “Step 1 riser,” and “Step 1 nose.” Work from the bottom up or top down, but stay consistent. A simple numbering system saves time and prevents the classic DIY tragedy of cutting a perfect piece for the wrong stair.
Step 8: Cut the Laminate Tread Pieces
Cut the laminate plank for each tread according to your measurements. The tread is the flat part where your foot lands. Depending on stair depth and plank width, you may need one full plank or a combination of planks. Dry-fit the pieces before applying adhesive.
Use a sharp blade designed for laminate to reduce chipping. Cut with the finished side facing the correct direction for your saw type. If you are using a jigsaw, painter’s tape along the cut line can help reduce splintering. Always wear safety glasses and cut in a well-ventilated area.
Step 9: Cut and Prepare the Risers
The riser is the vertical face between steps. You can cover it with matching laminate, white riser board, painted wood, or another compatible material. White risers with wood-look laminate treads are especially popular because they create a clean, bright contrast.
Measure and cut each riser separately. Dry-fit it against the stair before gluing. The riser should sit neatly without bowing. If the wall or skirt board is not perfectly square, you may need to scribe the edge for a tighter fit.
Step 10: Install the First Riser
Many installers prefer to install the riser first, then the tread, then the stair nose. Apply construction adhesive to the back of the riser in a wavy pattern, press it into place, and make sure it is aligned. Use painter’s tape, small finish nails, or temporary bracing if needed to hold it while the adhesive sets.
Wipe away adhesive squeeze-out immediately with a damp cloth, following the adhesive manufacturer’s cleanup instructions. Dried adhesive is much less charming than it sounds.
Step 11: Glue Down the Laminate Tread
Apply flooring-approved construction adhesive to the stair tread. Set the laminate tread piece in place and press it firmly into the adhesive. Make sure the back edge fits cleanly against the riser and the front edge is positioned correctly for the stair nose.
Unlike laminate flooring installed in a room, laminate on stairs should not float. Each tread piece must be secure because stairs receive direct downward and forward pressure. Use weights or gentle clamping where appropriate, but avoid damaging the plank surface.
Step 12: Install the Stair Nose Molding
The stair nose covers the front edge of the tread and creates a finished transition from one step to the next. Cut the stair nose to the exact width of the stair. Dry-fit it before adhesive. It should sit straight, secure, and flush with the tread surface according to the product design.
Apply the recommended adhesive and press the stair nose firmly into place. Some systems also use screws, tracks, shims, or fasteners. If fasteners are allowed, predrill carefully and cover visible holes with color-matched filler. Make sure the stair nose does not rock, shift, or create a raised tripping edge.
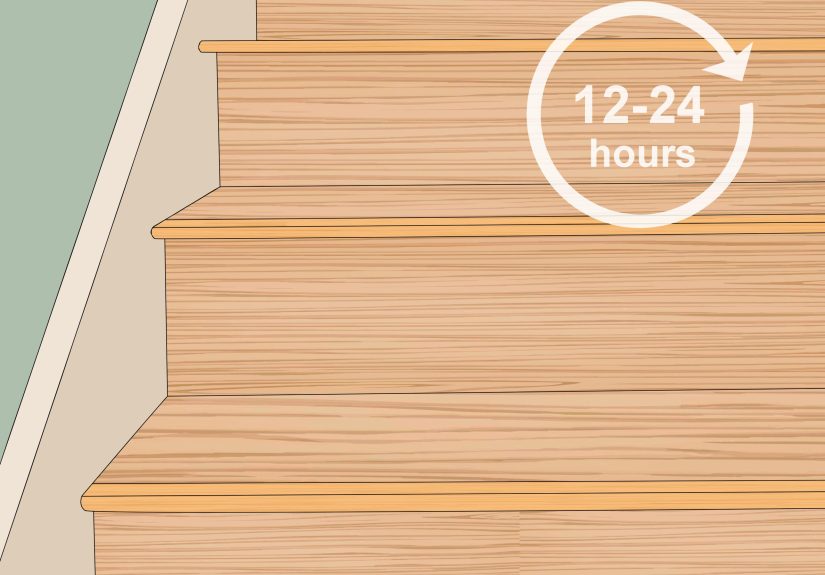
Step 13: Fill Gaps, Clean Up, and Let the Adhesive Cure
Once all treads, risers, and stair noses are installed, inspect the staircase. Fill tiny side gaps with paintable caulk or color-matched filler, depending on the location and material. Do not fill required expansion gaps at landings unless the manufacturer allows it. Clean the laminate surface with a product approved for laminate flooring.
Most adhesives need time before light foot traffic and longer before full use. Follow the adhesive and stair-nose instructions closely. If the product says to wait, wait. Your staircase may look ready, but adhesive curing is not a “good vibes only” situation.
Common Mistakes to Avoid
Using Underlayment on Stairs
Laminate underlayment is useful for floating floors, but stairs are different. Padding or foam under laminate stair treads can create movement and reduce adhesive bond. In most stair installations, underlayment should be removed and the laminate should be glued directly to the prepared stair surface.
Skipping the Dry Fit
Dry-fitting each piece before applying adhesive is one of the easiest ways to avoid ugly gaps and panic cuts. Once adhesive is spread, your working time is limited. Test the fit first, then glue.
Assuming Every Stair Is Identical
Staircases often have small variations from step to step. Measure each tread and riser individually. This is slower, but it prevents gaps that look like your staircase is slowly trying to separate from your design plan.
Ignoring Manufacturer Instructions
Different laminate brands use different stair nose profiles, tracks, adhesives, shims, and fastening methods. Always follow the instructions for your exact product. A method that works for one stair-nose system may not work for another.
Maintenance Tips After Installation
After installing laminate flooring on stairs, protect your work with simple maintenance habits. Sweep or vacuum regularly using a hard-floor setting. Wipe spills quickly. Avoid soaking the stairs with water. Use felt pads under furniture near landings, and consider a runner if the stairs are used heavily by kids, pets, or everyone in the house who treats stairs like a racetrack.
Check the stair nose periodically. If you ever notice movement, lifting, or a clicking sound, address it right away. A loose stair nose is both a durability problem and a safety concern.
Extra Experience: Real-World Lessons for Installing Laminate Flooring on Stairs
One of the biggest lessons from installing laminate flooring on stairs is that the project rewards patience more than speed. A staircase looks like a small area, so many DIYers assume it will be easier than a full room. In reality, stairs are a collection of small, highly visible, high-traffic surfaces. Every tread is a mini project. Every riser has its own quirks. Every stair nose needs to line up cleanly because it sits right where people look and step.
A practical experience-based tip is to create a cutting station close to the stairs but not directly in the work zone. You will measure, walk to the saw, cut, walk back, dry-fit, adjust, and repeat. If your saw is too far away, the project becomes a cardio workout with sawdust. If it is too close, dust and offcuts clutter the staircase. A nearby garage, porch, or protected room with good ventilation usually works well.
Another helpful habit is to cut slightly large, then trim carefully. You can always shave off a little more material, but you cannot uncut a plank. Laminate is not bread dough; it will not rise back into shape because you apologized. When fitting pieces against skirt boards or walls, use small adjustments and test often.
For a cleaner final look, pay special attention to the side edges. Many staircases are not perfectly square, especially where the tread meets the wall. If a cut leaves a small but uneven gap, it may stand out more than expected. Scribing the plank edge can make a big difference. This means tracing the wall’s slight irregularity onto the laminate and trimming to match. It takes extra time, but the finished staircase looks much more professional.
Adhesive choice also matters. Use a product compatible with laminate, wood substrates, and stair applications. Read the label for open time, cure time, cleanup method, and temperature requirements. Some adhesives skin over quickly, which means you need to place the piece promptly. Others allow more working time. Either way, spread only what you can install confidently.
If you are working in a busy household, plan access before you start. Once adhesive is curing, the stairs may need limited use. If all bedrooms are upstairs, coordinate the project so people are not forced to leap over fresh stair noses like contestants on a home-improvement obstacle course. Work in sections if your adhesive and installation method allow it, or schedule the job when traffic is light.
Lighting is another underrated detail. Staircases often have shadows that hide gaps during installation but reveal them later. Use a bright work light and inspect each step from several angles. Look from the bottom up, from the top down, and from the side. If something looks slightly off before the adhesive cures, fix it immediately.
Finally, remember that safety beats style. A beautiful stair installation should feel solid underfoot. The stair nose should not shift. The tread should not flex. The surface should not be slick. If you have doubts about structural repairs, stair code requirements, or fastening methods, bring in a professional. A good installer can help ensure the staircase is not only attractive but also dependable for daily use.
Conclusion
Installing laminate flooring on stairs is a detail-heavy project, but it can completely transform the look of your home. The key is preparation: repair the stairs, clean the surface, measure every step, dry-fit each piece, use the correct adhesive, and install the stair nose securely. When done well, laminate stairs can look sharp, coordinate beautifully with nearby floors, and stand up to everyday traffic.
The main rule is simple: do not rush the steps on the steps. Take your time, follow the product instructions, and let the adhesive cure properly. Your reward is a staircase that looks finished, modern, and much easier to clean than old carpet. That is a home improvement win worth climbing.