Table of Contents >> Show >> Hide
- Why the 9s Times Tables Finger Trick Works
- How to Use Your Fingers to Do the 9s Times Tables: 12 Steps
- Step 1: Hold Up Both Hands
- Step 2: Number Your Fingers from Left to Right
- Step 3: Choose the Number You Want to Multiply by 9
- Step 4: Fold Down the Matching Finger
- Step 5: Count the Fingers on the Left
- Step 6: Count the Fingers on the Right
- Step 7: Try 9 × 4
- Step 8: Try 9 × 5
- Step 9: Try 9 × 6
- Step 10: Try 9 × 8
- Step 11: Check the Answer with the “Digits Add to 9” Rule
- Step 12: Practice Until the Facts Become Automatic
- Examples of the 9s Finger Trick in Action
- Another Way to Understand the 9 Times Table
- Common Mistakes When Using the 9s Finger Trick
- How Parents and Teachers Can Teach the Trick
- Practice Plan for Mastering the 9s Times Tables
- Why This Trick Builds Confidence
- Experience Notes: What It Feels Like to Learn the 9s Finger Trick
- Conclusion
Learning the 9s times tables can feel like trying to teach a squirrel to file taxes: possible in theory, but oddly stressful at first. The good news is that the 9 times table has one of the best built-in math tricks in elementary arithmetic. You do not need a calculator, a multiplication chart, or a dramatic speech about how math “builds character.” You only need ten fingers, a little attention, and the ability to count from left to right.
The finger trick for the 9 times table works for multiplying 9 by numbers 1 through 10. It turns each multiplication fact into a visual model. Instead of memorizing 9 × 7 = 63 as a random fact floating around in your brain like a lost balloon, you can see the tens and ones right on your hands. That makes the method especially helpful for kids, parents, teachers, homeschoolers, tutors, and anyone who has ever stared at a worksheet and thought, “Why are there so many nines today?”
In this guide, you will learn how to use your fingers to do the 9s times tables in 12 clear steps. You will also learn why the trick works, how to check your answers with number patterns, and how to turn the trick into real multiplication fluency instead of a party trick that only appears when someone says, “Quick, what is 9 times 8?”
Why the 9s Times Tables Finger Trick Works
The 9s times tables have a beautiful pattern. For the answers from 9 × 1 through 9 × 10, the tens digit increases while the ones digit decreases. Look closely:
- 9 × 1 = 09
- 9 × 2 = 18
- 9 × 3 = 27
- 9 × 4 = 36
- 9 × 5 = 45
- 9 × 6 = 54
- 9 × 7 = 63
- 9 × 8 = 72
- 9 × 9 = 81
- 9 × 10 = 90
Notice the staircase effect. The tens digits go 0, 1, 2, 3, 4, 5, 6, 7, 8, 9. The ones digits go 9, 8, 7, 6, 5, 4, 3, 2, 1, 0. Your fingers simply act out that pattern. The fingers to the left of the folded finger become the tens digit, and the fingers to the right become the ones digit.
How to Use Your Fingers to Do the 9s Times Tables: 12 Steps
Step 1: Hold Up Both Hands
Start by holding both hands in front of you with all ten fingers raised. Spread your fingers apart enough so you can count them easily. Your palms may face you or face away from you, but many students find it easiest when their palms face outward, like they are giving the number 10 a very enthusiastic high-five.
Step 2: Number Your Fingers from Left to Right
Imagine your fingers are numbered 1 through 10 from left to right. Your far-left pinky is finger 1. Your far-right pinky is finger 10. Do not worry if this feels strange for a moment. Your fingers are not offended by being assigned math jobs.
Step 3: Choose the Number You Want to Multiply by 9
Pick a multiplication fact, such as 9 × 4, 9 × 6, or 9 × 8. The number being multiplied by 9 tells you which finger to fold down. For example, in 9 × 4, you fold down the 4th finger. In 9 × 8, you fold down the 8th finger.
Step 4: Fold Down the Matching Finger
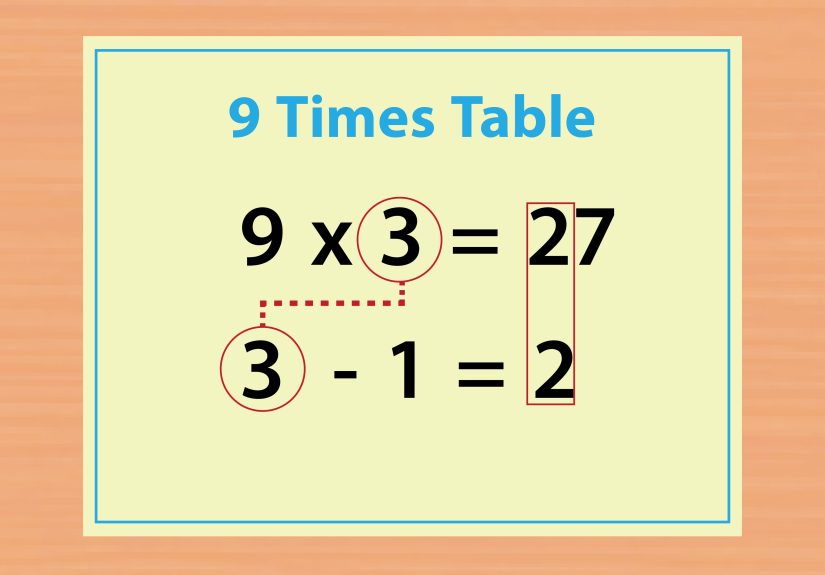
Count from the left and fold down the finger that matches the second factor. For 9 × 3, count three fingers from the left and fold down the 3rd finger. That folded finger becomes a divider between the tens and ones places.
Step 5: Count the Fingers on the Left
Now count how many fingers are still standing to the left of the folded finger. This number gives you the tens digit of the answer. For 9 × 3, there are 2 fingers to the left of the folded finger. That means the answer starts with 2.
Step 6: Count the Fingers on the Right
Next, count how many fingers are still standing to the right of the folded finger. This number gives you the ones digit. For 9 × 3, there are 7 fingers to the right. Put the digits together: 2 and 7 make 27. So, 9 × 3 = 27.
Step 7: Try 9 × 4
Hold up both hands. Count from the left and fold down your 4th finger. You should see 3 fingers standing on the left and 6 fingers standing on the right. That gives you 36. Therefore, 9 × 4 = 36. See? Your hands just did math without even asking for a snack break.
Step 8: Try 9 × 5
For 9 × 5, fold down your 5th finger. There are 4 fingers on the left and 5 fingers on the right. The answer is 45. This is one of the easiest facts to remember because 9 × 5 is also half of 90, and half of 90 is 45.
Step 9: Try 9 × 6
For 9 × 6, fold down your 6th finger. Count the fingers on the left: 5. Count the fingers on the right: 4. The answer is 54. This is a great example of how the pattern flips after 45. Before 9 × 5, the answers climb toward the middle. After 9 × 5, they continue in reverse-looking pairs: 45, 54, 63, 72, 81, 90.
Step 10: Try 9 × 8
For 9 × 8, fold down your 8th finger. You will have 7 fingers standing on the left and 2 fingers standing on the right. That gives you 72. This fact is often one of the trickier ones to memorize, so the finger method is a very useful backup strategy.
Step 11: Check the Answer with the “Digits Add to 9” Rule
Most answers in the 9 times table from 9 × 1 through 9 × 9 have digits that add up to 9. For example, 27 has 2 + 7 = 9. The number 63 has 6 + 3 = 9. The number 81 has 8 + 1 = 9. This rule is not the finger trick itself, but it is a helpful way to check your work.
Step 12: Practice Until the Facts Become Automatic
The finger trick is a tool, not a life sentence. Use it to understand and remember the 9s times tables, then practice until the answers become quick and natural. The goal is not to hide your hands under the desk forever like a secret math wizard. The goal is to build multiplication fluency so you can recall facts quickly, accurately, and confidently.
Examples of the 9s Finger Trick in Action
Let’s walk through a few examples slowly so the pattern becomes impossible to miss.
Example 1: 9 × 2
Fold down your 2nd finger. There is 1 finger on the left and 8 fingers on the right. The answer is 18.
Example 2: 9 × 7
Fold down your 7th finger. There are 6 fingers on the left and 3 fingers on the right. The answer is 63.
Example 3: 9 × 9
Fold down your 9th finger. There are 8 fingers on the left and 1 finger on the right. The answer is 81.
Once you understand the method, the answers feel less like memorized noise and more like a pattern you can control. That is one reason teachers often use finger models, number patterns, skip counting, multiplication charts, and repeated practice together. Each strategy helps students see multiplication from a slightly different angle.
Another Way to Understand the 9 Times Table
The finger trick is visual, but there is also a mental math explanation. Multiplying by 9 is the same as multiplying by 10 and then subtracting one group of the number.
For example:
- 9 × 6 = 10 × 6 − 6
- 10 × 6 = 60
- 60 − 6 = 54
This is why 9 × 6 equals 54. The finger trick shows the answer, while the 10-minus-1 strategy explains the math behind it. When students understand both, they are not just memorizing. They are building number sense, which is a fancy way of saying, “Math is starting to make actual sense instead of sounding like a refrigerator manual.”
Common Mistakes When Using the 9s Finger Trick
Counting from the Wrong Side
The most common mistake is counting fingers from the wrong direction. Always number your fingers from left to right. If you switch directions halfway through, your answer may wander off into nonsense land wearing a tiny backpack.
Forgetting That the Left Side Is the Tens Digit
The fingers on the left of the folded finger give the tens digit. The fingers on the right give the ones digit. For 9 × 8, 7 fingers on the left and 2 on the right make 72, not 27.
Using the Trick Beyond 9 × 10
This finger method works neatly for 9 × 1 through 9 × 10 because you have ten fingers. For 9 × 11, 9 × 12, and higher facts, use other strategies such as 10 times the number minus the number. For example, 9 × 12 = 120 − 12 = 108.
How Parents and Teachers Can Teach the Trick
When teaching the 9s times tables finger trick, start with understanding before speed. Ask students what multiplication means: equal groups. Then connect 9 × 4 to four groups of nine, or nine groups of four. After that, show the finger model as a shortcut that matches the pattern.
A good mini-lesson might look like this:
- Review that multiplication means equal groups.
- Write the 9 times table from 9 × 1 to 9 × 10.
- Ask students to notice the tens and ones pattern.
- Demonstrate the finger trick with 9 × 3.
- Let students practice with partners.
- Have them check each answer using the digits-add-to-9 rule.
This approach helps students see the finger trick as part of a larger math pattern. That matters because a trick without understanding can be forgotten. A trick connected to meaning becomes a strategy.
Practice Plan for Mastering the 9s Times Tables
Day 1: Learn the Finger Method
Practice 9 × 1 through 9 × 10 in order. Go slowly. Focus on folding the correct finger and reading the answer correctly.
Day 2: Mix the Facts
Practice the facts out of order: 9 × 6, 9 × 2, 9 × 8, 9 × 4, and so on. This keeps your brain from simply chanting the table like a robot with homework.
Day 3: Add Speed Carefully
Try answering each fact within five seconds. Use your fingers if needed. If you make mistakes, slow down and rebuild accuracy first.
Day 4: Use the Check Rules
After each answer, check whether the digits add to 9. For 9 × 7 = 63, 6 + 3 = 9. Correct. For 9 × 8 = 72, 7 + 2 = 9. Correct.
Day 5: Move Toward Memory
Cover your hands and answer from memory. If you get stuck, bring the finger trick back. Over time, the trick becomes less necessary because the pattern has settled into your brain.
Why This Trick Builds Confidence
Many students feel nervous when they are asked to memorize multiplication facts. The 9s can look intimidating because the answers jump into larger numbers quickly. A visual trick lowers the pressure. It gives students a reliable way to find the answer while they are still building memory.
Confidence matters in math. When students believe they have a strategy, they are more likely to try. When they try more often, they practice more. When they practice more, they improve. This is the opposite of the classic math panic cycle, where a student sees a worksheet, freezes, and suddenly becomes deeply interested in sharpening a pencil for seven minutes.
Experience Notes: What It Feels Like to Learn the 9s Finger Trick
One of the best things about the 9s finger trick is that it creates a quick “aha” moment. Many learners first approach the 9 times table as if it is a wall. The facts look similar, the numbers feel large, and the order can be confusing. Then someone shows the finger method, and the wall suddenly has a door. Not a fancy door with gold handles, perhaps, but a very useful door that says, “Come in, the answer is 72.”
In real learning situations, students often start by moving slowly. They hold up both hands, count the fingers carefully, fold down one finger, then count both sides. At first, this may feel clunky. That is normal. Every new strategy has a slightly awkward beginning. Think of tying shoes, riding a bike, typing, or opening a stubborn bag of chips without launching it across the room. Practice turns awkward actions into smooth habits.
Parents and teachers may notice that some students want to rush immediately. They fold the wrong finger, reverse the digits, and proudly announce that 9 × 8 = 27. That is not failure. That is useful feedback. The best response is calm correction: “Let’s count from the left again. How many fingers are on the left side? How many are on the right?” This keeps the focus on thinking, not embarrassment.
Another helpful experience is pairing the trick with spoken facts. For example, a student folds the 6th finger and says, “Nine times six equals fifty-four.” Speaking the full equation helps connect the hand movement to the multiplication fact. Eventually, the student may no longer need to fold the finger because the sentence itself becomes familiar.
The trick also works well during short practice sessions. Five minutes of focused practice is often better than thirty minutes of tired guessing. A learner can practice while waiting for dinner, sitting in the car, or standing in line. Since the tool is literally attached to the body, there is no worksheet to lose and no app password to forget. Your fingers are refreshingly low-maintenance.
Over time, the most important shift is from dependence to confidence. At first, students use the finger trick to find every answer. Later, they use it only for harder facts like 9 × 7 or 9 × 8. Finally, they know the facts from memory and use the trick only to check. That progression is exactly what should happen. The finger method is a bridge. You cross it, appreciate it, and keep going.
For many learners, the emotional benefit is just as valuable as the math benefit. The 9s times tables stop feeling mysterious. Students begin to notice patterns, predict answers, and correct themselves. That kind of ownership is powerful. It turns multiplication from a list of facts to memorize into a system that makes sense. And when math makes sense, it becomes much less scaryand occasionally even fun. Yes, fun. The 9s did not see that plot twist coming.
Conclusion
The 9s times tables finger trick is simple, visual, and surprisingly powerful. By folding the finger that matches the number you are multiplying by 9, you can instantly see the tens digit on the left and the ones digit on the right. The method works for 9 × 1 through 9 × 10 and helps learners understand the pattern behind the answers.
Still, the goal is not only to perform a clever trick. The real goal is multiplication fluency. Use the finger method, check answers with the digits-add-to-9 rule, connect the facts to the 10-minus-1 strategy, and practice until the answers become automatic. With a little repetition, the 9s times tables can go from “Uh-oh” to “Oh, I’ve got this.” Your fingers deserve a round of applause, but since they are the ones clapping, that may get complicated.