Table of Contents >> Show >> Hide
- Why Sewing Is a Skill Worth Learning
- Start Here: Essential Sewing Supplies for Beginners
- Tutorial 1: Learn Basic Hand Sewing Stitches
- Tutorial 2: Understand Your Sewing Machine
- Tutorial 3: Sew a Straight Seam
- Tutorial 4: Learn How to Cut Fabric Correctly
- Tutorial 5: Make a Simple Cloth Napkin
- Tutorial 6: Sew an Envelope Pillow Cover
- Tutorial 7: Try a Beginner Tote Bag
- Tutorial 8: Practice Mending Clothes
- Tutorial 9: Read a Simple Sewing Pattern
- Common Beginner Sewing Mistakes and How to Fix Them
- A Simple Learning Plan for New Sewists
- Beginner Sewing Experiences: What It Really Feels Like to Learn
- Conclusion
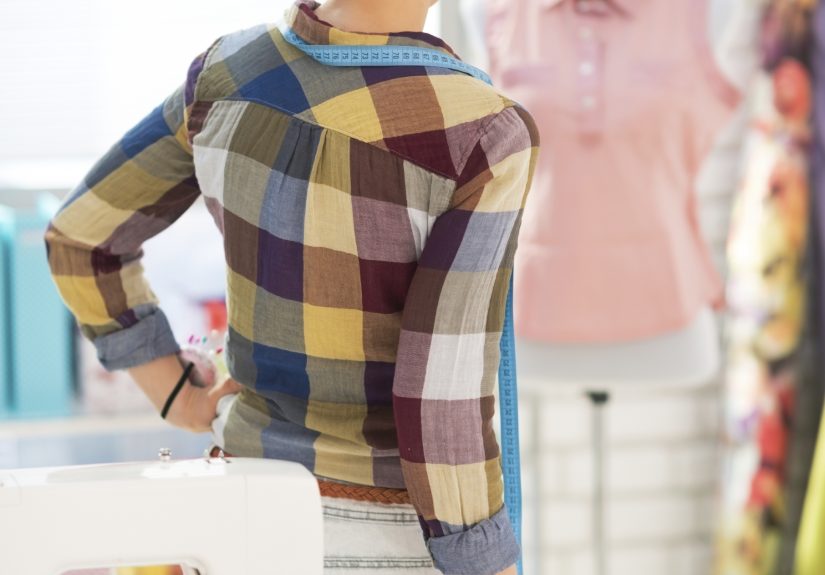
Learning how to sew can feel a little like meeting a tiny mechanical dragon. There is thread everywhere, the needle moves faster than your confidence, and somehow the bobbin always looks innocent while causing most of the drama. The good news? Sewing is not magic. It is a practical skill built from a few simple habits: thread the machine correctly, guide fabric gently, press seams neatly, and practice on projects that do not require emotional support snacks.
If you want to learn how to sew, the best beginner tutorials are the ones that teach real skills in a logical order. Start with hand sewing, move to machine basics, practice straight seams, learn fabric behavior, and then make something small but useful. A tote bag, pillow cover, scrunchie, simple apron, or cloth napkin can teach more than an ambitious first attempt at a lined blazer. The blazer can wait. It knows what it did.
This guide walks you through beginner sewing tutorials that build confidence step by step. You will learn what to practice first, which supplies matter, how to avoid common mistakes, and how to choose beginner projects that actually help you improve.
Why Sewing Is a Skill Worth Learning
Sewing gives you a superpower hiding in plain sight. You can mend ripped seams, hem pants, replace buttons, adjust simple garments, make gifts, decorate your home, and understand why store-bought clothes fit the way they do. It also teaches patience, precision, and the sacred art of not panicking when thread nests under the fabric.
For beginners, sewing is especially rewarding because progress shows quickly. One week you may be learning how to tie a knot. The next week you are making a pillow cover and casually saying things like “seam allowance” as if you were born holding tailor’s chalk. The key is choosing tutorials that focus on fundamentals instead of rushing into complicated patterns.
Start Here: Essential Sewing Supplies for Beginners
You do not need a studio full of professional equipment to begin. A clean workspace, a few reliable tools, and some practice fabric are enough. Start with fabric scissors, all-purpose thread, hand sewing needles, pins or clips, a seam ripper, measuring tape, tailor’s chalk or a washable marking pen, an iron, and a basic sewing machine if you want to machine sew.
One tool deserves special praise: the seam ripper. Beginners sometimes treat it like a symbol of failure. It is not. It is an eraser. Experienced sewists use seam rippers constantly. The only difference is they sigh more dramatically.
Choose Beginner-Friendly Fabric
For your first tutorials, choose woven cotton or cotton-blend fabric. It is stable, easy to press, and less likely to stretch out of shape. Avoid slippery satin, stretchy knits, thick denim, velvet, and delicate lace until you have basic control. A quilting cotton, old pillowcase, or thrifted cotton sheet can become excellent practice material.
Pick the Right Thread and Needle
All-purpose polyester thread works well for many beginner projects because it is strong and flexible. For machine sewing, match the needle to the fabric. A universal needle is fine for basic cotton. Change dull needles regularly because a worn needle can cause skipped stitches, fabric pulls, or mysterious sewing machine behavior that makes you question your life choices.
Tutorial 1: Learn Basic Hand Sewing Stitches
Even if you plan to use a sewing machine, hand sewing is worth learning first. It teaches control and helps you understand how stitches hold fabric together. Hand sewing also saves the day when a button falls off, a hem comes loose, or you need to finish a small area neatly.
Beginner Stitches to Practice
- Running stitch: A simple in-and-out stitch used for gathering, basting, and light seams.
- Backstitch: A strong hand stitch that works well for mending seams and sewing areas that need durability.
- Whip stitch: Useful for joining edges or closing felt and craft projects.
- Ladder stitch: A nearly invisible stitch for closing pillows, plush toys, and linings.
- Blind hem stitch: Helpful for hemming pants, skirts, and curtains with minimal visible stitching.
Practice each stitch on two scraps of cotton. Draw a straight line with a washable marker and sew along it. Focus on keeping stitch length consistent. Your first line may look like a nervous caterpillar. That is fine. The caterpillar is learning.
Tutorial 2: Understand Your Sewing Machine
A sewing machine is easier to use once you know what the main parts do. Learn the spool pin, thread guide, tension dial, take-up lever, presser foot, feed dogs, bobbin case, handwheel, reverse lever, stitch selector, and needle plate. You do not need to memorize every technical detail immediately, but you should know the path the thread takes and how fabric moves under the foot.
Practice Machine Setup
Before sewing a project, practice winding a bobbin, inserting the bobbin, threading the upper thread, raising the bobbin thread, and replacing the needle. These steps may feel slow at first, but correct threading solves many beginner problems. If the machine suddenly creates loops, jams, or nests, rethread the machine with the presser foot raised and check that the bobbin is inserted correctly.
Try Your First Machine Stitches
Start with a straight stitch on medium-weight cotton. Set a moderate stitch length, place fabric under the presser foot, lower the foot, hold the thread tails for the first few stitches, and sew slowly. Practice stopping with the needle down, lifting the presser foot, turning the fabric, lowering the foot, and continuing. This simple corner-turning exercise prepares you for napkins, bags, pillow covers, and pockets.
Tutorial 3: Sew a Straight Seam
Sewing straight seams is the foundation of almost every beginner sewing project. The trick is not to stare at the needle. Watch the seam guide on the needle plate instead. Line the raw edge of the fabric with the correct measurement and let the feed dogs move the fabric. Your hands should guide, not push or pull.
What Is Seam Allowance?
Seam allowance is the distance between the raw fabric edge and the stitching line. Many patterns use 1/2 inch or 5/8 inch seam allowances, while quilting often uses 1/4 inch. Consistent seam allowance keeps projects the right size and helps pieces line up neatly.
To practice, cut two rectangles of cotton. Place them right sides together, pin along one long edge, and sew a 1/2-inch seam. Backstitch at the beginning and end to secure the seam. Then press the seam flat, open it, and press again. Pressing may not sound exciting, but it is the difference between “homemade in a charming way” and “homemade by a raccoon during a thunderstorm.”
Tutorial 4: Learn How to Cut Fabric Correctly
Cutting is not just a prelude to sewing. It is part of sewing. Crooked cutting creates crooked seams, uneven hems, and pieces that refuse to match. Before cutting fabric, wash and dry it if the finished item will be laundered. Press wrinkles out, lay the fabric flat, and pay attention to grainline.
Why Grainline Matters
Fabric grain refers to the direction of the threads. The lengthwise grain usually runs parallel to the selvage and is more stable. Patterns often include a grainline arrow to help pieces hang correctly. If a garment piece is cut off-grain, it may twist, sag, or behave like it has a secret agenda.
For your first projects, use simple rectangles and squares. Measure carefully, mark with chalk, and cut with sharp fabric scissors or a rotary cutter on a cutting mat. Keep paper scissors away from fabric scissors unless you enjoy dull blades and family conflict.
Tutorial 5: Make a Simple Cloth Napkin
A cloth napkin is one of the best beginner sewing tutorials because it teaches measuring, cutting, pressing, hemming, and pivoting at corners. Cut a square of cotton, such as 18 by 18 inches. Press each edge under 1/4 inch, then fold again another 1/4 inch to hide the raw edge. Pin or clip the folds, then stitch close to the inner folded edge.
This project is small, useful, and forgiving. If one corner is not perfect, congratulations: you have made a napkin with personality. Make four, and by the last one your seams will already look cleaner.
Tutorial 6: Sew an Envelope Pillow Cover
An envelope pillow cover is a beginner favorite because it looks impressive but uses basic straight seams. You do not need a zipper. You cut one front rectangle and two overlapping back rectangles, hem the back edges, layer everything right sides together, sew around the perimeter, clip corners, turn right side out, and insert a pillow form.
This tutorial teaches seam allowance, finishing edges, turning corners, and pressing. It also gives you a finished item you can actually use. Few things build sewing confidence faster than pointing at a pillow and saying, “I made that,” while pretending not to check whether everyone heard you.
Tutorial 7: Try a Beginner Tote Bag
A basic tote bag introduces construction. You will sew side seams, attach handles, finish edges, and create a boxed bottom if you want extra shape. Use sturdy cotton canvas or medium-weight cotton for your first tote. Avoid thick upholstery fabric until your machine and needle are ready for heavier layers.
Skills a Tote Bag Teaches
- How to sew longer seams without drifting
- How to reinforce stress points
- How to topstitch for strength and decoration
- How to turn a flat piece of fabric into a three-dimensional object
A tote also teaches practical problem-solving. If your handles twist, you learn to check placement. If your corners look bulky, you learn to trim seam allowance. If your topstitching waves around, you learn to slow down. Every mistake becomes a tiny private lesson with fabric.
Tutorial 8: Practice Mending Clothes
Mending is one of the most useful ways to learn sewing. Start by sewing on a button, closing a ripped seam, repairing a small hole, or hemming a pair of pajama pants. These tasks teach you how fabric behaves after wear, how seams are built, and how stitches hold under movement.
Hand mending is often faster than setting up a machine for tiny repairs. A backstitch can close a ripped seam securely. A ladder stitch can close a pillow or plush toy invisibly. A simple patch can extend the life of jeans, jackets, and children’s clothes. Sewing becomes less intimidating when you realize it can solve everyday annoyances.
Tutorial 9: Read a Simple Sewing Pattern
Once you can sew straight seams and finish small projects, try a simple pattern. Look for patterns labeled beginner, easy, or learn to sew. Good first garment projects include elastic-waist pajama pants, a gathered skirt, a boxy top, or an apron. Avoid fitted garments, slippery fabrics, buttonholes, linings, and zippers for your first pattern unless you enjoy turning hobbies into endurance sports.
Pattern Terms Beginners Should Know
- Right side: The side of the fabric meant to show.
- Wrong side: The back side of the fabric.
- Notches: Small marks that help align pattern pieces.
- Grainline: The direction used to place pattern pieces correctly.
- Fold line: A pattern edge placed on folded fabric.
- Basting: Temporary long stitches used for fitting or gathering.
Read the full instruction sheet before cutting. Then read it again with a snack nearby. Sewing patterns are easier when you understand the order of construction before the machine starts humming.
Common Beginner Sewing Mistakes and How to Fix Them
Every sewist makes mistakes. The goal is not perfection; it is learning how to recover without launching the project into a closet.
The Thread Keeps Nesting Under the Fabric
Rethread the machine with the presser foot raised, check the bobbin direction, hold thread tails at the beginning, and make sure the needle is inserted correctly. Thread nests usually mean the machine is threaded incorrectly or tension is not engaging properly.
The Seam Is Wavy or Crooked
Slow down and watch the seam guide instead of the needle. Use pins or clips. Keep fabric edges clean and straight. Do not pull the fabric from behind the presser foot.
The Fabric Is Puckering
Try a fresh needle, adjust stitch length, check thread quality, and press the seam. Lightweight fabric may need a finer needle or more careful handling.
The Project Looks Messy
Press after each seam. Trim loose threads. Clip corners before turning. Use matching thread when you want mistakes to hide politely. These small habits make beginner projects look dramatically better.
A Simple Learning Plan for New Sewists
If you want a clear path, follow this beginner sewing plan over several practice sessions:
- Practice threading a needle and tying knots.
- Learn running stitch, backstitch, whip stitch, and ladder stitch.
- Thread your sewing machine and sew straight lines on scrap fabric.
- Practice seam allowance using the guide on your needle plate.
- Make two cloth napkins to practice hems and corners.
- Sew an envelope pillow cover to learn construction.
- Make a tote bag to practice reinforcement and topstitching.
- Try a simple pattern like pajama pants, an apron, or an elastic skirt.
This order works because each tutorial builds on the previous one. You do not need to master everything before making something. You only need enough skill for the next step.
Beginner Sewing Experiences: What It Really Feels Like to Learn
Learning to sew is not always graceful. In fact, the early days often feel like a comedy show starring you, a spool of thread, and a machine that has strong opinions. The first time many beginners thread a sewing machine, they miss one tiny guide and spend twenty minutes wondering why the stitches look like spaghetti. Then they rethread it correctly and suddenly the machine behaves like a polite appliance. That moment is oddly thrilling.
One of the most common beginner experiences is realizing that sewing is slower than expected. Online tutorials can make a tote bag look like a twenty-minute project. In real life, you may spend twenty minutes just deciding which way the fabric should face. This is normal. Sewing is part craft, part engineering, and part puzzle. Speed comes later. Accuracy comes first.
Another experience beginners share is the discovery that pressing matters. Many new sewists think the iron is optional. Then they compare an unpressed seam with a pressed seam and understand why experienced sewists keep repeating it. Pressing sets stitches, flattens bulk, shapes edges, and makes topstitching easier. It is not glamorous, but neither is brushing your teeth, and both prevent regrettable results.
Choosing the first project can also be emotional. Beginners often want to sew clothes immediately, which is understandable. Wearing something you made sounds amazing. But starting with a garment can introduce fitting, fabric choice, pattern reading, hemming, curves, and finishing all at once. A better experience is to start with small wins. Cloth napkins teach hems. Pillow covers teach construction. Tote bags teach strength. Scrunchies teach turning tubes. Each tiny project gives you a skill you can use later in clothing.
The seam ripper becomes part of the journey too. At first, using it feels like defeat. After a while, it feels like editing. Writers delete sentences. Painters repaint. Sewists unpick seams. A removed seam is not wasted time; it is proof that you noticed something and cared enough to improve it. That mindset makes sewing much more enjoyable.
Beginners also learn to respect fabric. Cotton behaves nicely, while slippery fabric escapes like a mischievous fish. Stretchy knit fabric can grow while you sew. Thick layers may need a stronger needle. Lightweight fabric may pucker if handled roughly. Every fabric has a personality, and sewing becomes easier when you stop forcing fabric to behave like something it is not.
Perhaps the best experience is the first finished project. It may have uneven seams, one suspicious corner, and topstitching that wanders slightly. Still, it exists because you made it. That feeling is powerful. Sewing turns flat fabric into useful objects, repairs beloved clothes, and gives you a creative skill that keeps growing. The beginner stage is not something to rush through. It is where you build the habits that make every future project better.
Conclusion
If you want to learn how to sew, start small, practice often, and choose beginner tutorials that teach one skill at a time. Learn hand stitches, understand your machine, sew straight seams, cut fabric carefully, press every seam, and make simple projects before moving into garments. Sewing rewards patience more than perfection. Your first stitches may wobble, but every line teaches your hands what your brain is trying to explain.
The best beginner sewing tutorials are practical, repeatable, and confidence-building. A napkin, pillow cover, tote bag, or mending project may look simple, but each one teaches the foundations of sewing. With a few tools and steady practice, you can move from “Which way does the bobbin go?” to “I made this” faster than you think.