Table of Contents >> Show >> Hide
- Why Update Kitchen Cabinets Instead of Replacing Them?
- Before You Start: Cabinet Update Prep That Saves Headaches
- 26 DIY Kitchen Cabinet Updates So You Don’t Have to Replace Them
- 1. Paint the Cabinets a Fresh, Modern Color
- 2. Try a Two-Tone Cabinet Look
- 3. Replace Old Cabinet Hardware
- 4. Add Backplates Behind Knobs and Pulls
- 5. Install Soft-Close Hinges
- 6. Add Soft-Close Drawer Slides
- 7. Reface Cabinet Doors and Drawer Fronts
- 8. Add Peel-and-Stick Wood Veneer
- 9. Install Decorative Molding on Plain Doors
- 10. Add Crown Molding Above Upper Cabinets
- 11. Add Trim to Cabinet End Panels
- 12. Replace Solid Door Centers With Glass Inserts
- 13. Use Metal Mesh or Cane Inserts
- 14. Remove a Few Cabinet Doors for Open Shelving
- 15. Paint the Cabinet Interiors
- 16. Line Cabinet Backs With Peel-and-Stick Wallpaper
- 17. Add Under-Cabinet Lighting
- 18. Install Toe-Kick Lighting
- 19. Upgrade to Pull-Out Shelves
- 20. Add a Lazy Susan or Blind-Corner Organizer
- 21. Install Door-Mounted Storage Racks
- 22. Add Drawer Dividers and Inserts
- 23. Build a Plate Rack or Vertical Divider
- 24. Add Furniture Feet to Base Cabinets
- 25. Refresh Cabinet Stain or Add a Clear Topcoat
- 26. Create a Statement Island With Paint or Paneling
- How to Choose the Best DIY Cabinet Update for Your Kitchen
- Common Mistakes to Avoid During Cabinet Updates
- Best Cabinet Colors for a Fresh Look
- Tools and Supplies Worth Having
- of Real-World Experience: What It’s Actually Like to Update Kitchen Cabinets Yourself
- Conclusion: Give Your Cabinets a Second Act
Your kitchen cabinets work harder than almost anything in your home. They hold the snack stash, hide the mismatched mugs, survive spaghetti splatters, and silently judge every time someone puts a cereal bowl on the wrong shelf. But when they start looking tired, dated, or just painfully “builder-grade beige,” replacement is not your only option.
New cabinets can be expensive, disruptive, and messy. The good news? Many cabinets do not need to be ripped out; they need a thoughtful glow-up. With paint, trim, new hardware, clever inserts, lighting, storage upgrades, and a little weekend courage, you can make old cabinets look custom without sending your budget into cardiac arrest.
This guide covers 26 DIY kitchen cabinet updates that refresh style, improve function, and help you fall back in love with your kitchenwithout a full remodel. Before starting, make sure your cabinets are structurally sound. If the boxes are water-damaged, sagging, moldy, or separating from the wall, cosmetic fixes will only put lipstick on a very wobbly pig.
Why Update Kitchen Cabinets Instead of Replacing Them?
Replacing kitchen cabinets usually means demolition, disposal, new layout decisions, countertop complications, and a whole parade of “while we’re at it” expenses. DIY cabinet updates, on the other hand, let you target what actually bothers you: the color, hardware, door style, storage, lighting, or dated finish.
Cabinet updates are especially smart when the cabinet boxes are solid wood or sturdy plywood, the layout still works, and the main issue is appearance. A fresh finish, modern pulls, soft-close hinges, or added molding can make existing cabinets feel dramatically newer. It is the home-improvement version of a haircut, new shoes, and eight hours of sleep.
Before You Start: Cabinet Update Prep That Saves Headaches
Preparation is not glamorous, but it is the difference between a kitchen cabinet makeover that looks polished and one that looks like it was completed during a power outage. Start by cleaning every surface with a degreasing cleaner. Kitchen cabinets collect cooking oil, fingerprints, dust, and mysterious sticky spots nobody in the family will confess to creating.
Remove doors, drawers, and hardware when painting or refinishing. Label each door and hinge location with painter’s tape so reassembly does not turn into a puzzle designed by a villain. Protect counters, floors, appliances, and walls. If your home was built before 1978, be cautious when sanding or disturbing old paint, because lead-based paint may be present. Testing first is the safest move.
26 DIY Kitchen Cabinet Updates So You Don’t Have to Replace Them
1. Paint the Cabinets a Fresh, Modern Color
Painting kitchen cabinets is one of the most powerful DIY updates. White, warm cream, sage green, navy, charcoal, mushroom, and soft greige can all change the entire mood of the room. For a durable result, clean thoroughly, scuff-sand or degloss glossy surfaces, prime when needed, and use cabinet-grade enamel or urethane-reinforced paint. Thin, even coats beat one thick coat every time.
2. Try a Two-Tone Cabinet Look
Two-tone cabinets add designer style without replacing a single box. Paint upper cabinets a lighter color to keep the kitchen airy, then use a darker shade on lower cabinets or the island for contrast. Popular combinations include white and navy, cream and forest green, pale gray and charcoal, or natural wood with painted lowers. It is a simple way to make standard cabinets look intentional and custom.
3. Replace Old Cabinet Hardware
New knobs and pulls are the earrings of the kitchen: small, shiny, and capable of changing the whole outfit. Swap dated hardware for matte black pulls, brushed brass knobs, polished nickel handles, bronze cup pulls, or sleek stainless bars. Measure the distance between existing screw holes before buying replacements. If the new hardware has the same center-to-center measurement, installation is much easier.
4. Add Backplates Behind Knobs and Pulls
If old hardware left scratches, dents, or faded marks, backplates can hide the evidence beautifully. These decorative plates sit behind knobs or pulls and add vintage, traditional, or industrial charm. They are especially useful when switching from knobs to pulls or when covering imperfect paint around old holes.
5. Install Soft-Close Hinges
Few things make a kitchen feel more upgraded than cabinet doors that close quietly instead of slamming like a dramatic soap opera exit. Soft-close hinges slow the door during the final inches of movement. Choose hinges that match your cabinet type: face-frame, frameless, inset, partial overlay, or full overlay. Bring an old hinge to the hardware store if you are unsure.
6. Add Soft-Close Drawer Slides
If your drawers screech, stick, or slam, new drawer slides can make them feel luxurious. Soft-close slides are available in side-mount and undermount styles. Measure the drawer box and cabinet depth carefully before buying. This update improves daily function, especially in busy kitchens where drawers are opened more often than the refrigerator during snack hour.
7. Reface Cabinet Doors and Drawer Fronts
Cabinet refacing keeps the existing cabinet boxes but changes the visible surfaces. You can replace doors and drawer fronts, then apply veneer or laminate to face frames and exposed sides. This is more advanced than painting, but it delivers a near-new look for less disruption than full replacement. It works best when cabinet boxes are sturdy and the layout already suits your needs.
8. Add Peel-and-Stick Wood Veneer
Peel-and-stick veneer can refresh cabinet frames, end panels, or flat slab doors. Wood veneer adds warmth and texture, especially in modern, midcentury, or Scandinavian-inspired kitchens. The key is careful measuring, clean surfaces, and slow application with a smoothing tool to prevent bubbles. Trim edges with a sharp utility knife for a crisp finish.
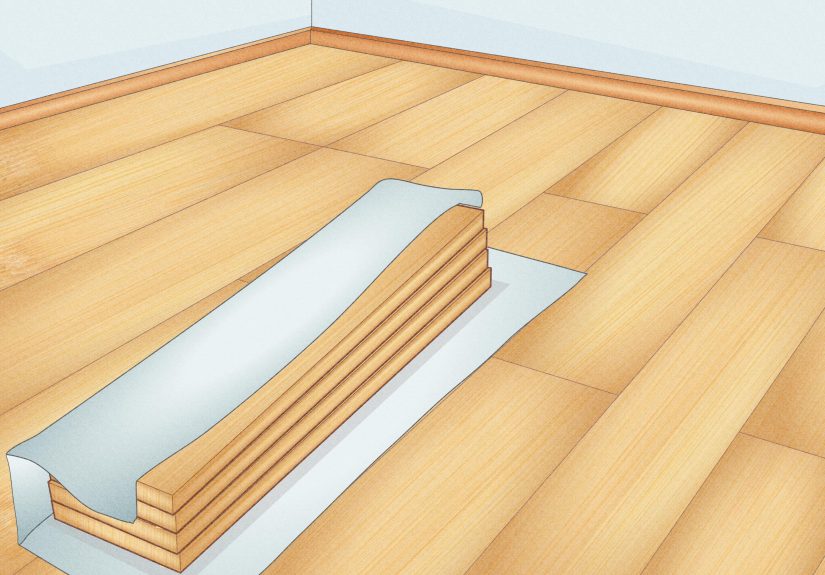
9. Install Decorative Molding on Plain Doors
Flat cabinet doors can look basic, but thin molding can turn them into shaker-style or picture-frame doors. Cut lightweight trim to size, attach it with wood glue and brad nails, caulk seams, then paint. This budget-friendly cabinet update is perfect for builder-grade kitchens that need architectural detail without major carpentry.
10. Add Crown Molding Above Upper Cabinets
Crown molding makes upper cabinets look taller and more finished. If there is a gap between cabinets and ceiling, molding can bridge the space or create the illusion of custom built-ins. For uneven ceilings, use a small reveal or flexible trim strategy rather than trying to force every piece perfectly flush. Houses are rarely square; they just pretend during open houses.
11. Add Trim to Cabinet End Panels
Exposed cabinet sides often look unfinished, especially on islands or at the end of a cabinet run. Add decorative panels, board-and-batten trim, beadboard, or shaker-style molding to give the side panels a furniture-like appearance. Paint everything the same color for a seamless look.
12. Replace Solid Door Centers With Glass Inserts
Glass inserts lighten the look of upper cabinets and give you a place to display pretty dishes, glassware, or cookbooks. Clear glass feels classic, frosted glass hides clutter, seeded glass adds vintage charm, and ribbed glass offers a trendy textured look. This project requires careful cutting, so use clamps, eye protection, and patience. The glass does not forgive chaos.
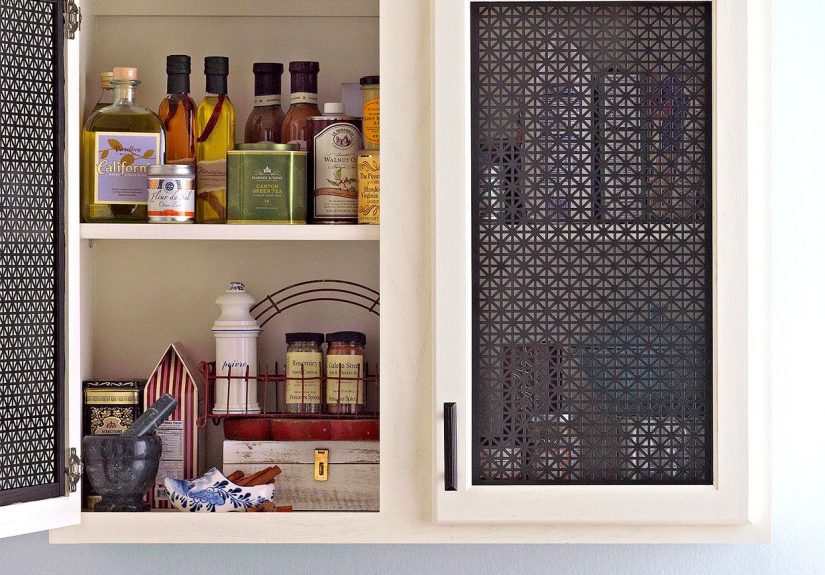
13. Use Metal Mesh or Cane Inserts
Instead of glass, try metal mesh, radiator screen, woven cane, or rattan inserts. These materials add texture and personality while allowing some airflow. Cane works beautifully in coastal, bohemian, and warm modern kitchens. Metal mesh leans farmhouse, industrial, or vintage. Use inserts on a few feature doors rather than every cabinet to keep the design balanced.
14. Remove a Few Cabinet Doors for Open Shelving
If your upper cabinets feel heavy, remove the doors from one or two sections to create open shelving. Paint the interior, fill old hinge holes, and style the shelves with everyday dishes, bowls, or jars. This is a low-cost update, but it does require honesty. If your shelves usually look like a mug avalanche, choose another idea.
15. Paint the Cabinet Interiors
A pop of color inside glass-front or open cabinets adds charm. Try soft blue, sage, warm terracotta, charcoal, or even wallpaper on the back panel. This detail works especially well with white or neutral cabinet exteriors. It is subtle when doors are closed and delightful when they are open.
16. Line Cabinet Backs With Peel-and-Stick Wallpaper
Peel-and-stick wallpaper can brighten cabinet interiors without permanent commitment. Use it behind open shelves, glass doors, or pantry cabinets. Choose washable designs for kitchens and avoid overly busy patterns if your dishes are already colorful. Botanical prints, small geometrics, grasscloth textures, and faux tile patterns all work well.
17. Add Under-Cabinet Lighting
Under-cabinet lighting makes food prep easier and gives the kitchen a warm evening glow. LED light bars, puck lights, and tape lights are common DIY options. Plug-in versions are easier for beginners, while hardwired options look cleaner but may require an electrician. Warm white lighting usually feels more inviting than harsh blue-white light.
18. Install Toe-Kick Lighting
Toe-kick lighting adds a soft glow near the floor and makes the kitchen feel surprisingly high-end. LED strips can be installed under base cabinets for subtle nighttime lighting. This is especially useful in open-plan homes or for late-night water trips when you do not want to blast the whole kitchen with overhead lights.
19. Upgrade to Pull-Out Shelves
Pull-out shelves make deep base cabinets much easier to use. Instead of crawling halfway inside a cabinet to find a pan, you slide the shelf forward and pretend you have always been this organized. DIY kits come in many widths, and some mount directly to existing shelves. Measure carefully and check for hinges or face frames that may block movement.
20. Add a Lazy Susan or Blind-Corner Organizer
Corner cabinets are where kitchen items go to retire. A lazy Susan, kidney-shaped pullout, or blind-corner organizer brings hidden items back into circulation. Use these for oils, baking supplies, mixing bowls, or small appliances. This update improves storage without changing the footprint of your kitchen.
21. Install Door-Mounted Storage Racks
The inside of cabinet doors is valuable real estate. Add racks for spices, cutting boards, pot lids, foil, wraps, cleaning supplies, or measuring spoons. Make sure the rack clears shelves when the door closes. This tiny planning step prevents the classic DIY tragedy: the door that almost closes but not quite.
22. Add Drawer Dividers and Inserts
Drawer inserts make cabinets feel new from the inside out. Use dividers for utensils, knives, spices, food containers, baking tools, or coffee supplies. Bamboo inserts look warm and polished, while adjustable plastic or metal dividers are practical and easy to clean. A well-organized drawer can bring a suspicious amount of happiness.
23. Build a Plate Rack or Vertical Divider
Vertical dividers help store baking sheets, cutting boards, trays, and platters upright. You can buy wire dividers or build simple wooden slots. This update prevents the noisy metal-pan landslide that happens every time you reach for a cookie sheet. It is a small cabinet improvement with big daily benefits.
24. Add Furniture Feet to Base Cabinets
Furniture-style feet can make standard base cabinets look more custom. Install them at cabinet ends, island corners, or beneath decorative panels. Paint or stain them to match the cabinets. This detail works especially well in traditional, cottage, farmhouse, and transitional kitchens.
25. Refresh Cabinet Stain or Add a Clear Topcoat
If your wood cabinets are scratched but still attractive, consider cleaning, lightly sanding, and applying stain touch-up, gel stain, or a protective clear coat. Gel stain can deepen color without fully stripping the wood, though prep still matters. Always test in a hidden spot first because wood finishes can react unpredictably. Cabinets, like toddlers, sometimes have big feelings.
26. Create a Statement Island With Paint or Paneling
If painting every cabinet feels overwhelming, update only the island or peninsula. A contrasting island in navy, black, green, taupe, or deep blue can become a focal point. Add beadboard, fluted trim, shiplap-style paneling, or decorative end panels for more impact. This project gives you a major style win with less work than a full cabinet makeover.
How to Choose the Best DIY Cabinet Update for Your Kitchen
Start with your biggest problem. If the kitchen feels dark, paint or glass inserts may help. If it feels dated, replace hardware and add modern hinges. If clutter is the issue, focus on pull-outs, dividers, and door-mounted storage. If the cabinets look plain, add molding, end panels, or crown trim.
Budget also matters. Hardware, wallpaper, organizers, and paint are usually more affordable than refacing or replacing doors. Skill level matters, too. Beginners can start with knobs, pulls, lighting, shelf liners, and drawer inserts. Intermediate DIYers may enjoy painting, trim, and pull-out shelves. Advanced DIYers can tackle glass inserts, veneer, refacing, and custom paneling.
Common Mistakes to Avoid During Cabinet Updates
The most common mistake is rushing prep. Paint will not stick well to greasy, glossy, or dusty cabinets. Another mistake is buying hardware without measuring hole spacing. Also avoid painting hinges unless the product is designed for metal hardware; painted hinges can chip, stick, and make doors close poorly.
Do not ignore cabinet function. A beautiful cabinet that still hides chaos is only half improved. Combine cosmetic upgrades with storage fixes whenever possible. For example, paint the lower cabinets and install pull-out shelves. Replace hardware and add drawer dividers. Add glass inserts and style the interior shelves. The best cabinet updates look good and make cooking easier.
Best Cabinet Colors for a Fresh Look
White remains popular because it brightens the kitchen and works with almost every style. Warm white and cream feel softer than stark white. Sage green, blue-gray, mushroom, and taupe bring color without overwhelming the room. Navy, charcoal, black, and deep green create drama, especially on lower cabinets or islands.
When choosing a color, consider countertops, backsplash, flooring, wall color, and natural light. Paint large sample boards and view them morning, afternoon, and evening. A color that looks calm in daylight can turn weirdly purple under kitchen bulbs. Paint is sneaky like that.
Tools and Supplies Worth Having
For most DIY kitchen cabinet updates, useful supplies include a drill, screwdriver, tape measure, level, painter’s tape, drop cloths, degreaser, sanding sponge, wood filler, caulk, primer, cabinet paint, foam rollers, angled brushes, clamps, and a hardware installation jig. For trim projects, a miter saw or miter box helps. For inserts, you may need a jigsaw, utility knife, tin snips, silicone, or glass clips.
A hardware jig is especially helpful when installing knobs and pulls. It keeps holes consistent and prevents that one handle from sitting slightly crooked forever, quietly annoying you every time you make toast.
of Real-World Experience: What It’s Actually Like to Update Kitchen Cabinets Yourself
DIY kitchen cabinet updates look simple in before-and-after photos, but real life includes dust, drying time, missing screws, and at least one moment when you ask, “Why did I start this on a Sunday?” The good news is that most cabinet updates are absolutely manageable when you plan carefully and do not try to finish everything in one heroic afternoon.
One of the biggest lessons is that painting cabinets takes longer than expected. The actual painting is not the hard part. The real work is removing doors, labeling everything, cleaning grease, sanding or deglossing, filling holes, priming, waiting, flipping doors, painting again, waiting again, and then resisting the urge to reinstall doors before the finish has cured. Cabinet paint can feel dry to the touch but still be soft underneath. Give it time. Your future self, holding a chip-free coffee mug cabinet, will thank you.
Hardware swaps are the easiest confidence booster. If you want a quick weekend project, start there. Replacing old knobs with modern pulls can make the kitchen feel cleaner immediately. The trick is to use a template or jig. Measuring each hole by hand sounds fine until pull number nine is slightly off and suddenly your cabinet looks confused. If old holes do not match the new hardware, fill them with wood filler, sand smooth, prime the spots, and repaint before drilling new holes.
Storage upgrades are the projects you appreciate every single day. Pull-out shelves, tray dividers, and door racks may not create the same dramatic photo as navy paint, but they make cooking easier. A cabinet that used to swallow pot lids can become organized in less than an hour. When measuring for organizers, check the interior width, depth, door opening, hinges, and any center stile. Many cabinets have less usable space than they appear to have from the outside.
Trim and molding updates are satisfying but require patience. Lightweight molding can transform flat doors, but cutting accurate corners matters. Paint hides small sins, but it does not perform miracles. Dry-fit trim before attaching it, use painter’s tape as a guide, and caulk tiny gaps after installation. Once painted, even inexpensive trim can look surprisingly high-end.
Another real-world tip: update in zones. Do the island first, or one wall of cabinets, or only the uppers. This keeps the kitchen usable and helps you learn as you go. The first cabinet door is usually the practice pancake; by the fifth door, you will be much better.
Finally, accept that DIY does not mean perfect. It means personal, budget-smart, and customized to your home. A tiny brush mark inside a cabinet frame is not failure. A slightly imperfect project that saves thousands and makes your kitchen happier is still a win. Besides, once the coffee maker, fruit bowl, and everyday life return to the room, nobody will inspect your cabinet corners with a magnifying glassunless they do, in which case they are no longer invited to brunch.
Conclusion: Give Your Cabinets a Second Act
You do not need to replace your kitchen cabinets to create a fresher, smarter, better-looking space. With the right DIY kitchen cabinet updates, you can modernize color, improve storage, add custom details, and make everyday cooking more enjoyable. Paint can brighten the room, new hardware can sharpen the style, lighting can improve function, and organizers can rescue you from cabinet chaos.
The best approach is to match the update to your cabinets, budget, skill level, and lifestyle. Start small if you are new to DIY. Replace pulls, add dividers, install door racks, or paint an island. If you are ready for a bigger transformation, try cabinet painting, refacing, glass inserts, or decorative molding. Either way, your cabinets may have plenty of good years left in them. They just need a little attention, a little creativity, and maybe fewer mystery containers hiding in the back.
Note: This article is written as original, publication-ready web content based on widely accepted U.S. home improvement practices for cabinet painting, refacing, hardware replacement, storage upgrades, lighting, and lead-safe renovation awareness.