Table of Contents >> Show >> Hide
- Before You Replace Hardwood Flooring: Inspect First
- Tools and Materials You Will Need
- Step 1: Prepare the Room
- Step 2: Remove the Old Hardwood Floor
- Step 3: Inspect and Repair the Subfloor
- Step 4: Choose the Right Replacement Hardwood
- Step 5: Acclimate the New Flooring
- Step 6: Plan the Layout
- Step 7: Install Underlayment or Moisture Barrier
- Step 8: Install the First Rows
- Step 9: Continue Across the Room
- Step 10: Install the Final Rows
- Step 11: Add Transitions, Trim, and Finishing Touches
- Common Mistakes to Avoid
- How Much Does It Cost to Replace Hardwood Floor?
- Should You DIY or Hire a Pro?
- Care Tips After Replacing Hardwood Flooring
- Real-World Experience: What Replacing Hardwood Floor Teaches You
- Conclusion
Replacing a hardwood floor is one of those home projects that looks simple on videountil you discover the first board is nailed down like it owes someone money. Still, with the right plan, the right tools, and a little patience, learning how to replace hardwood floor can be a realistic DIY project for handy homeowners. It can also help you decide when calling a flooring professional is the smarter, less sweaty move.
Hardwood floors are durable, beautiful, and excellent at making a room feel finished. But they are not immortal. Water damage, deep pet stains, buckled boards, termite damage, uneven subfloors, or years of sanding can push a floor beyond simple refinishing. When that happens, replacement gives you a clean slate: new boards, better underlayment, corrected squeaks, and a chance to update the wood species, plank width, color, and finish.
This guide walks through the process of replacing hardwood flooring from demolition to final trim. It is written for full-room replacement, but many principles also apply when replacing a damaged section of hardwood floor.
Before You Replace Hardwood Flooring: Inspect First
Before you buy a single plank, inspect the existing floor. Not every ugly hardwood floor needs replacement. Scratches, dull finish, light discoloration, and minor gaps can often be fixed by sanding and refinishing. Replacement makes more sense when the boards are warped, cracked, loose, mold-damaged, structurally thin, or patched so many times the floor looks like a wooden quilt.
Replace or refinish?
Refinishing is usually better when the floor is mostly flat and solid. Replacement is better when the wood itself is failing. If boards are cupping from moisture, popping loose, or showing dark stains that go deep into the grain, refinishing may only make the problem look slightly more expensive. A badly damaged subfloor is another sign that the old hardwood needs to come out.
Also check the thickness of existing solid hardwood. Solid hardwood can usually be refinished several times, but once the wear layer is too thin, sanding can expose nails or weaken the tongue-and-groove edges. Engineered hardwood depends on the thickness of the top veneer; some products can be refinished lightly, while others cannot.
Tools and Materials You Will Need
The exact tools depend on whether you are installing nail-down solid hardwood, glue-down engineered hardwood, or a floating engineered hardwood floor. For most hardwood floor replacement projects, gather the following:
- Pry bar, hammer, and utility knife
- Circular saw or oscillating multi-tool
- Flooring nailer or stapler for nail-down installation
- Air compressor if using pneumatic tools
- Miter saw or table saw for cutting boards
- Measuring tape, chalk line, pencil, and spacers
- Moisture meter
- Level or straightedge
- Underlayment, vapor retarder, or adhesive as required
- New hardwood flooring
- Baseboards, shoe molding, transitions, and matching trim
- Safety glasses, work gloves, hearing protection, and dust mask or respirator
Order extra flooring. A common rule is to add 5% to 10% for waste, cuts, mistakes, and future repairs. If your room has angled walls, closets, fireplaces, or complicated transitions, lean toward the higher end. Future-you will be grateful when one board gets damaged and the matching product has not vanished from the market like a discontinued cereal flavor.
Step 1: Prepare the Room
Remove furniture, rugs, curtains that touch the floor, and anything fragile. Flooring replacement creates dust, vibration, noise, and enough loose nails to make walking barefoot a terrible life choice. Seal doorways with plastic sheeting if you want to keep dust from traveling through the house.
Next, remove baseboards and shoe molding carefully if you plan to reuse them. Score the caulk line with a utility knife, then use a pry bar and a scrap block to protect the wall. Label trim pieces by wall location so they go back where they belong. This tiny step prevents a surprisingly annoying puzzle later.
Step 2: Remove the Old Hardwood Floor
Start along a wall or a damaged area. If the existing hardwood is nailed down, set a circular saw depth just slightly deeper than the flooring thickness. Cut the floor into manageable strips, being careful not to cut into the subfloor. Pry up each section with a pry bar, then remove remaining nails or staples.
If the floor is glued down, removal can be harder. You may need a floor scraper, demolition hammer, or professional removal equipment. Glue-down hardwood can cling to the subfloor with heroic stubbornness. Work slowly so you do not gouge the subfloor more than necessary.
For floating hardwood or engineered flooring, remove transitions, lift the first row, and unlock the planks. Floating floors are usually the easiest to remove because they are not fastened directly to the subfloor.
Safety warning for older floors
If your home has old vinyl, old adhesive, or unknown flooring layers beneath the hardwood, stop before sanding, scraping, or grinding. Older flooring materials and black mastics can contain asbestos. When in doubt, have the material tested and hire a qualified professional for safe removal. No floor upgrade is worth turning demolition dust into a health hazard.
Step 3: Inspect and Repair the Subfloor
Once the old hardwood is removed, the subfloor gets its big moment. Sweep and vacuum thoroughly. Pull nails, staples, adhesive chunks, and loose debris. Then check for squeaks, soft spots, uneven seams, water stains, and rot.
A good hardwood flooring installation depends on a clean, dry, flat, and structurally sound subfloor. If the subfloor flexes, squeaks, or dips, the new hardwood may move, gap, or make noise. Fasten loose plywood or OSB panels to the joists with screws. Replace water-damaged panels. Sand down high spots and fill low spots with a flooring-approved leveling compound if appropriate for your installation type.
Check moisture, too. Wood expands and contracts with humidity. Installing hardwood over a damp subfloor is like inviting future buckling, cupping, and regret into your home. Use a moisture meter and follow the flooring manufacturer’s acceptable moisture range. Concrete slabs require special testing and usually need engineered hardwood approved for concrete, plus the correct moisture barrier or adhesive system.
Step 4: Choose the Right Replacement Hardwood
Hardwood flooring comes in two main categories: solid hardwood and engineered hardwood. Solid hardwood is milled from one piece of wood and is often nailed to a wood subfloor. It can last for generations when maintained well. Engineered hardwood has a real wood veneer over a layered core, making it more dimensionally stable in areas where humidity changes are a concern.
Solid hardwood
Solid hardwood is a classic choice for living rooms, bedrooms, dining rooms, and hallways above grade. Oak, maple, hickory, walnut, and cherry are popular options. Solid wood can usually be sanded and refinished multiple times, but it is not ideal for basements or damp areas.
Engineered hardwood
Engineered hardwood is often better for concrete slabs, basements, condos, and spaces where moisture conditions are less predictable. It can be installed as nail-down, glue-down, or floating flooring depending on the product. Pay attention to veneer thickness, finish quality, warranty, and installation instructions.
Choose a finish and plank width that fit your lifestyle. Dark glossy floors look elegant but show dust, scratches, and pet hair faster. Matte or satin finishes are more forgiving. Wider planks create a modern look but may require extra attention to subfloor flatness and humidity control.
Step 5: Acclimate the New Flooring
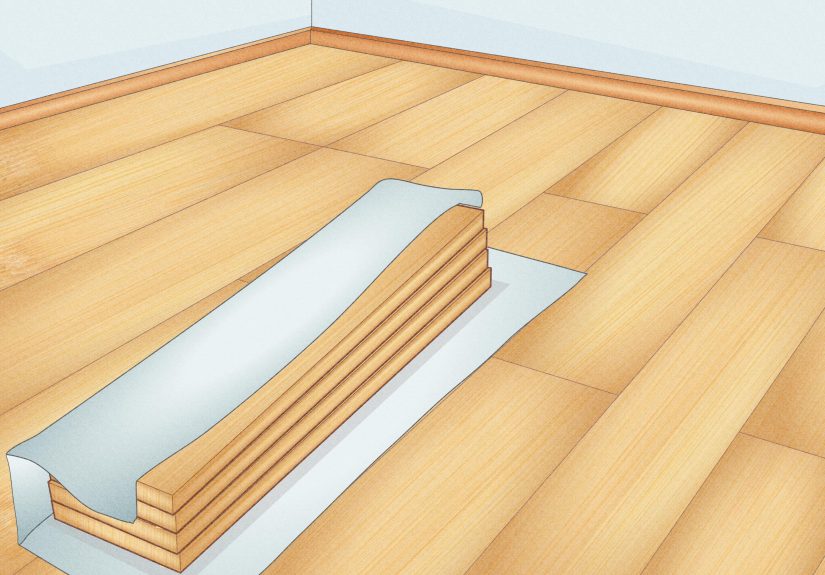
Do not bring hardwood home and install it immediately unless the manufacturer specifically allows it. Most wood flooring needs time to acclimate to the room where it will be installed. Place the unopened or partially opened cartons in the installation area according to product directions. Maintain normal living conditions for temperature and humidity.
Acclimation helps the wood adjust before it is locked, nailed, or glued into place. Skipping this step can cause gaps, swelling, or buckling later. Think of it as letting the wood meet the room before asking it to commit.
Step 6: Plan the Layout
Measure the room carefully. Decide which direction the boards will run. Hardwood is often installed perpendicular to floor joists for strength, though engineered products may allow more flexibility. Visually, boards usually look best running parallel to the longest wall or toward the main light source.
Snap a chalk line for your starting row. Dry-lay several rows to avoid ending with a tiny sliver of flooring against the far wall. If the last row would be too narrow, rip the first row slightly narrower so both sides look balanced.
Stagger end joints so seams do not line up from row to row. Randomized board lengths create a natural appearance. Avoid stair-step patterns unless you want your floor to look like it is quietly marching across the room.
Step 7: Install Underlayment or Moisture Barrier
Follow the flooring manufacturer’s instructions exactly. Nail-down hardwood over wood subfloor may need a vapor retarder such as flooring paper. Floating engineered hardwood often needs foam or felt underlayment. Glue-down systems may require a specific adhesive that also acts as a moisture barrier.
Do not mix random products and hope for the best. Flooring warranties often depend on using approved underlayment, adhesive, fasteners, and installation methods.
Step 8: Install the First Rows
The first rows control the rest of the floor, so take your time. Use spacers along the walls to maintain the required expansion gap. Wood needs room to expand and contract around the perimeter. This gap will later be hidden by baseboards or shoe molding.
For nail-down hardwood, position the tongue facing into the room. Face-nail the first row where the baseboard will hide the nail heads, then blind-nail through the tongue where possible. Drill pilot holes near edges to reduce splitting. Keep rows straight and tight.
For glue-down hardwood, spread only as much adhesive as you can cover within the recommended working time. Use the correct trowel size. Press boards firmly into the adhesive and clean glue from the surface quickly with the manufacturer-approved cleaner.
For floating floors, connect the planks according to the locking system. Use a tapping block if allowed, but do not hammer directly on the board edges. That is not craftsmanship; that is bullying the floor.
Step 9: Continue Across the Room
Work row by row. Check alignment often. Use boards from multiple cartons to blend color and grain variation. Natural hardwood is supposed to vary; mixing cartons prevents one corner from looking like a different tree showed up late to the party.
Cut boards at the ends of rows so they fit while maintaining the expansion gap. Use leftover cut pieces to start new rows when they are long enough and help create good seam spacing. Keep the workspace clean so debris does not get trapped under boards.
Around door jambs, undercut the casing so the flooring slides underneath. This creates a cleaner finish than trying to cut flooring perfectly around trim. Use a scrap piece of flooring as a height guide when undercutting.
Step 10: Install the Final Rows
The last rows are often too close to the wall for a flooring nailer. You may need to glue and face-nail them, depending on the product and installation method. Measure the remaining space, subtract the expansion gap, and rip the final boards to width.
Use a pull bar carefully to snug the last boards into place. Do not force boards so tightly that the expansion gap disappears. A hardwood floor needs breathing room, even if it does not pay rent.
Step 11: Add Transitions, Trim, and Finishing Touches
Remove spacers and install transition strips at doorways, thresholds, fireplaces, or where hardwood meets tile, carpet, vinyl, or another flooring type. Reinstall baseboards and shoe molding by nailing them to the wall, not the floor. Nailing trim into the floor can restrict movement and cause problems later.
Fill nail holes with matching wood filler if needed. Clean the floor with a product approved for the finish. Avoid wet mopping new hardwood. Water and wood have a complicated relationship, and the wood usually loses.
Common Mistakes to Avoid
Skipping moisture testing
Moisture problems cause many hardwood flooring failures. Always test the subfloor and flooring when required, especially over concrete or in humid climates.
Ignoring subfloor flatness
New hardwood will not magically fix an uneven subfloor. It will simply advertise the problem with gaps, hollow spots, squeaks, or movement.
Forgetting expansion gaps
Hardwood expands. Without perimeter gaps, boards can buckle when humidity rises.
Using the wrong fasteners or adhesive
Each flooring product has requirements for nail size, staple spacing, adhesive type, and underlayment. Follow the instructions, not the advice of someone who “did it once in 1998.”
Installing damaged boards
Inspect boards as you work. Set aside pieces with broken tongues, bad milling, deep scratches, or extreme color mismatch.
How Much Does It Cost to Replace Hardwood Floor?
The cost to replace hardwood flooring depends on room size, wood species, plank width, product quality, installation method, labor rates, demolition difficulty, and subfloor repairs. Solid hardwood typically costs more than basic engineered hardwood, while exotic species and wide planks can raise the budget quickly.
DIY can save labor costs, but tool rental, waste, adhesive, underlayment, trim, transitions, and mistakes still add up. Professional installation costs more upfront but may be worth it for large rooms, glued-down flooring removal, concrete subfloors, stairs, patterned layouts, or expensive materials.
For many homeowners, the smartest budget includes three categories: materials, installation supplies, and surprise repairs. The surprise category is important because subfloors love to reveal their secrets only after the old flooring is gone.
Should You DIY or Hire a Pro?
You can DIY hardwood floor replacement if you are comfortable using saws, measuring accurately, handling demolition, and following technical instructions. A simple rectangular bedroom with a wood subfloor is far more beginner-friendly than a large open-concept space with stairs, transitions, a fireplace, and moisture issues.
Hire a professional if you discover structural damage, major moisture problems, asbestos concerns, uneven concrete, complex patterns, or expensive flooring you cannot afford to waste. A pro can also complete the job faster and often with cleaner results.
Care Tips After Replacing Hardwood Flooring
After installation, protect your new hardwood floor from day one. Add felt pads under furniture. Use rugs in high-traffic areas. Keep pet nails trimmed. Wipe spills quickly. Maintain indoor humidity within the flooring manufacturer’s recommended range. Sweep or vacuum regularly with a hardwood-safe attachment.
Avoid steam mops, harsh cleaners, waxes not approved for the finish, and dragging furniture. Your floor is tough, but it is not a cutting board, a swimming pool, or a sledding hill for sofas.
Real-World Experience: What Replacing Hardwood Floor Teaches You
The biggest lesson from replacing hardwood floor is that the visible boards are only half the story. Homeowners often focus on color, plank width, and whether the finish is “warm honey oak” or “moody espresso with main-character energy.” Those choices matter, but the success of the project usually depends on what happens underneath.
One common experience is discovering that demolition takes longer than expected. Old hardwood may have been nailed with more fasteners than seems emotionally necessary. Some boards come up cleanly; others splinter, crack, or cling to the subfloor. If adhesive is involved, the job becomes more physical. The best approach is to work in sections, keep the area clean, and avoid rushing. Rushing demolition can damage the subfloor and create extra repair work.
Another practical lesson is that subfloor preparation is not glamorous, but it is everything. A homeowner might spend hours choosing a beautiful white oak floor, only to realize the plywood below has squeaks, dips, and old water stains. Fixing those issues before installation prevents future frustration. Screwing down loose panels, sanding high seams, replacing soft spots, and checking moisture may not produce dramatic before-and-after photos, but those steps make the finished floor feel solid.
Layout planning is another area where experience pays off. Beginners sometimes start against the first wall they see, then reach the opposite side and discover the final row is a thin, awkward strip. Measuring beforehand prevents that. Dry-laying several rows also helps you see color variation. Hardwood is natural, and some boards are lighter, darker, calmer, or wilder than others. Mixing boards from different boxes gives the floor a balanced look.
Cutting around doorways teaches patience. Door jambs, closets, vents, and transitions can slow the project down. The cleanest result usually comes from undercutting door casing so the floor slides underneath. It looks professional and hides imperfect cuts. This small detail can make a DIY floor look much more polished.
The final rows are often the most annoying. Space gets tight, tools feel too large, and every board seems to need a custom cut. This is where patience matters most. A rushed final row can leave gaps or damage board edges. Measure twice, cut carefully, and keep the expansion gap intact.
Another real-world tip: save extra flooring. Store leftover boards in a dry place after the project. Years later, if a board gets damaged by a leak, dropped tool, or enthusiastic furniture move, matching the exact product may be difficult. Having spare boards can turn a future repair from a full detective mission into a simple patch.
Finally, hardwood replacement reminds you that perfection and quality are not the same thing. Real wood has grain, knots, mineral streaks, and variation. A good hardwood floor does not look like plastic. It looks alive. The goal is not to erase every sign of nature; it is to install the floor correctly so those natural details can shine for years.
Conclusion
Replacing hardwood floor is a rewarding project when it is planned carefully. The process starts with deciding whether replacement is truly necessary, then moves through demolition, subfloor repair, moisture checks, layout planning, installation, trim, and long-term care. The best results come from respecting the basics: use the right materials, follow manufacturer instructions, maintain expansion gaps, and never ignore moisture.
If your old floor is deeply damaged, uneven, stained, or beyond refinishing, a new hardwood floor can completely refresh your home. Whether you choose solid oak, engineered maple, wide-plank hickory, or another style, the key is preparation. A beautiful floor is built from the bottom up, even when the only part people compliment is the surface.
Note: This article is for educational home-improvement content. For structural damage, suspected asbestos, major moisture problems, or complex installations, consult a qualified flooring professional before beginning work.