Table of Contents >> Show >> Hide
- Before You Start: The Basic Formula for Homemade Ice Cream
- Way 1: Classic Churned Custard Ice Cream
- Way 2: Philadelphia-Style Eggless Ice Cream
- Way 3: No-Churn Ice Cream
- Way 4: Ice Cream in a Bag
- How to Make Homemade Ice Cream Creamier
- Common Homemade Ice Cream Mistakes
- of Real-Life Experience: What Making Ice Cream Teaches You
- Conclusion
Note: This guide focuses on practical, kitchen-tested methods for making homemade ice cream safely and deliciously. If you use eggs, choose pasteurized eggs or cook the custard base properly before freezing.
Homemade ice cream has a special kind of magic. It turns cream, sugar, vanilla, fruit, chocolate, or whatever delicious chaos is hiding in your pantry into something that makes adults hover near the freezer like hopeful raccoons. The best part? You do not need a professional machine, a culinary degree, or a freezer blessed by dessert angels. You just need the right method.
In this guide, you will learn four reliable ways to make ice cream at home: classic churned custard ice cream, eggless Philadelphia-style ice cream, no-churn ice cream, and ice cream in a bag. Each method has its own personality. Some are rich and luxurious, some are fast and kid-friendly, and some are perfect when you want dessert but refuse to buy another appliance that will live in the cabinet next to the waffle maker.
The secret to great homemade ice cream is balance. Fat gives richness, sugar keeps the texture scoopable, air makes it lighter, and fast freezing helps reduce large ice crystals. Once you understand those basics, you can make vanilla, chocolate, strawberry, coffee, cookies and cream, mint chip, peanut butter swirl, or a flavor so personal your family politely asks whether it has a name.
Before You Start: The Basic Formula for Homemade Ice Cream
Most homemade ice cream starts with a simple base: dairy, sweetener, flavoring, and sometimes eggs. Heavy cream adds richness, whole milk lightens the texture, sugar sweetens the mixture and prevents it from freezing rock-hard, and salt sharpens the flavor. Vanilla extract, cocoa powder, fruit puree, espresso, caramel, crushed cookies, or toasted nuts can turn that base into almost anything.
A dependable beginner formula is 2 cups heavy cream, 1 cup whole milk, 2/3 cup sugar, 1 teaspoon vanilla extract, and a pinch of salt. For a custard version, add 4 to 6 egg yolks and cook the base gently. For a no-churn version, swap the milk and sugar for sweetened condensed milk and fold in whipped cream. For a bag method, use half-and-half, sugar, vanilla, ice, and rock salt or kosher salt.
Texture matters as much as flavor. Ice cream becomes smooth when the mixture freezes quickly while staying in motion or when the base contains enough fat, sugar, and air to resist iciness. That is why churning works so well: it freezes the base while incorporating air. No-churn ice cream imitates that effect by whipping cream before freezing. Ice cream in a bag uses salt and ice to create a super-cold environment around the mixture.
Way 1: Classic Churned Custard Ice Cream
Classic custard ice cream is the gold standard for creamy homemade ice cream. It uses egg yolks, milk, cream, and sugar to create a rich base that churns into a smooth, scoopable dessert. If ice cream had a velvet jacket, this would be it.
Best For
This method is ideal when you want premium texture, deep flavor, and a traditional ice cream parlor result. It is especially good for vanilla bean, chocolate, coffee, pistachio, caramel, and other flavors where richness is the point.
Ingredients
- 2 cups heavy cream
- 1 cup whole milk
- 2/3 cup granulated sugar
- 4 to 6 large egg yolks
- 1/4 teaspoon salt
- 1 tablespoon vanilla extract or 1 vanilla bean
How to Make It
- Warm the milk, cream, half the sugar, and salt in a saucepan over medium heat until steaming but not boiling.
- In a separate bowl, whisk the egg yolks with the remaining sugar until slightly pale.
- Slowly pour a small amount of hot dairy into the yolks while whisking. This tempers the eggs so they do not scramble.
- Pour the egg mixture back into the saucepan and cook gently, stirring constantly, until the custard reaches 160°F and coats the back of a spoon.
- Strain the custard through a fine mesh sieve, stir in vanilla, and chill for at least 4 hours or overnight.
- Churn in an ice cream maker according to the manufacturer’s instructions, usually 20 to 30 minutes.
- Transfer to a chilled container and freeze for 3 to 4 hours until firm.
Why This Method Works
Egg yolks contain fat and emulsifiers that help create a smooth body. Cooking the custard thickens the base and improves safety. Chilling the mixture before churning helps it freeze faster, which creates smaller ice crystals. Smaller ice crystals mean smoother ice cream. That is the difference between “wow, this is creamy” and “why am I chewing frozen milk gravel?”
Flavor Example: Vanilla Bean Custard Ice Cream
For a classic vanilla version, split one vanilla bean and scrape the seeds into the warm dairy. Add the pod while heating, then remove it before churning. The result is fragrant, rich, and speckled with tiny vanilla seeds. Serve it with pie, brownies, grilled peaches, or a spoon straight from the container while pretending you are “checking the texture.”
Way 2: Philadelphia-Style Eggless Ice Cream
Philadelphia-style ice cream skips the eggs and uses cream, milk, sugar, and flavoring. It tastes cleaner and lighter than custard ice cream, allowing fresh dairy and delicate flavors to shine. It is also easier because there is no tempering, no custard, and no risk of accidentally making sweet scrambled eggs.
Best For
This method is perfect for beginners who have an ice cream maker but want a simpler process. It works beautifully for fruit flavors, vanilla, mint, sweet cream, honey, and fresh strawberry ice cream.
Ingredients
- 2 cups heavy cream
- 1 cup whole milk
- 3/4 cup granulated sugar
- 1/4 teaspoon salt
- 1 tablespoon vanilla extract or other flavoring
How to Make It
- Whisk the cream, milk, sugar, salt, and vanilla until the sugar dissolves completely.
- Chill the mixture for at least 2 hours. Cold bases churn better.
- Pour the mixture into an ice cream maker and churn until it reaches a soft-serve consistency.
- Fold in mix-ins such as chopped chocolate, cookie pieces, or fruit swirl during the final minute of churning.
- Transfer to a freezer-safe container, press parchment or plastic wrap against the surface, cover, and freeze until firm.
Why This Method Works
Without eggs, the flavor is fresher and more direct. The fat from heavy cream provides body, while sugar helps keep the ice cream from freezing too hard. Because there is no cooked custard, this style is faster and less fussy. The trade-off is that it may taste slightly less rich than custard ice cream, but for bright fruit flavors, that can be a benefit.
Flavor Example: Strawberry Sweet Cream Ice Cream
To make strawberry ice cream, mash 1 1/2 cups sliced strawberries with 2 tablespoons sugar and let them sit for 20 minutes. Blend half into the base and save the rest as a swirl. Churn the base, then layer the churned ice cream with the reserved strawberries before freezing. The result tastes like summer decided to wear a cardigan and move into your freezer.
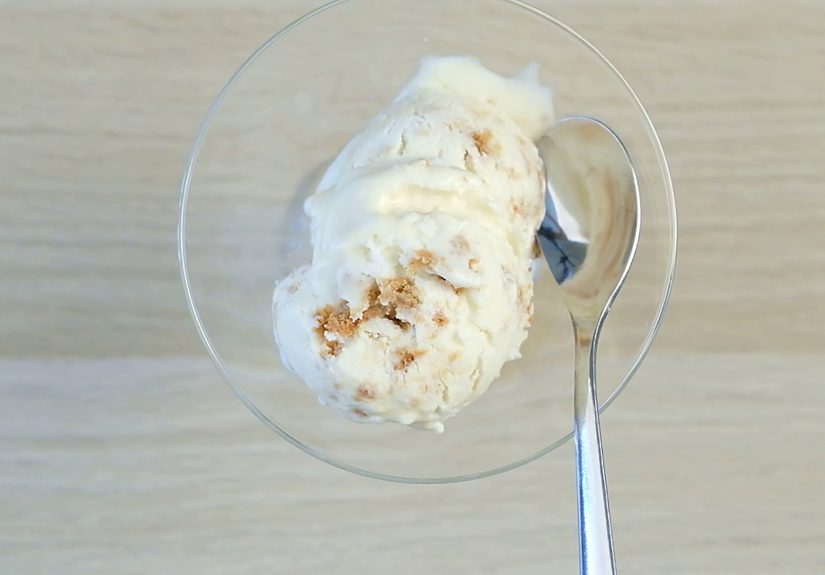
Way 3: No-Churn Ice Cream
No ice cream maker? No problem. No-churn ice cream is the hero of small kitchens, dorm rooms, vacation rentals, and anyone who refuses to freeze a machine bowl for 24 hours. This method usually combines whipped cream with sweetened condensed milk. The whipped cream adds air, while condensed milk adds sweetness, body, and a creamy texture.
Best For
No-churn ice cream is great for beginners, busy families, parties, and quick desserts. It is also excellent for mix-in flavors like cookies and cream, brownie batter, peanut butter cup, birthday cake, and mocha fudge.
Ingredients
- 2 cups cold heavy cream
- 1 can sweetened condensed milk
- 1 tablespoon vanilla extract
- 1/4 teaspoon salt
- Optional mix-ins: crushed cookies, chocolate chips, caramel, fruit jam, nuts, or brownie pieces
How to Make It
- Chill a metal loaf pan in the freezer for 20 to 30 minutes.
- In a large bowl, whisk together sweetened condensed milk, vanilla, and salt.
- In another bowl, whip the heavy cream until firm peaks form.
- Fold one cup of whipped cream into the condensed milk mixture to lighten it.
- Gently fold in the remaining whipped cream until smooth and fluffy.
- Add mix-ins, then spread the mixture into the chilled loaf pan.
- Cover tightly and freeze for at least 6 hours.
Why This Method Works
No-churn ice cream relies on trapped air. Since you are not churning the mixture in a machine, you create volume by whipping the cream first. Sweetened condensed milk lowers the freezing point and prevents the final dessert from becoming a dairy brick. A chilled metal pan helps the mixture freeze faster, improving texture.
Flavor Example: Cookies and Cream No-Churn Ice Cream
Crush 18 chocolate sandwich cookies. Fold two-thirds into the base, then sprinkle the rest on top before freezing. For a bakery-style twist, add a ribbon of chocolate fudge sauce between layers. Do not overmix the fudge unless you want chocolate ice cream instead of a swirl. Both are delicious, but only one looks like you meant to do it.
Way 4: Ice Cream in a Bag
Ice cream in a bag is part recipe, part science experiment, and part arm workout. It uses a small sealed bag filled with ice cream base placed inside a larger bag filled with ice and salt. Shake it, massage it, dance with it if necessary, and the mixture freezes into soft ice cream.
Best For
This method is perfect for kids, classrooms, camping, summer parties, and anyone who wants ice cream in about 10 to 15 minutes. It makes a small portion, so it is not the best choice for feeding a crowd unless your crowd enjoys synchronized shaking.
Ingredients
- 1 cup half-and-half
- 2 tablespoons granulated sugar
- 1/2 teaspoon vanilla extract
- 3 cups ice
- 1/3 cup rock salt or kosher salt
- 1 small zip-top freezer bag
- 1 large zip-top freezer bag
How to Make It
- Add half-and-half, sugar, and vanilla to the small freezer bag. Seal tightly.
- Fill the large bag with ice and salt.
- Place the small bag inside the large bag and seal the large bag.
- Wrap the bag in a towel or wear gloves because it gets very cold.
- Shake for 8 to 12 minutes, until the mixture thickens.
- Remove the small bag, rinse the outside carefully so salt does not sneak into your dessert, then open and enjoy.
Why This Method Works
Salt lowers the freezing point of ice, creating a brine that becomes colder than plain ice water. That extra-cold environment pulls heat from the dairy mixture, freezing it quickly. The shaking adds movement, which helps prevent large ice crystals. The result is soft, fresh ice cream with a texture similar to a milkshake-meets-soft-serve situation.
Flavor Example: Chocolate Bag Ice Cream
Add 1 tablespoon cocoa powder and an extra tablespoon of sugar to the small bag. Shake well before placing it in the ice bag. After freezing, stir in mini chocolate chips or crushed graham crackers. The result is fast, fun, and just messy enough to feel like a summer memory in progress.
How to Make Homemade Ice Cream Creamier
Whether you use a machine or not, a few small details can improve your homemade ice cream dramatically.
Use Enough Fat
Heavy cream gives ice cream richness and helps reduce iciness. Whole milk adds balance. Using only low-fat milk often leads to a harder, frostier texture. If you want a lighter dessert, consider frozen yogurt or sorbet instead of expecting skim milk to behave like cream. Skim milk is many things, but luxurious ice cream is not usually one of them.
Dissolve the Sugar Fully
Undissolved sugar can make the texture grainy. Whisk thoroughly or warm the base gently to help sugar dissolve. Sugar also affects texture by lowering the freezing point, which keeps ice cream scoopable.
Chill the Base
A cold base freezes faster. Faster freezing creates smaller ice crystals, and smaller ice crystals create smoother ice cream. For churned methods, chilling the base overnight often gives the best result.
Do Not Over-Churn
Over-churning can make ice cream dense, buttery, or slightly greasy. Stop when the mixture looks like thick soft serve. It will firm up during the hardening stage in the freezer.
Store It Properly
Store homemade ice cream in a shallow, airtight container. Press parchment paper, wax paper, or plastic wrap directly against the surface before adding the lid. Keep it in the back of the freezer where the temperature is more stable, not in the freezer door. Repeated thawing and refreezing create large crystals, which are the tiny villains of creamy dessert.
Common Homemade Ice Cream Mistakes
Mistake 1: Freezing a Warm Base
Warm ice cream base takes too long to freeze, which encourages large ice crystals. Chill the mixture thoroughly before churning or freezing.
Mistake 2: Adding Watery Fruit
Fresh fruit contains water, which can freeze into icy chunks. To avoid this, cook fruit into a quick jam, macerate it with sugar, roast it, or use freeze-dried fruit powder for concentrated flavor without extra moisture.
Mistake 3: Using Too Many Mix-Ins
Mix-ins are fun, but there is a limit. Too many cookies, candies, or nuts can make the ice cream difficult to scoop. Aim for about 1/2 to 1 cup of mix-ins per quart.
Mistake 4: Skipping Salt
A small pinch of salt does not make ice cream salty. It makes vanilla taste more like vanilla, chocolate taste deeper, and caramel taste less flat. Salt is the quiet friend who makes everyone at the party more interesting.
of Real-Life Experience: What Making Ice Cream Teaches You
The first thing you learn when making ice cream at home is that patience is an ingredient. You can have the best cream, the fanciest vanilla, and a shiny ice cream maker, but if the base is warm or the freezer bowl is not fully frozen, the result may come out more like sweet soup with ambition. The good news is that even the imperfect batches are usually edible. A slightly icy vanilla can become a milkshake. A too-soft chocolate batch can be layered into a frozen pie. Homemade ice cream is forgiving, especially when you own spoons.
Classic custard ice cream feels intimidating the first time because tempering eggs sounds like something that should require a small certificate. In reality, it is just slow pouring and steady whisking. The biggest lesson is not to rush the heat. Gentle cooking gives you a silky base; high heat gives you breakfast. Once you get the rhythm, custard becomes deeply satisfying. You can smell the dairy warming, see the mixture thicken, and feel it coat the spoon. It is less like following a recipe and more like learning a kitchen language.
No-churn ice cream teaches a different lesson: convenience does not have to taste lazy. Whipping cream and folding it into condensed milk takes only a few minutes, but the result can be surprisingly rich. The trick is to fold gently. If you smash out all the air, the final texture becomes dense. If you keep the mixture light, it freezes into something creamy and scoopable. This method is also the most playful. Crumbled cookies, peanut butter ribbons, jam swirls, toasted coconut, espresso powder, and brownie chunks all work well. It is the method for people who believe dessert should have accessories.
Ice cream in a bag is the most entertaining method because it turns dessert into an activity. It is loud, cold, slightly chaotic, and usually accompanied by someone asking, “Is it done yet?” every 45 seconds. The important experience here is to double-check the seals and rinse the inner bag before opening it. Saltwater in vanilla ice cream is a tragedy with a zipper. Still, this method is wonderful for kids because they can see science working in real time. Salt melts the ice, the temperature drops, and the liquid base thickens into ice cream right in their hands.
Philadelphia-style ice cream is the one you appreciate more with time. It is clean, quick, and flexible. Because there are no eggs, delicate flavors stay bright. Fresh mint tastes fresh, strawberries taste like strawberries, and sweet cream tastes beautifully simple. After trying all four ways, you realize there is no single best method. There is only the best method for the moment. Want luxury? Make custard. Want easy? Go no-churn. Want fast and fun? Use the bag. Want pure flavor? Try eggless churned ice cream. The real experience is discovering that homemade ice cream is not just dessert. It is a small, cold celebration you can make whenever the freezer has room.
Conclusion
Learning how to make ice cream at home gives you control over flavor, texture, sweetness, and mix-ins. Classic custard ice cream delivers the richest result, Philadelphia-style ice cream keeps things simple and fresh, no-churn ice cream is the easiest machine-free option, and ice cream in a bag turns dessert into a fun kitchen experiment. Once you understand the role of fat, sugar, air, temperature, and storage, you can create homemade ice cream that is creamy, customizable, and much more exciting than the lonely freezer-burned pint hiding behind the peas.
Start with vanilla if you are new, then experiment. Add roasted strawberries, melted chocolate, coffee, caramel, crushed cookies, toasted pecans, or a ripple of raspberry jam. Keep the base cold, freeze it quickly, store it tightly, and do not be afraid to taste as you go. Homemade ice cream rewards curiosity, and the worst-case scenario is usually still dessert.