Table of Contents >> Show >> Hide
- What Makes a Wood Joint “Signature”?
- Start with Function Before Flair
- Respect the Villain Nobody Invited: Wood Movement
- Choose Your Signature-Joint Direction
- How to Design a Signature Joint Without Reinventing Physics
- Five Strong Ideas for a Signature Wood Joint
- Material Choice Changes the Personality
- Build a Repeatable Process
- Common Mistakes That Ruin a Signature Joint
- How to Know You’ve Found “Your” Joint
- Experience: What Creating a Signature Wood Joint Actually Teaches You
- Conclusion
If furniture could shake hands, a signature wood joint would be the part that introduced itself first. Before someone notices the finish, the wood species, or the stylish curve you spent three weekends perfecting, they often notice the joinery. Good joinery quietly holds a piece together. Great joinery does that and leaves a calling card.
That is the magic of creating a signature wood joint. You are not just choosing a way to connect two boards. You are choosing how your work will be recognized. Maybe it is a crisp wedged through-tenon that says, “Yes, I care about structure and drama.” Maybe it is a keyed miter that looks clean from ten feet away and clever from ten inches away. Maybe it is a loose-tenon-based hybrid with a tiny reveal that turns a practical solution into a design detail. Suddenly, the joint is not background noise. It is the chorus.
The best part is that a signature joint does not have to be weird for the sake of being weird. In fact, the strongest signature joints usually begin with very old ideas: mortise-and-tenon, dovetail, housed lap, bridle, miter, spline, dowel, or keyed variations of them. What makes the joint memorable is how well it matches the piece, respects wood movement, handles stress, and looks intentional instead of accidental. In woodworking, “intentional” is the difference between “custom detail” and “well, that certainly happened.”
What Makes a Wood Joint “Signature”?
A signature wood joint has four jobs. First, it must be structurally appropriate. A joint can be gorgeous and still fail if it ignores the direction of force or the way solid wood expands and contracts across the grain. Second, it should fit the visual language of the project. A light Scandinavian-style cabinet and a heavy Arts and Crafts bench do not usually want the same joinery expression. Third, it must be repeatable. If you cannot make it accurately more than once, it is not a signature; it is a lucky accident wearing a nice outfit. Fourth, it should reveal something about your style as a maker.
That last point matters most. Some woodworkers become known for proud through-tenons and wedges. Others love hidden joinery with a razor-thin shadow line. Some favor exposed dovetails with slightly softened edges, while others create geometric splines that look almost architectural. A signature joint grows from repeated preferences: proportion, contrast, rhythm, reveal, edge treatment, and how boldly you let the joint show itself.
Start with Function Before Flair
Before sketching dramatic keys and decorative pegs, ask the boring but important question: what is the joint actually doing? Is it resisting racking in a table base? Holding a drawer corner under repeated stress? Keeping a door frame aligned while allowing a center panel to move? Joining long-grain edges for a wide panel? The answers shape everything.
Long-grain-to-long-grain glue surfaces are usually your friends. End grain, on the other hand, is a much less generous host for glue. That is one reason classic joints remain classics: they increase mechanical strength, increase favorable glue surface, or both. A mortise-and-tenon works beautifully because it combines a mechanical relationship with strong glue surfaces. Dadoes, rabbets, laps, and splined miters do similar work in different situations. So, when designing a signature joint, begin with a dependable structural family and then customize the look.
Think of it this way: first make the joint trustworthy, then make it unforgettable.
Respect the Villain Nobody Invited: Wood Movement
If you ignore wood movement, the wood will not ignore you back. Solid wood expands and contracts mostly across the grain as humidity changes, while movement along the grain is comparatively tiny. That means a wide panel, rail, or slab can behave very differently from a narrow part. If your signature joint locks cross-grain parts too rigidly, the wood may reward you with cracks, gaps, or a slow-motion act of rebellion months after delivery.
This is why so many time-tested signature-worthy joints come from frame-and-panel logic. Narrow rails and stiles are easier to manage, while floating panels can move inside grooves. It is also why breadboard ends, wide tenons, and panel attachments require thought rather than optimism. A joint can be beautifully cut and still be badly designed if it restrains wood where it should allow movement.
In practice, that means your signature joint should do one of three things well: allow movement, avoid cross-grain conflict, or place the conflict where it is too small to matter. A flashy joint that ignores seasonal change is like building a relationship on a trampoline. There will be motion. There will be consequences.
Choose Your Signature-Joint Direction
1. The Proud Joint
This style celebrates construction. Think exposed through-tenons, wedges, tusk tenons, visible keys, or decorative pegs. These joints feel honest, sturdy, and handmade. They work especially well in benches, tables, stools, and casework with a craft-forward personality.
2. The Discreet Joint
This style hides the engineering but leaves a subtle clue: a reveal line, knife line, shadow gap, or contrasting spline. It is perfect for modern furniture where the form stays clean but the details reward a closer look.
3. The Graphic Joint
Here the joint becomes visual rhythm. Finger joints, stepped laps, butterfly keys, and contrasting bow ties can create patterns that carry across a piece. This works well when you want the joinery to behave almost like inlay or trim.
4. The Hybrid Joint
Many of the smartest custom joints are hybrids. A housed bridle with a wedge. A miter reinforced with a loose spline and a tiny exposed key. A loose tenon hidden inside a joint that also features a shoulder reveal. Hybrid joints let you combine strength, alignment, and style without forcing one classic form to do every job.
How to Design a Signature Joint Without Reinventing Physics
A practical method is to start with a proven base joint, then modify one visual feature and one structural feature. For example, begin with a standard mortise-and-tenon. Then ask:
- Can the shoulder profile become part of the design?
- Can a wedge, key, or peg add visual identity?
- Can the joint be made proud, recessed, chamfered, or gently pillowed?
- Can a contrasting species be used for one visible element?
- Can a shadow line make the joint look crisper?
That process keeps you grounded. You are not inventing a mystery puzzle joint that only makes sense during a full moon. You are refining a known structure into a recognizable design element.
Proportion is everything here. A wedge that is too chunky looks cartoonish. A reveal that is too tiny disappears. A proud tenon that sticks out too far can look clumsy unless the whole piece is built around that boldness. Signature joints succeed when the dimensions feel related to the rest of the furniture. If your table has lean legs and delicate aprons, the joint should speak in the same voice. If the piece looks stout and architectural, the joint can be more assertive.
Five Strong Ideas for a Signature Wood Joint
Wedged Through-Tenon with a Soft Chamfer
This is a classic for a reason. It is structural, expressive, and instantly readable. A soft chamfer around the proud tenon keeps the look refined instead of blunt, while a contrasting wedge adds drama. It suits trestle tables, benches, and stools beautifully.
Keyed Miter with Contrasting Wood
A plain miter can be elegant but fragile by itself. Add contrasting keys or splines and the joint becomes both stronger and more graphic. This is a great move for boxes, frames, cabinet details, and modern casework.
Shouldered Bridle Joint with a Reveal
Bridle joints already have a bold silhouette. Add a tiny reveal or step at the shoulder and the joint starts to look custom rather than generic. This works especially well where you want exposed joinery without the heaviness of a through-tenon.
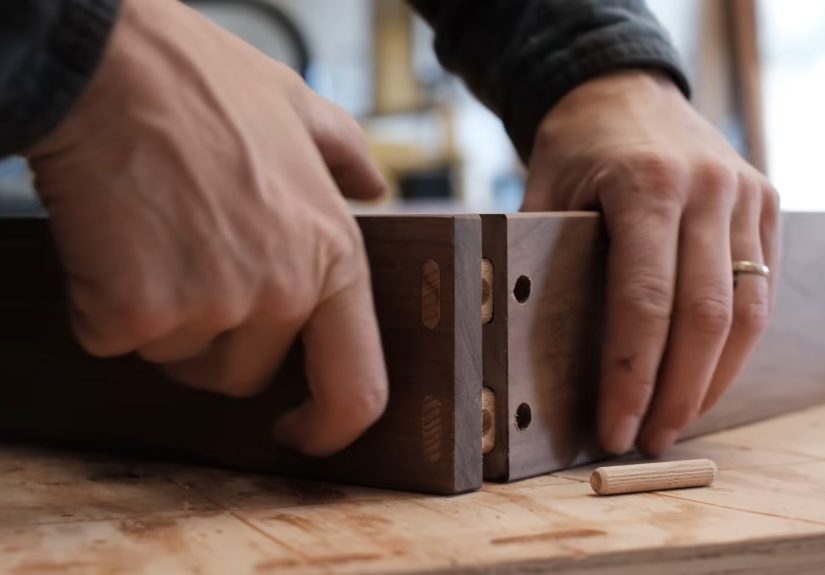
Loose-Tenon Joint with Decorative Peg Placement
Loose tenons are efficient and strong, but they do not have to look anonymous. A visible peg or carefully placed faux drawbore detail can give the joint personality while the real work happens inside. It is a smart path for makers who value repeatability.
Housed Lap Joint with Sculpted Transitions
Laps are underrated. Add a shallow housing and shape the visible corners thoughtfully, and the joint becomes elegant rather than purely utilitarian. This is a strong option for shelving, frames, and stand components.
Material Choice Changes the Personality
The same joint can look entirely different in white oak, walnut, maple, ash, or cherry. Ring-porous woods tend to emphasize texture and shadow. Fine-grained woods can make a joint feel crisp and precise. Contrasting species can highlight wedges, keys, and pegs, but contrast works best when it supports the design instead of shouting over it.
Texture matters too. A hand-planed surface with tiny facets makes exposed joinery feel warm and crafted. A glassy surface makes the same joint look more contemporary. Even edge treatment changes the mood. Sharp edges feel architectural; eased edges feel approachable. If you want a signature joint, decide whether you want it to whisper, speak, or perform a full Broadway number.
Build a Repeatable Process
A signature joint becomes part of your identity only when you can reproduce it accurately. That means test pieces, story sticks, reference marks, and setup routines matter more than dramatic inspiration. One of the quiet truths of fine woodworking is that recognizable style often comes from disciplined repetition rather than spontaneous genius.
Make prototypes in scrap before committing to your good stock. Test the fit. Check how the joint looks under finish. See whether your reveal is visible from normal viewing distance. Adjust the proportions. Then document what worked: shoulder sizes, reveal depth, stock thickness, the visual relationship between the joint and nearby parts, and where you allowed movement. Your future self will be grateful and slightly less dramatic.
Common Mistakes That Ruin a Signature Joint
Designing for Attention Instead of Service
If the joint steals attention from the whole piece in a bad way, it is not signature joinery. It is a plot twist. The joint should support the furniture’s character, not wrestle it to the floor.
Ignoring Glue-Surface Reality
Not every attractive configuration glues well. Long-grain bonding is reliable; end-grain-heavy designs usually need mechanical help or a smarter geometry.
Forgetting Seasonal Movement
This is the classic heartbreak. A rigid, decorative idea may behave beautifully in the shop and badly in a dining room six months later.
Making It Too Complicated to Repeat
If each version requires heroic effort and luck, it is not a sustainable signature detail for client work or consistent output.
Overdecorating
One special idea is memorable. Three competing special ideas in the same joint can look like a committee got involved.
How to Know You’ve Found “Your” Joint
You have probably found your signature wood joint when three things happen. First, you start using it across different projects because it genuinely solves problems. Second, people notice it without needing a speech. Third, you begin refining it rather than replacing it. That refinement might involve changing the shoulder line, adjusting the reveal, simplifying the wedge shape, or tuning the contrast between species. Over time, the joint becomes less of an experiment and more of a dialect. Other woodworkers may use the same vocabulary, but your accent becomes unmistakable.
That is the real goal. A signature joint is not about novelty for novelty’s sake. It is about joining engineering and aesthetics so neatly that the structure becomes part of the beauty. The strongest woodworking always feels inevitable in hindsight, as if the piece could not possibly have been built any other way.
Experience: What Creating a Signature Wood Joint Actually Teaches You
The first time I tried to create a signature wood joint, I made the classic mistake of designing with my ego first and the wood second. On paper, the idea looked brilliant: exposed joinery, contrasting wedges, crisp shoulders, and enough visual flair to make me feel like I should immediately be interviewed by a design magazine. In the shop, reality arrived wearing work boots. The first version looked bulky. The second looked timid. The third fit beautifully but ignored wood movement in a way that would have turned the finished piece into a seasonal science experiment. That was the moment I learned the most important lesson about signature joinery: the joint is not there to flatter the maker. It is there to serve the furniture.
Once I accepted that, the process got much better and much more interesting. I stopped asking, “How can I make this look impressive?” and started asking, “What does this piece want the joint to do?” On a small cabinet, that answer was subtle alignment and clean lines. On a bench, it was visible strength and a little swagger. On a table, it was rigidity paired with enough humility to let the top move when the seasons changed. Each project pushed the same basic idea in a slightly different direction, and that is where the real experience came from.
I also learned that repeatability is what separates a personal style from a one-time stunt. The joint that finally felt like mine was not the fanciest option on the sketch page. It was the one I could cut accurately, tune consistently, and adjust without panic. That repeatability built confidence. Confidence made the work cleaner. Cleaner work made the joint look more intentional. Funny how often craftsmanship turns out to be a romance between patience and measuring twice.
Another surprise was how much finishing changed my opinion of the joint. A detail that looked subtle before sanding suddenly came alive with a little oil. A crisp shoulder line that seemed slightly severe turned elegant after the edges were softened just enough. Even the choice of wood species changed the personality. White oak made the joint feel grounded and architectural. Walnut made it quieter and more sophisticated. Maple made every tiny inaccuracy wave hello. Wood is generous with lessons and stingy with mercy.
Most of all, creating a signature wood joint taught me to think like a designer and a builder at the same time. I had to consider load paths, glue surfaces, moisture movement, viewing angles, grain direction, and proportion, all while keeping the whole piece coherent. That balancing act is what makes the process satisfying. You are not just making a connection between two parts. You are making an argument about what kind of maker you want to be: flashy or restrained, traditional or hybrid, bold or quiet, fussy or disciplined. In the end, the best signature joint is the one that feels honest in your hands and inevitable in the finished piece. When that happens, people notice. They may not always know why. They just know the furniture feels resolved, and the joint looks like it belongs there. That is when you realize you are no longer just assembling wood. You are developing a recognizable voice.
Conclusion
Creating a signature wood joint is really the art of making structure visible in a meaningful way. Start with a trustworthy joint family. Respect wood movement. Tune the proportions. Add one memorable visual detail. Then repeat, refine, and document the process until the joint becomes part of your design language. The result is furniture that does more than stay together. It tells people who made it, how thoughtfully it was built, and why craftsmanship still matters.