Table of Contents >> Show >> Hide
- Quick Answer: The Best Way to Clean a Blackstone
- What You Need to Clean a Blackstone Griddle
- How to Clean a New Blackstone Before First Use
- How to Clean a Blackstone After Every Cook
- How to Deep-Clean a Blackstone After Messy Cooks
- How to Remove Rust From a Blackstone
- How to Clean the Exterior, Hood, Shelves, and Grease Tray
- Biggest Mistakes to Avoid When Cleaning a Blackstone
- How Often Should You Clean and Reseason a Blackstone?
- Storage Tips That Make Cleaning Easier
- Conclusion
- Real-World Experiences With Cleaning a Blackstone
- SEO Tags
If you own a Blackstone griddle, congratulations: you now have a flat-top cooking machine that can turn out pancakes, burgers, fajitas, and enough fried rice to make the neighbors suddenly very friendly. But once the cooking fun ends, the cleanup begins. That is where many people either become calm, confident griddle owners… or the kind of person staring at a sticky, rusty surface while whispering, “I have made mistakes.”
The good news is that learning how to clean a Blackstone is not complicated. The better news is that it gets easier the more you do it. The best news is that you do not need a chemistry degree, a hazmat suit, or a dramatic soundtrack. You just need the right routine, a little patience, and a firm understanding that “a thin layer of oil” means thin. Not “small pond.” Thin.
In this guide, you will learn how to clean a Blackstone griddle before first use, after everyday cooking, after greasy or sugary meals, and after the dreaded rust shows up like an uninvited party guest. You will also learn what not to do, because a lot of Blackstone cleanup problems start with good intentions and end with over-scrubbing, over-soaping, or forgetting to dry the surface properly.
Quick Answer: The Best Way to Clean a Blackstone
The easiest routine is simple: clean the griddle while it is still warm, scrape off food debris, add a little water to loosen stuck-on bits, wipe it dry, then spread on a very thin coat of cooking oil before storing it. For a brand-new Blackstone, wash it first with mild soapy water to remove factory residue, then dry and season it. For rust or stubborn buildup, scrub more aggressively and reseason the surface afterward.
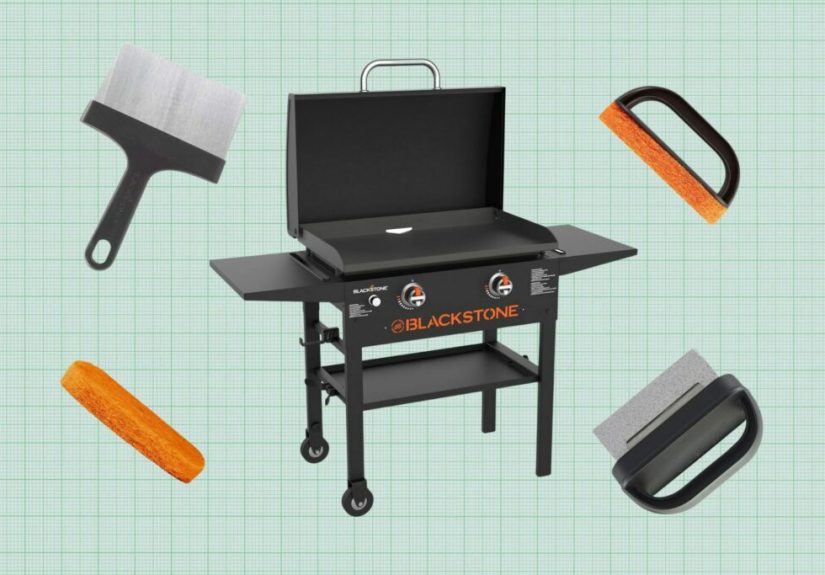
What You Need to Clean a Blackstone Griddle
- Metal griddle scraper or spatula
- Paper towels or clean lint-free cloths
- Water in a squeeze bottle or cup
- Heat-resistant gloves
- Non-abrasive scrub pad or griddle cleaning pad
- Cooking oil or griddle seasoning conditioner
- Mild dish soap for first-time cleaning or deep restoration
- Pumice stone, grill stone, or steel wool for rust removal only
You do not need harsh oven cleaner for the cooking surface, and you definitely do not need to soak the griddle top like it is a casserole dish having a spa day. Outdoor Blackstone griddles reward a cleaner, gentler, more consistent routine.
How to Clean a New Blackstone Before First Use
This is the one time mild soapy water is not just acceptable, but helpful. A new Blackstone griddle can arrive with dust, shipping residue, and factory protective oils on the steel surface. Before you season it, give it a proper first wash.
Step 1: Mix warm water with a little dish soap
Use only a small amount of soap. You are not trying to create a bubble bath for your griddle. You are just removing residue from manufacturing and storage.
Step 2: Wipe the entire cooktop
Use a soft cloth or sponge and clean the full surface, including corners, edges, and side walls. If your model has shelves or a hood that need cleaning too, wipe those separately.
Step 3: Rinse and dry completely
Go back over the surface with clean water to remove any soap, then dry it thoroughly with paper towels or a clean cloth. Do not leave moisture sitting on bare steel unless you enjoy surprise rust.
Step 4: Season the griddle
Once the surface is clean and dry, follow the seasoning process with a very thin layer of oil. This creates the protective coating that makes future cleaning easier and helps prevent corrosion.
How to Clean a Blackstone After Every Cook
This is the everyday method most Blackstone owners should use. It is quick, effective, and kind to your seasoning layer.
1. Clean it while the surface is still warm
Warm is ideal. Volcano-hot is not. If the griddle is still warm after cooking, debris comes off more easily. If it has cooled completely, you can reheat it briefly.
2. Scrape off food bits and grease
Use a metal scraper to push leftover food, grease, and carbon into the grease trap. Move methodically across the whole surface instead of just attacking the one ugly patch in the middle like it insulted your family.
3. Add a little water for stuck-on residue
For browned bits, sugary sauces, or stubborn crust, squirt a little water onto the warm surface. The steam helps lift debris. Scrape again gently as the residue loosens. A little water works well; flooding the surface does not.
4. Wipe the griddle dry
Use paper towels or a cloth to wipe away loosened debris and moisture. Make sure the surface is dry. This step matters more than people think, because moisture left behind is often the start of rust.
5. Apply a very thin coat of oil
Once the surface is clean and dry, apply a thin film of cooking oil or griddle conditioner. Spread it evenly across the cooktop. You want protection, not a sticky slick. If you can see puddles, you used too much.
6. Empty or check the grease cup
Do not forget the grease management system. A spotless cooktop with an overflowing grease tray is basically the backyard version of cleaning your room by shoving everything under the bed.
How to Deep-Clean a Blackstone After Messy Cooks
Some meals leave behind more drama than others. Think sticky barbecue sauce, teriyaki glaze, smash burgers with heavy grease, or cheese that escaped and fused itself to the steel like it signed a lease.
When the griddle is especially messy, follow the normal warm-scrape routine first. Then use one of these deeper cleaning methods:
Steam-and-scrape method
Add water to the warm surface, let the steam loosen grime, then scrape and wipe again. This is usually enough for everyday heavy messes.
Non-abrasive pad method
If debris remains, use a griddle cleaning pad or non-scratch scrubber while the surface is warm or slightly cooled. Work with the grain of the steel if visible. Avoid going at the surface like you are sanding a boat.
Soap-for-restoration method
If the cooktop has sticky oil buildup, rancid residue, or you are intentionally resetting part of the seasoning, a small amount of mild dish soap can be used. Wash, rinse, dry completely, then reseason the surface. Soap is not the go-to routine for every cleanup, but it is not a mythical villain either when used for restoration.
How to Remove Rust From a Blackstone
Rust looks scary, but it is fixable. It usually shows up because the griddle was stored damp, left unoiled, exposed to the elements, or not used for a long time. The solution is simple: remove the rust, clean the surface, and reseason.
Step 1: Heat the griddle briefly if needed
A short heat-up can help loosen surface rust and make scraping easier. Then let the top cool enough to work safely.
Step 2: Scrape and scrub the rusted spots
Use a scraper first. Then move to steel wool, medium-grit sandpaper, or a griddle stone only on the rusted areas or when the whole top needs restoration. This step will remove seasoning, which is normal during rust repair.
Step 3: Wipe away all debris
Remove every bit of rust dust and residue with dry paper towels, then wipe again so the surface is clean.
Step 4: Wash if necessary and dry thoroughly
For heavy restoration, a quick wash with warm water and mild soap can help remove remaining residue. Then dry the griddle completely. No shortcuts here.
Step 5: Reseason the griddle
Apply a very thin layer of oil across the surface and heat until it smokes off. Repeat several rounds until the top develops an even, darker protective layer. Rust removal is basically your griddle asking for a fresh start.
How to Clean the Exterior, Hood, Shelves, and Grease Tray
The cooktop gets the glory, but the rest of the griddle needs attention too.
Exterior surfaces
When the griddle is cool and the gas is off, wipe down the exterior with warm water, mild detergent, and a soft cloth. Avoid letting greasy buildup sit for weeks unless your goal is to create a permanent “barbecue chic” finish.
Side shelves and knobs
These collect oil splatter fast. Wipe them regularly with a damp cloth and a little mild soap if needed.
Grease cup or tray
Empty it often. For heavier grease, wash it with hot soapy water and dry it before replacing it. Liners can make this job much easier if you cook on your Blackstone often.
Cover and storage area
Clean the cover occasionally and make sure the griddle is fully dry before covering it. Trapping moisture under a cover is one of the fastest ways to invite rust.
Biggest Mistakes to Avoid When Cleaning a Blackstone
- Using too much oil after cleaning: this causes sticky buildup instead of a smooth seasoned finish.
- Skipping the drying step: leftover water leads to rust.
- Using harsh chemical cleaners on the cooktop: not necessary for routine care and can damage the seasoned surface.
- Over-scrubbing a healthy seasoning layer: deep abrasion should be reserved for rust or major restoration.
- Ignoring the grease trap: because surprise grease overflow is nobody’s favorite side dish.
- Covering the griddle while damp: that is basically rust’s preferred housing arrangement.
How Often Should You Clean and Reseason a Blackstone?
You should do a light cleaning after every cook. That is the normal maintenance routine. A deeper cleanup is only needed when food residue is stubborn, the surface feels sticky, or the griddle has been neglected for a while.
As for reseasoning, you do not need to do a full dramatic reset after every burger night. Usually, a thin post-cook oil layer keeps things in good shape. Full reseasoning is best when you remove rust, strip sticky buildup, or notice that the surface has lost its dark, smooth, semi-nonstick look.
Storage Tips That Make Cleaning Easier
A clean Blackstone stays cleaner when it is stored well. Keep it in a dry place, use a proper cover, and always leave a thin protective oil film on the surface. If you live in a humid climate, check it regularly instead of assuming the cover alone is doing all the work. A covered griddle is protected. A covered damp griddle is just marinating in bad decisions.
Conclusion
If you want your griddle to last, cleaning it should become part of the cooking routine, not an emergency response. Scrape while warm, loosen stuck bits with a little water, wipe the surface dry, and finish with a whisper-thin coat of oil. That is the core habit that keeps a Blackstone cooking well and looking good.
When you are dealing with a brand-new griddle, start with a mild soapy wash before seasoning. When you are dealing with rust, get more aggressive, then reseason. And when you are tempted to “deal with it later,” remember that later usually arrives with sticky grime, surface rust, and the kind of cleanup session that makes you rethink your life choices.
Take care of the griddle consistently, and it will reward you with easier cooking, easier cleanup, and fewer sad moments staring at a flaky patch of orange corrosion. That is a pretty solid trade.
Real-World Experiences With Cleaning a Blackstone
One of the most common experiences Blackstone owners talk about is how quickly the cleanup routine becomes second nature. The first few times, people tend to overthink everything. Is the surface too hot? Did I scrape too hard? Is this dark color good or bad? Why does the oil look like I accidentally glazed the griddle with regret? After a handful of cooks, most people realize the system is surprisingly simple: warm surface, scrape, small splash of water, wipe dry, tiny bit of oil, done.
Another very real experience is the panic that comes when the griddle changes color. A new Blackstone does not stay shiny silver for long. It darkens, streaks, and develops patches as the seasoning builds. Many beginners assume they ruined it. In reality, that uneven darkening is often part of the normal process. The cooktop usually looks less like a showroom appliance and more like a hard-working piece of cooking equipment after a few meals, which is exactly what it should be.
People also learn the hard way that sugary sauces are sneaky. Burgers and bacon usually clean up without much drama, but barbecue sauce, teriyaki, and glazes can leave sticky caramelized spots that cling to the steel like they pay rent there. The usual lesson is that cleaning right after cooking saves a huge amount of effort. Let that mess sit until tomorrow, and suddenly a five-minute wipe-down becomes an extended relationship with a scraper and several paper towels.
Rust is another classic Blackstone experience, especially after rain, winter storage, or one very optimistic decision to put the cover on before the surface was fully dry. The first sight of rust can feel catastrophic, but experienced owners usually say the same thing: it looks worse than it is. Most surface rust can be scrubbed away, and the griddle can be brought back with a solid reseasoning session. That discovery tends to be the moment people stop babying the griddle and start understanding it.
There is also a nearly universal experience involving too much oil. Almost everyone does it once. Maybe twice. The idea sounds reasonable: more oil equals more protection, right? In practice, too much oil often turns into a sticky, gummy layer that feels tacky and attracts residue. Seasoning works best in thin coats. Very thin coats. The kind of thin coat that makes you wonder whether you put enough on at all. Usually, that is the correct amount.
Long-term owners often say the griddle becomes easier to clean as the seasoning improves. Foods release more easily, scraping gets faster, and the surface develops that smooth, dark look everyone wants. At that point, cleaning feels less like a chore and more like resetting the station for the next cook. It becomes part of the rhythm: cook, scrape, wipe, oil, cover. The routine is not glamorous, but neither is replacing a rusted cooktop.
In the end, the real experience of learning how to clean a Blackstone is mostly about confidence. Once you understand the difference between routine maintenance and full restoration, the griddle stops feeling fragile. It starts feeling reliable. And that is when owning a Blackstone gets especially fun, because you spend less time worrying about cleanup and more time making breakfast for a crowd like a backyard short-order legend.