Table of Contents >> Show >> Hide
- What Are Gorditas?
- Ingredients for Puffy Gorditas
- The Secret to Puffy Gorditas
- How to Cook Puffy Gorditas Step by Step
- Best Fillings for Puffy Gorditas
- Common Mistakes When Making Gorditas
- How to Serve Gorditas
- How to Store and Reheat Gorditas
- Experience Notes: What Cooking Puffy Gorditas Teaches You
- Conclusion
If a tortilla and a pita had a delicious corn-scented baby, it would be a gordita. The name means “little fat one,” which is not an insult hereit is a compliment. A good gordita should be thick enough to split, soft enough to bite without jaw exercises, and puffy enough to create a pocket for beans, cheese, salsa, meat, or whatever glorious leftovers are currently waving at you from the fridge.
Learning how to cook puffy gorditas is mostly about understanding masa. You do not need chef-school wizardry, a restaurant flattop, or an abuela standing behind you saying, “Más agua, mijo.” Helpful? Yes. Required? No. With masa harina, warm water, salt, a little fat, and the right heat, you can make homemade gorditas that puff, split, and stuff beautifully.
This guide walks you through the full process: making the dough, shaping thick discs, cooking them until they puff, finishing them for a lightly crisp exterior, and filling them like a person who respects dinner. We will also cover common mistakes, the best fillings, storage tips, and real kitchen experience so your gorditas come out tender, flavorful, and proudly chubby.
What Are Gorditas?
Gorditas are Mexican masa cakes made from corn dough, usually shaped thicker than tortillas and cooked on a comal, skillet, or griddle. Many versions are then split open and filled. Some are pan-cooked, some are fried, and some are cooked on a griddle first and lightly fried afterward for a crisp shell and soft middle.
The most common home version uses masa harina, a nixtamalized corn flour that becomes masa when mixed with water. If you have ever made corn tortillas, the ingredients will look familiar. The difference is thickness. A tortilla is thin and flexible; a gordita is thicker, puffier, and built to hold fillings like refried beans, shredded chicken, carnitas, queso fresco, salsa verde, lettuce, crema, or spicy potatoes.
Ingredients for Puffy Gorditas
This recipe makes about 8 medium gorditas.
For the Dough
- 2 cups masa harina
- 1 1/2 cups warm water, plus more as needed
- 3/4 teaspoon fine salt
- 1 teaspoon baking powder
- 1 tablespoon lard, vegetable shortening, or neutral oil
For Cooking
- 1 to 2 tablespoons neutral oil for the skillet
- Additional oil for shallow frying, optional
Suggested Fillings
- Refried beans and queso fresco
- Shredded chicken with salsa roja
- Carnitas with pickled onions
- Ground beef, lettuce, crema, and salsa
- Roasted poblano strips with cheese
- Potatoes with chorizo
- Avocado, beans, cabbage, and salsa verde
The Secret to Puffy Gorditas
The secret is not one thing. It is a small team of things working together: hydrated masa, proper thickness, medium-high heat, and enough patience to let the dough rest. Masa harina absorbs water gradually. If you mix it and immediately cook it, the gorditas may crack around the edges or stay dry inside. A short rest gives the corn flour time to drink up the moisture.
The dough should feel like soft modeling clay: moist, smooth, and flexible, but not sticky. If it cracks when you press it, add warm water one tablespoon at a time. If it sticks aggressively to your hands like it has emotional attachment issues, knead in a little more masa harina.
Baking powder is optional in some traditional recipes, but it helps home cooks get a lighter, puffier texture. A small amount of fat also improves tenderness and flavor. Lard gives the most classic savory taste, but shortening or neutral oil works well too.
How to Cook Puffy Gorditas Step by Step
Step 1: Mix the Masa Dough
In a large bowl, combine the masa harina, salt, and baking powder. Stir with your fingers or a spoon so the dry ingredients are evenly mixed. Add the warm water gradually while mixing with your hand. The dough will look crumbly at first, then shaggy, then smooth as the masa hydrates.
Add the lard, shortening, or oil and knead for 3 to 5 minutes. The dough should become soft and cohesive. Press a small piece between your fingers. If the edges crack badly, add another tablespoon of warm water and knead again. If it smears and sticks, sprinkle in a teaspoon or two of masa harina.
Step 2: Rest the Dough
Cover the bowl with a damp towel or plastic wrap and let the dough rest for 20 minutes. This pause matters. It helps the masa hydrate evenly, which makes the gorditas easier to shape and more likely to puff.
Do not skip the towel. Masa dries quickly when exposed to air, and dry masa makes cracked gorditas. Cracked gorditas are still edible, of course, but they are harder to split and stuff. They also look like they have been through a dramatic breakup.
Step 3: Shape the Gorditas
Divide the dough into 8 equal balls, roughly the size of a small lime or golf ball. Keep the dough balls covered while you work. Place one ball between two pieces of plastic wrap or inside a cut-open freezer bag. Press it gently with a tortilla press, flat-bottomed pan, or your palms.
Aim for a disc about 1/3 inch thick and 4 inches wide. This is thicker than a tortilla but not so thick that the center stays raw. If you press too thin, you will get a tortilla. A nice tortilla, maybe, but not a gordita. If you press too thick, the outside may brown before the inside cooks.
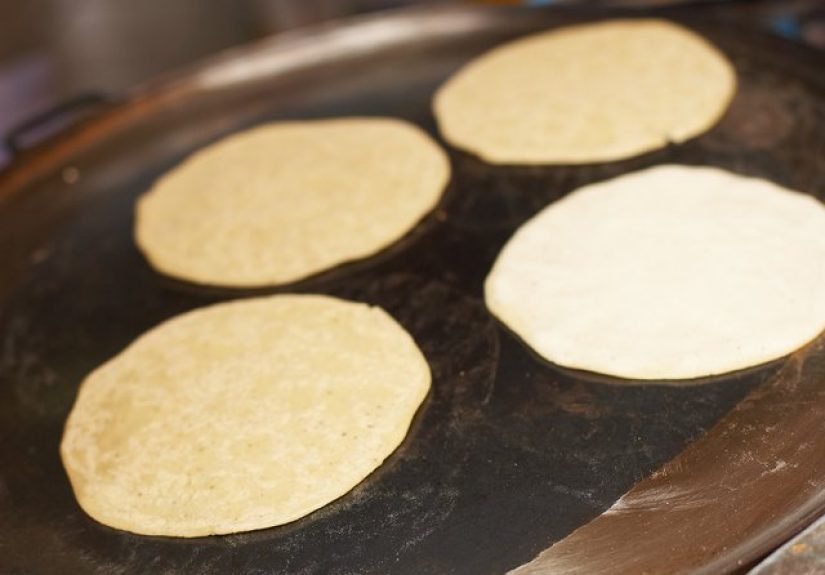
Step 4: Heat the Skillet or Comal
Heat a cast-iron skillet, comal, or heavy griddle over medium-high heat. Lightly oil the surface, then wipe away excess oil with a paper towel. You want a thin sheen, not a swimming pool.
To test the heat, flick a tiny drop of water onto the surface. It should sizzle and evaporate quickly. If the pan smokes heavily, lower the heat. If nothing happens, give it more time. Gorditas need steady heat so the outside sets while steam builds inside, helping them puff.
Step 5: Cook the Gorditas
Place one or two shaped gorditas on the hot skillet. Cook for 2 to 3 minutes on the first side, until light brown spots appear. Flip and cook another 2 to 3 minutes. Flip once more if needed and gently press the edges with a spatula. You may see the center puff slightly or the edges lift.
Do not smash them flat. A gentle press helps encourage steam; a heavy press turns them into corn pancakes with trust issues. The gorditas should feel firm outside but still slightly springy.
Step 6: Optional Shallow Fry for Extra Puff and Crispness
For the best texture, heat about 1/4 inch of neutral oil in a skillet over medium heat. Add the cooked gorditas and fry for 30 to 60 seconds per side, until lightly golden and crisp. Drain on paper towels.
This step gives homemade gorditas a street-food-style finish: crisp edges, toasted corn flavor, and a soft interior. If you prefer a lighter version, skip the frying and serve them straight from the comal.
Step 7: Split and Fill
Let the gorditas cool for 1 to 2 minutes so you can handle them. Use a small sharp knife to make a slit around one edge, then gently open the pocket. Do not cut all the way through. Think of it like opening a tiny corn purseone that fortunately holds beans instead of receipts.
Spoon in warm fillings and finish with salsa, crema, cheese, lettuce, cilantro, or pickled onions. Serve immediately while the gorditas are warm, soft, and slightly crisp.
Best Fillings for Puffy Gorditas
Gorditas are incredibly flexible. The classic approach is to fill them with something warm and savory, then add something fresh and bright. Refried beans and cheese are simple and perfect. Shredded chicken with salsa verde is hearty without being heavy. Carnitas bring rich pork flavor, especially with pickled onions or a squeeze of lime.
For a vegetarian gordita, try black beans, roasted poblanos, sautéed mushrooms, queso fresco, and salsa. For a breakfast version, fill them with scrambled eggs, potatoes, chorizo, and avocado. If using meat fillings, cook poultry to 165°F and ground meats to 160°F for safe serving. Reheat leftovers until hot throughout before stuffing.
Common Mistakes When Making Gorditas
The Dough Cracks
Cracking usually means the dough is too dry. Add warm water one tablespoon at a time, knead, and test again. Keep unused dough covered with a damp towel.
The Gorditas Do Not Puff
They may be too thin, too dry, or cooked on a pan that is not hot enough. Make sure the discs are about 1/3 inch thick and the skillet is fully preheated. A little baking powder also helps.
The Center Tastes Raw
The gorditas may be too thick or the heat may be too high. Lower the heat slightly and cook longer on each side. You want browning, not burning.
They Fall Apart When Split
Let them cool briefly before cutting. If they are too hot, the steam can make the inside fragile. Also avoid overstuffing. Yes, self-control is difficult around melted cheese, but the gordita has structural limits.
How to Serve Gorditas
Serve gorditas as a main dish with rice, beans, salad, or grilled vegetables. They also make excellent party food because guests can choose their own fillings. Set out a gordita bar with warm shells, beans, meats, cheese, shredded lettuce, crema, salsa roja, salsa verde, pickled jalapeños, and lime wedges.
For the best experience, fill gorditas right before eating. If they sit too long with saucy fillings, the pocket can soften. That is not the end of the world, but it does move the meal from “crispy and exciting” to “delicious but floppy.”
How to Store and Reheat Gorditas
Store unfilled gorditas in an airtight container in the refrigerator for up to 3 days. To reheat, warm them on a dry skillet over medium heat for 1 to 2 minutes per side. You can also wrap them in foil and heat them in a 350°F oven until warm.
For freezing, place cooled gorditas in a single layer on a baking sheet until firm, then transfer them to a freezer bag. Reheat from frozen on a skillet or in the oven. Avoid microwaving if possible because it can make them rubbery. If you must use a microwave, wrap them in a slightly damp paper towel and heat in short bursts.
Experience Notes: What Cooking Puffy Gorditas Teaches You
The first time you cook puffy gorditas, the dough will probably teach you more than the recipe does. Masa has a personality. It is not difficult, but it is honest. If it needs water, it cracks. If it has too much water, it sticks. If you ignore it, it dries out. In other words, masa is basically a tiny edible life coach.
One useful experience is learning to trust touch instead of measuring alone. Two cups of masa harina and one and a half cups of warm water is a reliable starting point, but humidity, brand, and storage conditions can change the dough. On a dry day, you may need an extra few tablespoons of water. On a humid day, the dough may come together faster. The goal is not to obey the measuring cup with military discipline. The goal is soft, smooth masa that presses without cracking.
Another lesson is that heat control matters more than speed. Many beginners turn the pan too hot because they want dramatic browning. The outside cooks quickly, but the center stays dense. Medium-high heat is usually the sweet spot. You want enough heat to create steam and color, but not so much that the gordita burns before it cooks through. If your first one looks too dark, lower the heat and call it the “test gordita.” Every cook deserves a snack with a job title.
Shaping also gets easier with practice. The first disc may look like a map of an imaginary country. That is fine. By the fourth one, your hands understand the pressure. A tortilla press helps, but palms work too. The key is even thickness. Thin edges split. Thick centers stay heavy. A uniform disc gives the steam room to push upward, creating the puff that makes gorditas fun to open.
Filling gorditas is where personality enters the kitchen. A simple bean-and-cheese gordita can be as satisfying as a meat-filled one if the beans are warm, the salsa is bright, and the cheese is salty. Leftover roasted chicken becomes exciting with salsa verde and avocado. Potatoes become dinner with chorizo and crema. Even a vegetable filling can feel rich when paired with refried beans and queso fresco.
The biggest practical tip from experience is to serve gorditas fresh. They are at their best when the shell is warm and slightly crisp, the inside is tender, and the filling is hot. If feeding a group, cook the shells first, keep them warm under a towel, and split and fill them just before serving. This keeps the texture lively.
Finally, do not chase perfection too aggressively. Puffy gorditas are rustic food, not museum sculptures. Some will puff more than others. Some will have little cracks. Some will open beautifully, while one stubborn shell may need extra encouragement from a knife. They will still taste like toasted corn, warm comfort, and the kind of homemade meal that makes people hover near the stove pretending they are “just checking.” That is the real victory.
Conclusion
Cooking puffy gorditas at home is simple once you understand the rhythm: hydrate the masa, let it rest, shape it thick, cook it on steady heat, and fill it while warm. The best gorditas have a tender center, lightly crisp surface, and enough puff to open into a pocket. Whether you stuff them with beans and cheese, shredded chicken, carnitas, vegetables, or breakfast fillings, homemade gorditas turn basic ingredients into something deeply satisfying.
Start with a small batch, pay attention to the dough, and let your skillet teach you. After one or two tries, you will know exactly how the masa should feel and how hot your pan should be. And once you can make puffy gorditas, you have a recipe that works for weeknight dinners, weekend brunches, parties, leftovers, and emergency cheese situations. Very important category.