Table of Contents >> Show >> Hide
- Why a “Good Indoor Tan” Today Usually Means Sunless Tanning
- 11 Steps to Get a Good Indoor Tan Look
- Step 1: Decide on Your Ideal Shade Before You Buy Anything
- Step 2: Exfoliate Like You Mean It
- Step 3: Shave or Wax Ahead of Time
- Step 4: Moisturize Dry Areas, But Do Not Slather Your Whole Body
- Step 5: Choose the Right Formula for Your Lifestyle
- Step 6: Do a Patch Test First
- Step 7: Use a Mitt and Apply in Sections
- Step 8: Go Easy on Hands, Feet, Knees, and Elbows
- Step 9: Let It Develop Without Rushing the Process
- Step 10: Rinse, Then Maintain the Color Properly
- Step 11: Protect Your Skin Like a Responsible Bronze-Looking Legend
- Common Mistakes That Ruin an Indoor Tan Look
- How to Make Your Tan Look More Natural
- Is a Professional Spray Tan Better Than At-Home Tanning?
- Experience: What People Learn After Chasing the Perfect Indoor Tan
- Final Thoughts
If you came here dreaming of that golden, just-got-back-from-vacation glow, welcome. If you came here expecting a pep talk for tanning beds, plot twist: the smartest way to get a good “indoor tan” is to skip the UV and go for a sunless glow instead. Your skin will thank you now, and your future self will send a handwritten thank-you card later.
The truth is simple. Many people want a bronzed look, but they do not want the burns, patchiness, weird orange ankles, or the long-term skin drama that can come from chasing color the risky way. The good news is that you can absolutely get a smooth, believable, indoor tan look at home or in a salon without baking yourself like a casserole.
This guide walks you through 11 practical steps to get a good indoor tan look safely, evenly, and with a whole lot less regret. We will cover prep, product choice, application, maintenance, and the little details that separate “sun-kissed goddess” from “I fought a bottle of bronzer and lost.”
Why a “Good Indoor Tan” Today Usually Means Sunless Tanning
When people search for how to get a good indoor tan, they are usually after the result, not the radiation. They want color, confidence, and maybe a slightly more sculpted look in photos. A sunless tan can do that without turning your skincare routine into a long-term apology letter.
A good sunless tan should look natural, fade evenly, and make your skin look healthier rather than louder. The goal is not to become three shades darker overnight. The goal is to look like you spent a lovely weekend outdoors wearing a giant hat and making responsible decisions.
11 Steps to Get a Good Indoor Tan Look
Step 1: Decide on Your Ideal Shade Before You Buy Anything
One of the biggest mistakes people make is choosing a tanning product based on ambition instead of reality. If your skin is fair, jumping straight to “ultra dark tropical bronze storm cloud” is a bold move, but not always a wise one. Start with a light to medium shade that complements your natural skin tone.
Think of self-tanner like seasoning. You can always add more, but taking away too much is a lot harder. If you are new to sunless tanning, gradual tanning lotions are usually the most forgiving place to start.
Step 2: Exfoliate Like You Mean It
If smooth color is the dream, exfoliation is the opening act. Self-tanner clings to dry, rough patches, which means elbows, knees, ankles, and heels can turn dramatically darker than the rest of your body. Not mysterious. Not magical. Just dry skin doing dry skin things.
Use a gentle exfoliating mitt, washcloth, or body scrub about 24 hours before tanning. Focus on areas with thicker skin. Do not scrub yourself like you are sanding furniture. The goal is to remove dead skin cells and create an even canvas, not to challenge your moisture barrier to a duel.
Step 3: Shave or Wax Ahead of Time
If you shave after applying self-tanner, you risk fading the color faster or creating uneven patches. If you wax too close to application time, your skin may be irritated, and tanner on irritated skin is rarely a love story.
Try to shave or wax at least 24 hours before tanning. That gives your skin time to calm down and your pores time to look less obvious. Freshly shaved skin plus fresh self-tanner can sometimes create dotty-looking results, which is not the sort of texture anyone is aiming for.
Step 4: Moisturize Dry Areas, But Do Not Slather Your Whole Body
This is where strategy beats chaos. Apply a light, oil-free moisturizer to dry spots like your knees, elbows, ankles, wrists, and feet right before self-tanning. Those areas absorb more product, so a little moisturizer acts like a buffer.
Do not coat your entire body in thick lotion right before tanning unless you enjoy watching product slide around like it is on an ice rink. Too much moisturizer can dilute the tanner and make it harder to develop evenly.
Step 5: Choose the Right Formula for Your Lifestyle
There is no universal best self-tanner. There is only the best one for your patience level, skin type, and willingness to wait around in loose pajamas.
Mousses tend to dry quickly and work well for people who want deeper color. Lotions are often easier for beginners because they spread more slowly and can feel more hydrating. Drops can be mixed into moisturizer for the face. Sprays are fast but can be messy if your bathroom already resembles a small disaster site.
If you want subtle color, go with a gradual tanning lotion. If you want a special-event glow, use a mousse or professional spray tan. If you want control, choose a formula with a guide color so you can see where you have applied it.
Step 6: Do a Patch Test First
This step is not glamorous, but neither is discovering that your skin hates a product right before a wedding, vacation, or school dance. Test a small amount on a discreet area at least a day before full application. This helps you spot irritation and preview the color.
A patch test also tells you whether the shade looks warm, cool, golden, or oddly pumpkin-adjacent on your skin. That tiny preview can save you from a full-body plot twist.
Step 7: Use a Mitt and Apply in Sections
If you want streak-free results, a tanning mitt is your best friend. It helps distribute product more evenly and keeps your palms from looking suspiciously like sweet potatoes.
Work in sections: legs, torso, arms, then hands and feet last. Use long, smooth motions rather than random frantic circles fueled by panic. Blend carefully around ankles, wrists, and the hairline. Use less product on tricky areas and more on larger zones like thighs and upper arms.
For your back, either recruit a trusted helper or use a back applicator. Trying to freestyle it with one elbow over your shoulder and the other behind your back is a flexibility challenge, not a tanning technique.
Step 8: Go Easy on Hands, Feet, Knees, and Elbows
These are the areas that tell on you. A beautiful tan can look totally believable until the knuckles come in five shades darker like they attended a different event.
Use leftover product from the mitt for hands and feet instead of pumping out a fresh blob. Blend over the tops of hands and fingers lightly. Around wrists and ankles, feather the product outward so there is no harsh line. Bend your knees and elbows slightly while applying so the skin stretches more naturally.
Step 9: Let It Develop Without Rushing the Process
Once the product is on, give it time to dry before getting dressed. Wear loose, dark clothing and avoid sweating, tight straps, or doing anything that turns your fresh tan into abstract art. That is not the moment for leggings, a long car ride, or a spontaneous emotional support hug from a damp dog.
Follow the instructions on the label. Some products develop in a few hours. Others deepen overnight. Resist the urge to “check” by rubbing your arm every 20 minutes. Hovering does not help the tan. It only helps anxiety.
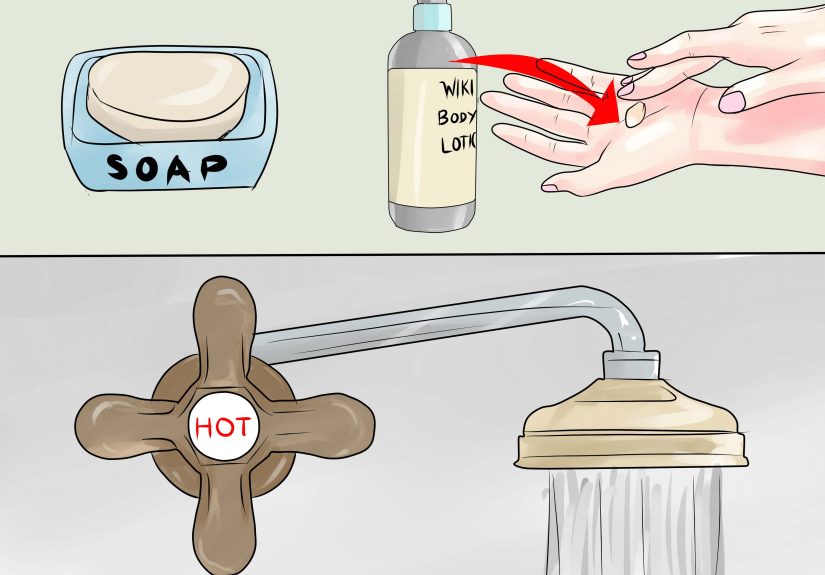
Step 10: Rinse, Then Maintain the Color Properly
After the recommended development time, rinse as directed. Usually this means a lukewarm shower with no harsh scrubbing. Some guide color may wash off, which can be alarming if you were emotionally attached to that immediate bronzed look. Stay calm. The actual color continues developing underneath.
To maintain your tan, moisturize daily. Hydrated skin holds color better and fades more evenly. Avoid exfoliating acids, rough scrubs, and marathon hot showers if you want the tan to last. A gradual tanning lotion every few days can help top up the color without starting from scratch.
Step 11: Protect Your Skin Like a Responsible Bronze-Looking Legend
A fake tan is not sunscreen. A bronzed glow can create the illusion that your skin is protected, but it is not a magical shield. If you are heading outdoors, wear broad-spectrum sunscreen, seek shade, and protect your skin like the masterpiece it is.
This is the step people skip when they get excited about the glow. Do not be that person. Looking tan and being sun-safe can absolutely exist in the same sentence.
Common Mistakes That Ruin an Indoor Tan Look
Applying Too Much Product
More self-tanner does not always equal more beauty. It often equals streaks, sticky drying time, and mysterious dark patches that show up later like uninvited guests.
Ignoring Body Prep
If you skip exfoliating and moisturizing the right areas, your tan may cling unevenly and fade in blotches. Prep is not optional. Prep is the entire personality of the tan.
Using the Wrong Shade
The best tan is one that looks believable. A natural-looking medium glow almost always beats an overly dark result that screams “I made a decision at midnight.”
Forgetting Maintenance
A good indoor tan is not just about application day. Daily moisturizer, gentle cleansing, and occasional touch-ups are what keep the glow looking polished instead of patchy.
How to Make Your Tan Look More Natural
Natural-looking color comes down to restraint and blending. Choose a tone that looks like your skin on its best day, not an entirely different person’s skin on a beach vacation. Add a little bronzer makeup to the collarbones or shoulders for special events rather than layering endless self-tanner.
It also helps to tan your face more cautiously than your body. The face sheds skin cells faster, and many facial products can break down the tan more quickly. Tanning drops mixed into moisturizer are often easier to control than a full-strength body formula.
Is a Professional Spray Tan Better Than At-Home Tanning?
It depends on your budget, your schedule, and your tolerance for trial and error. A professional spray tan can be fantastic for weddings, vacations, photos, and big events because it is fast and can look very even when done well. At-home products are more affordable and easier to maintain long term.
For beginners, at-home gradual tanning lotion is often less intimidating. For big occasions, professional spray tans can save time and reduce the chance of streaks. In other words, choose based on the stakes. Tuesday errands? Home lotion. Fancy event with 800 photos? Maybe call in the pros.
Experience: What People Learn After Chasing the Perfect Indoor Tan
One thing people often realize after experimenting with tanning is that the perfect glow has less to do with getting darker and more to do with getting smoother, more even, and more believable. Plenty of first-time users assume the goal is deep bronze. Then they try an ultra-dark product, panic halfway through the application, and spend the next morning aggressively Googling how to fix orange wrists. Experience teaches restraint.
Another common lesson is that prep matters more than the product price. Some people spend extra money on a trendy tanning mousse, only to apply it to dry, unexfoliated skin right after shaving and wonder why the result looks patchy. Meanwhile, someone else uses a basic gradual lotion, moisturizes properly, takes their time, and ends up looking like they naturally glow all year. The difference is usually the routine, not the label.
People also learn that self-tanning has a learning curve, and that is normal. The first application might be decent, the second one better, and by the third try they have a system. They know which elbow gets too dark, how much product their ankles can handle, and why loose pajamas after tanning are not a suggestion but a survival tactic. Once that routine clicks, tanning becomes much less dramatic.
There is also the emotional side of the experience. A lot of people say that a little color makes them feel more polished, especially for vacations, parties, or photos. That confidence boost is real, but the smarter tanners eventually stop chasing a fake “perfect” shade and start aiming for a healthy-looking finish. They realize a soft glow looks better in daylight, photographs better, and fades more gracefully than a too-dark tan that announces itself before they do.
Many experienced self-tanners become unexpectedly loyal to the boring basics: exfoliating mitts, plain moisturizer, tanning mitts, and patience. They learn that the glamorous part is the result, not the process. The process is usually standing in a bathroom in old clothes, air-drying like a very committed houseplant, and trying not to touch doorknobs with developing hands.
Another pattern shows up over time: people become much more careful with their face and hands. Beginners tend to over-apply there because those areas are visible and they want everything to match. Veterans know better. They use less product, more blending, and often separate formulas for the face and body. That tiny adjustment can make the whole tan look more polished and believable.
There is also a practical lesson about maintenance. People who love their results are rarely the ones doing dramatic full-body tans every single time. They often build with gradual color, moisturize consistently, and touch up only where needed. That approach tends to look more natural and creates less stress. Nobody wants their weekly schedule controlled by a patchy knee emergency.
Perhaps the biggest takeaway from real-world experience is this: the best indoor tan is the one that works with your skin, not against it. It looks even, feels comfortable, and does not require risky shortcuts. Once people stop chasing extreme darkness and start focusing on skin prep, smart application, and realistic color, the whole process gets easier. The glow looks better, the upkeep feels manageable, and the results are much more likely to earn compliments instead of concerned stares from friends who are too polite to mention your elbows.
Final Thoughts
If you want a good indoor tan look, the real secret is not speed, maximum darkness, or some mythical miracle product. It is preparation, moderation, and smart maintenance. Exfoliate well, choose the right shade, moisturize strategically, apply carefully, and protect your skin afterward.
A great tan should make you look refreshed, not roasted. Aim for believable color, smooth fading, and healthy skin first. That is how you get a glow that looks expensive, effortless, and entirely free from tanning-bed regret.