Table of Contents >> Show >> Hide
- What Are Tape Fake Nails?
- Materials You Need to Make Fake Nails Out of Tape
- How to Make Fake Nails Out of Tape: 7 Steps
- Step 1: Clean and Prep Your Natural Nails
- Step 2: Cut a Piece of Tape Larger Than Your Nail
- Step 3: Fold or Layer the Tape for Strength
- Step 4: Shape the Tape Into a Nail Extension
- Step 5: Smooth the Edges With a Nail File
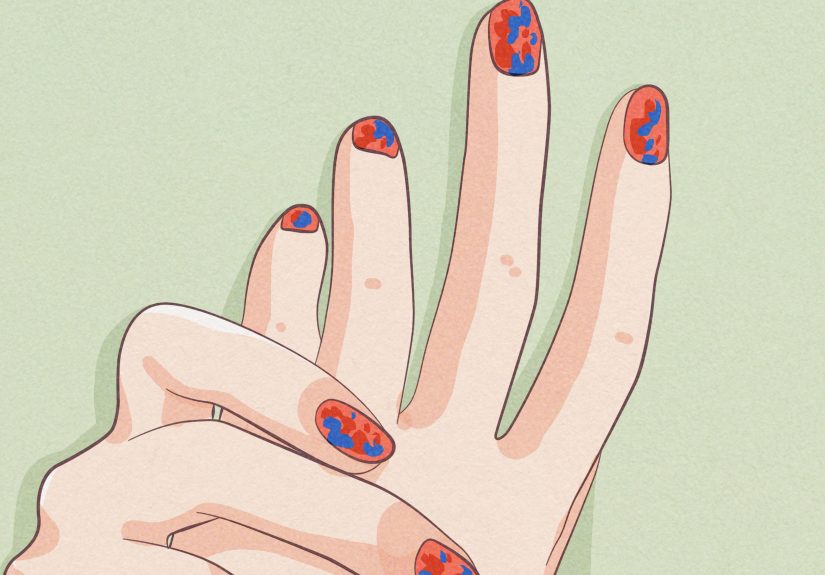
- Step 6: Paint and Decorate Your Tape Nails
- Step 7: Wear Carefully and Remove Gently
- Pro Tips for Better-Looking Tape Nails
- Creative Tape Nail Design Ideas
- Safety Tips Before Trying Tape Fake Nails
- How Long Do Tape Nails Last?
- Common Mistakes to Avoid
- Experience Notes: What It Is Really Like to Make Fake Nails Out of Tape
- Conclusion
Want fake nails right now, but your manicure budget is currently hiding under the couch with your missing hair ties? Good news: you can make surprisingly cute temporary fake nails out of clear tape. This DIY beauty trick is cheap, beginner-friendly, and perfect for photos, costume looks, quick nail art practice, or that dramatic “I have my life together” moment before your real nails remember they are only two millimeters long.
Before we begin, let’s set expectations. Tape nails are not salon acrylics, press-ons, gel extensions, or indestructible superhero claws. They are a fun, temporary craft. Think “cute for a selfie,” “great for a themed party,” or “perfect for testing a nail shape before buying press-ons.” They are not ideal for washing dishes, opening soda cans, typing a 12-page paper, or fighting dragons. Still, with the right tape, smart shaping, and a little polish magic, you can create a surprisingly polished look in minutes.
This guide explains how to make fake nails out of tape in 7 steps, plus safety tips, styling ideas, removal advice, and real-world experience notes so your DIY manicure looks intentionalnot like your office supplies staged a beauty rebellion.
What Are Tape Fake Nails?
Tape fake nails are temporary nail extensions made by layering, shaping, and trimming clear adhesive tape. The tape acts like a flexible plastic sheet that can be molded over your natural nail. Once shaped, it can be painted with nail polish, decorated with glitter, or finished with a top coat for shine.
The most common choice is clear household tape because it is thin, flexible, and easy to cut. Some people also use transparent packing tape for a sturdier result, but it can be harder to shape and may feel bulkier. For beginners, ordinary clear tape is usually the easiest option.
When Tape Nails Work Best
Tape nails are best for short-term wear. They work well for:
- Practicing nail shapes before buying press-on nails
- Creating quick costume nails
- Trying nail art designs without painting directly on your natural nails
- Taking photos or filming short videos
- Making a low-cost DIY manicure for fun
When You Should Skip Them
Skip tape nails if your nails are cracked, peeling, infected, painful, or irritated. Artificial nail covers can trap moisture, and moisture trapped against the nail may create a cozy little spa day for bacteria or funguswhich is not the kind of self-care anyone requested. If your skin reacts badly to adhesives, avoid this project or test a tiny piece of tape on your skin first.
Materials You Need to Make Fake Nails Out of Tape
You do not need a salon cart or a mysterious drawer full of professional tools. Most supplies are probably already in your home.
- Clear tape or transparent tape
- Small scissors or nail scissors
- Nail file or emery board
- Cuticle stick or tweezers
- Cotton pad or lint-free wipe
- Rubbing alcohol or gentle nail cleanser
- Nail polish
- Clear top coat
- Optional: glitter, nail stickers, small gems, or a fine-tip nail art brush
Choose tape that is clean, smooth, and not too old. Old tape can become cloudy, brittle, or extra sticky in strange ways. If the roll looks like it survived a garage sale, a move, and three emotional breakdowns, give it a peaceful retirement.
How to Make Fake Nails Out of Tape: 7 Steps
Follow these seven steps to make your own temporary tape nails at home. Work slowly, especially the first time. The goal is not speed; the goal is not accidentally making a thumbnail that resembles a tiny canoe.
Step 1: Clean and Prep Your Natural Nails
Start with clean, dry hands. Wash with soap and water, then dry thoroughly. Use a cotton pad with a little rubbing alcohol or nail cleanser to remove oil from the nail surface. This helps the tape stick better.
Trim your natural nails if needed, then gently file the edges. Do not aggressively buff or scrape your nail plate. Tape nails do not require heavy nail preparation, and over-filing can leave natural nails weak, thin, or sensitive. Push back cuticles gently only if you already know how to do it safely. Never cut living skin around the nail for this project.
Step 2: Cut a Piece of Tape Larger Than Your Nail
Pull off a piece of clear tape slightly larger than the nail you want to cover. For most nails, a piece about 1 to 1.5 inches long is enough. Place the sticky side down over your natural nail, leaving extra tape extending beyond the fingertip.
Press the tape lightly onto the nail, starting near the cuticle and smoothing toward the tip. Try to avoid wrinkles and air bubbles. If the tape crinkles badly, remove it slowly and start again with a fresh piece. Tape is cheap. Your patience, however, deserves protection.
Step 3: Fold or Layer the Tape for Strength
A single layer of tape is usually too flimsy for a fake nail tip. To make it stronger, fold the free edge of the tape back over itself so the sticky sides touch. This creates a non-sticky extension beyond your natural nail.
If you want a firmer nail, add a second strip of tape over the first one, then fold the tip again. Two layers usually provide enough structure for short or medium tape nails. Three layers can work for dramatic shapes, but they may look bulky. The sweet spot is strong enough to hold polish but flexible enough to trim cleanly.
Step 4: Shape the Tape Into a Nail Extension
Use small scissors to trim the tape into your desired nail shape. Start longer than you think you need. You can always cut more, but you cannot magically reattach a tip after one overly confident snip.
Popular shapes include:
- Round: easiest for beginners and good for a natural look
- Oval: elegant and forgiving if both sides are not identical
- Square: simple, modern, and easy to cut straight
- Squoval: square with softened corners, great for everyday style
- Almond: pretty but requires careful side trimming
For your first set, choose round or squoval. These shapes hide small imperfections better than sharp coffin or stiletto nails. Tape can technically become a stiletto, but one wrong move and it becomes “tiny transparent shark tooth.”
Step 5: Smooth the Edges With a Nail File
After cutting, use a nail file to refine the edges. File gently in one direction instead of sawing back and forth. Tape can fray if you file too aggressively. Focus on making both sides even and softening any sharp corners.
If the tape lifts near the sides, press it down with a cuticle stick or tweezers. If it refuses to cooperate, trim the lifted area rather than piling on more tape. Too much tape near the cuticle can look thick and may feel uncomfortable.
Step 6: Paint and Decorate Your Tape Nails
Now for the fun part: nail polish. Apply a thin coat of polish over the tape nail, starting near the center and moving outward. Use thin layers rather than one thick blob. Thick polish takes longer to dry and can make the tape bend or wrinkle.
Let the first coat dry before adding a second. For a clean look, try nude, sheer pink, milky white, red, or black. For a playful DIY manicure, add glitter polish, tiny dots, French tips, or nail stickers. If you want a glassy effect, use clear tape and a sheer iridescent polish.
Finish with a clear top coat. This helps smooth the tape texture, adds shine, and makes the design look more like a real manicure. Let everything dry completely before touching fabric, hair, or snacks. Wet polish has a magical ability to find every surface you love.
Step 7: Wear Carefully and Remove Gently
Tape nails are temporary, so treat them gently. Avoid soaking your hands, washing dishes, using harsh cleaners, or pulling at the tape. If one nail starts lifting, do not rip it off. Peel it slowly from the side or soak your fingertips in warm, soapy water to loosen the adhesive.
After removal, wash your hands and apply hand cream or cuticle oil. This helps restore moisture, especially if you used polish remover or alcohol during the process. If you notice redness, itching, swelling, or discomfort, stop using tape on your nails and give your skin time to recover.
Pro Tips for Better-Looking Tape Nails
Making tape nails is easy, but making them look cute requires a few small tricks. These details can turn “I taped my fingers” into “Wait, did you do your nails?”
Use Thin Layers
Thin tape layers look smoother and more natural. Thick layers may feel stronger, but they can also look cloudy, bulky, or uneven. Two layers are usually enough for short fake nails out of tape.
Match Each Nail Individually
Every fingernail is shaped differently. Your index nail and ring nail are not identical twins; they are more like cousins who only see each other at holidays. Cut each tape nail separately instead of using one template for every finger.
Keep the Cuticle Area Clean
Leave a tiny gap between the tape and your cuticle. This makes the manicure look neater and reduces pulling on the skin. Tape stuck directly on cuticles may lift faster and can feel uncomfortable.
Paint Before or After Applying?
You can paint tape nails after applying them, which is easiest for beginners. Another method is to stick tape to a smooth surface, paint it, let it dry, cut the nail shape, and then apply it. This second method gives cleaner polish edges, but it takes more patience.
Creative Tape Nail Design Ideas
Once you know the basic method, tape nails become a tiny art studio. Try these simple design ideas:
Clear Glass Nails
Use clear tape, shape the nails neatly, and apply only a shiny top coat. The result is a transparent “glass nail” effect. Add a tiny silver sticker or holographic glitter for extra sparkle.
French Tip Tape Nails
Paint the whole nail with sheer pink or nude polish. Once dry, paint the tips white. Because the tape extension is already separate from your natural nail, it is easier to create a longer French tip without needing long natural nails.
Glitter Party Nails
Apply glitter polish over the tape extension, then seal with top coat. Glitter hides small bumps and uneven tape lines, making it perfect for beginners. In the world of DIY nails, glitter is not decorationit is camouflage with confidence.
Color Block Nails
Use two polish colors on each nail. Paint one side one color and the other side another color. This works especially well with square or squoval shapes.
Safety Tips Before Trying Tape Fake Nails
Because tape uses adhesive, it can irritate sensitive skin. Keep tape on the nail plate as much as possible and avoid sticking it to broken skin. Do not use tape nails if your nail area is sore, swollen, inflamed, or showing signs of infection.
Also avoid using super glue, craft glue, hot glue, or random household adhesives to strengthen tape nails. Nail glue and press-on systems are designed for cosmetic nail use, but even those can cause problems if misused. Household glues are not a good shortcut. Your nails are not a school project, even if tape is involved.
If you want longer-lasting fake nails, consider proper press-on nails with adhesive tabs. Adhesive tabs are usually easier to remove than nail glue and are better suited for short-term wear. Tape nails are more of a creative DIY experiment than a durable manicure solution.
How Long Do Tape Nails Last?
Tape nails may last anywhere from a few minutes to a few hours, depending on the tape, your nail prep, the length of the fake nail, and how carefully you use your hands. Shorter tape nails usually last longer because there is less leverage pulling the tape away from the natural nail.
If you are making tape nails for photos, apply them shortly before taking pictures. If you are making them for a party or costume, keep the length modest and bring extra tape in your bag. Yes, emergency nail tape is a thing now. Fashion is unpredictable.
Common Mistakes to Avoid
Making the Nails Too Long
Long tape nails bend easily and pop off faster. Start short or medium-length until you understand how the tape behaves.
Using Too Much Polish
Heavy polish can wrinkle the tape and make drying painfully slow. Use thin coats and let each layer dry.
Skipping Nail Prep
Oil, lotion, and water make tape lift quickly. Clean, dry nails are essential for better adhesion.
Pulling Tape Off Too Fast
Quick removal can tug at the nail or surrounding skin. Peel slowly or soak first.
Experience Notes: What It Is Really Like to Make Fake Nails Out of Tape
The first thing you learn when making fake nails out of tape is that tape has a personality. Some pieces behave beautifully. Others wrinkle, stick to your scissors, attach themselves to your sleeve, and act like they were born to create drama. That is normal. The trick is to work slowly and accept that the first nail may be a practice nail.
In real use, the best results usually come from shorter shapes. A rounded or squoval tape nail looks cleaner, feels more comfortable, and is less likely to bend. When the nail is too long, the tape tip moves every time you touch something. That movement can loosen the tape near the cuticle. If you are planning to wear tape nails for photos, long shapes can look impressive for a short time. If you want to keep them on while moving around, short is smarter.
Another lesson: clear polish or top coat makes a huge difference. Plain tape can look cloudy or obviously homemade, but a glossy top coat gives it a smoother, more finished appearance. Glitter polish is also a beginner’s best friend. If the edge is slightly uneven or the tape has a small bubble, glitter distracts the eye. It is basically a tiny disco ball saying, “Please do not inspect my craftsmanship.”
Painting the tape after applying it is easier, but it requires patience. If you touch anything before the polish dries, the tape may shift or the polish may smear. A good routine is to apply tape nails on one hand, paint that hand, let it dry, then move to the other hand. Trying to do both hands at once can turn into a sticky little circus.
Removal is where gentleness matters most. Tape nails are not meant to be ripped away like a price tag. Peel from the side, go slowly, and use warm, soapy water if the tape feels stubborn. After removal, the nails may feel slightly dry if you used alcohol or polish remover, so hand cream or cuticle oil helps.
The biggest advantage of tape nails is creativity. They cost almost nothing, require no nail glue, and let you experiment with shapes before committing to press-ons or salon extensions. The biggest downside is durability. You cannot expect them to survive a full day of errands, showers, keyboards, and snack bags. But for a quick beauty experiment, a costume, a photo shoot, or a fun afternoon project, tape nails are surprisingly entertaining.
In short, tape fake nails are not a replacement for professional manicures, but they are a clever DIY hack. They teach you about nail shape, polish control, and patience. They also remind you that beauty can come from unexpected placesincluding the same drawer where you keep envelopes, paper clips, and that one pen that never works.
Conclusion
Learning how to make fake nails out of tape is a fun, budget-friendly way to experiment with nail art at home. With clear tape, scissors, a nail file, polish, and a little patience, you can create temporary nail extensions in seven simple steps. The key is to clean your nails first, layer the tape lightly, shape each nail carefully, paint with thin coats, and remove everything gently.
Tape nails are best for short-term style, not long-term wear. They are great for creative practice, quick photos, costume looks, and playful beauty experiments. Keep your natural nails healthy, avoid harsh adhesives, and treat the process like a craftnot a permanent manicure. Your final result may not fool a celebrity nail artist under studio lights, but it can absolutely look cute, clever, and camera-ready.
Note: This article is for general DIY beauty education. Tape nails are temporary and should not be used over damaged, painful, irritated, or infected nails.