Table of Contents >> Show >> Hide
- Why Trim an Aloe Vera Plant?
- When Is the Best Time to Trim Aloe Vera?
- Tools You Need Before Trimming
- How to Trim an Aloe Vera Plant Step by Step
- How to Harvest Aloe Vera Gel After Trimming
- How Much Aloe Can You Cut Without Hurting the Plant?
- Should You Cut Brown Tips Off Aloe Vera?
- What to Do After Trimming Aloe Vera
- How to Trim Aloe Pups
- Common Aloe Trimming Mistakes to Avoid
- Safety Notes Before Using Fresh Aloe
- Experience Notes: What Trimming Aloe Vera Teaches You Over Time
- Conclusion
If your aloe vera plant looks like it is trying to escape the pot, congratulations: you have a happy succulent with ambition. Aloe vera is one of the most useful and forgiving houseplants you can grow, but even this low-maintenance green hero needs a proper trim now and then. Whether you are removing tired leaves, shaping an overgrown plant, or harvesting aloe gel for topical use, knowing how to trim an aloe vera plant correctly keeps the plant healthy and prevents that sad, hacked-up look nobody wants on a sunny windowsill.
The good news? Trimming aloe vera is simple. The less-good news? You cannot just yank off leaves like you are opening a stubborn bag of chips. Aloe leaves are fleshy, water-filled, and prone to scarring if cut badly. A clean, intentional cut helps the plant heal faster, reduces disease risk, and gives you the best-quality gel when harvesting.
This guide explains when to prune, which leaves to choose, how to cut aloe without damaging the crown, how to harvest the gel safely, and what to do after trimming so your plant keeps growing like the sturdy little desert survivor it is.
Why Trim an Aloe Vera Plant?
Aloe vera does not need constant pruning like basil, roses, or your neighbor’s mysteriously perfect hedge. In fact, over-pruning is one of the fastest ways to stress the plant. Aloe stores moisture and energy in its leaves, so every cut removes part of its reserve system. The goal is not to give your aloe a stylish haircut. The goal is to remove what is no longer helping the plant or to harvest mature leaves in a way that lets the plant recover.
Common reasons to trim aloe vera
You may need to trim your aloe vera plant when lower leaves become brown, shriveled, mushy, broken, sunburned, or damaged by pests. You may also trim older outer leaves when harvesting aloe gel. Sometimes pruning is necessary because the plant has become crowded with pups, also called offsets, which grow around the base of the mother plant.
Healthy trimming improves appearance, increases airflow around the base, and helps the plant put energy into strong new growth. However, if the center leaves are firm, upright, and green, leave them alone. The center of the rosette is the aloe’s growth point, and cutting it can seriously weaken the plant.
When Is the Best Time to Trim Aloe Vera?
The best time to trim aloe vera is during the active growing season, usually spring through early fall. During this period, the plant has more energy to seal cuts and replace harvested leaves. If you only need to remove a dead or diseased leaf, you can do that anytime. Dead leaves do not magically become useful if you wait until June.
Avoid heavy harvesting in winter when indoor aloe plants often grow more slowly due to shorter days and cooler temperatures. Winter pruning should be limited to removing damaged, rotting, or fully dried leaves. Think of winter trimming as emergency maintenance, not a full spa appointment.
Tools You Need Before Trimming
You do not need a professional greenhouse setup to prune aloe vera, but clean tools matter. Aloe leaves are full of moisture, and dirty blades can introduce bacteria or fungi into fresh cuts.
Prepare these basic tools
- A sharp knife or pruning shears
- Rubbing alcohol or soap and hot water for cleaning tools
- Paper towels or a clean cloth
- Gloves, especially if your skin is sensitive
- A cutting board if you plan to harvest gel
- A small bowl or glass for draining yellow latex from harvested leaves
A sharp knife is often easier than scissors for thick aloe leaves because it creates a cleaner cut without crushing the tissue. If you use shears, make sure they are sharp enough to slice through the leaf in one clean motion.
How to Trim an Aloe Vera Plant Step by Step
Before cutting anything, look at the entire plant. Aloe vera grows in a rosette, with new leaves emerging from the center and older leaves sitting on the outside. Your job is to work from the outside in, never from the middle out.
Step 1: Inspect the plant
Check for brown tips, soft spots, yellowing, drooping leaves, pest damage, or dry, papery leaves at the base. Also look at the center. If the middle leaves are pale, stretched, or floppy, the real problem may be low light, overwatering, or poor drainage rather than lack of pruning.
Step 2: Clean your cutting tool
Wipe the blade with rubbing alcohol or wash it with hot, soapy water and dry it before cutting. This tiny step takes less than a minute and prevents a surprising amount of plant drama.
Step 3: Choose the right leaves
Start with old, damaged, or outer leaves. If you are harvesting gel, choose a mature, thick, healthy outer leaf. It should feel firm but not rock-hard, plump but not mushy. Avoid small inner leaves because they are still actively growing and usually contain less gel.
Step 4: Cut close to the base
Hold the chosen leaf gently and cut it as close to the base of the plant as possible without injuring nearby leaves. A whole-leaf cut is usually better than slicing off half a leaf. Half-cut leaves often form brown scars and look awkward, like the plant lost an argument with kitchen scissors.
Step 5: Remove dead or mushy leaves completely
If a leaf is dry, brown, and papery, remove it at the base. If a leaf is mushy, yellow, or smells unpleasant, remove it carefully and check the soil. Mushy leaves often point to overwatering or root rot. In that case, trimming the leaf is only part of the fix; the plant may also need drier soil, better drainage, and a brighter location.
Step 6: Do not over-prune
Never remove most of the leaves at one time. A good rule for home growers is to harvest only one or two mature outer leaves from a medium-size plant, then give it time to recover. Always leave plenty of healthy leaves, especially the young central growth. If you need a lot of aloe gel often, grow several plants instead of repeatedly shaving down one poor plant like it owes you rent.
How to Harvest Aloe Vera Gel After Trimming
Once you cut a mature aloe leaf, you can harvest the clear inner gel. This gel is commonly used topically for minor skin comfort, but it should be handled cleanly and used with common sense. Do not use fresh aloe as a substitute for medical care for serious burns, deep wounds, infections, or allergic reactions.
Step 1: Let the yellow latex drain
Place the cut leaf upright in a cup or bowl with the cut end facing down. A yellowish liquid may drain from the leaf. This is aloe latex, not the clear gel. Aloe latex can irritate skin and should not be ingested. Let the leaf drain for 10 to 20 minutes, then rinse the cut end under cool water.
Step 2: Trim the spiny edges
Lay the leaf flat on a clean cutting board. Use a sharp knife to slice off the prickly edges on both sides. Work slowly because aloe gel is slippery, and nobody needs a dramatic kitchen incident over a houseplant.
Step 3: Open the leaf
Slice the leaf lengthwise to expose the clear gel inside. You can peel back one side of the green skin or fillet the leaf by sliding the knife between the gel and the outer rind.
Step 4: Scoop out the gel
Use a clean spoon to scoop the clear gel into a clean container. Avoid collecting yellow residue or green rind. For topical use, many people apply the fresh gel directly to minor skin irritation after a patch test. If redness, itching, burning, or rash develops, stop using it.
Step 5: Store it properly
Fresh aloe gel is best used right away. If you need to store it, keep it in a clean, sealed container in the refrigerator and use it quickly. For longer storage, some people freeze aloe gel in small cubes for topical use. Label the container clearly so nobody mistakes it for a smoothie ingredient. Aloe is useful, but surprise aloe ice cubes in lemonade are not a hospitality strategy.
How Much Aloe Can You Cut Without Hurting the Plant?
Aloe vera is tough, but it is not limitless. Each leaf acts like a water tank and energy bank. Removing too many leaves at once weakens the plant, slows growth, and may leave the rosette unstable.
For a small aloe plant, avoid harvesting altogether until it has several mature leaves and a strong root system. For a medium or large plant, trim only the oldest outer leaves and leave the center untouched. If the plant looks sparse after trimming, you have cut too much. Aloe should still look balanced, upright, and capable of photosynthesis after pruning.
Should You Cut Brown Tips Off Aloe Vera?
Yes, you can cut brown tips off aloe vera leaves if they bother you visually, but it is not always necessary. Brown tips may happen because of underwatering, inconsistent watering, too much direct sun, cold drafts, low humidity, mineral buildup, or old age. If only the very tip is dry, trim it neatly with clean scissors, following the natural shape of the leaf.
However, trimming brown tips does not solve the underlying problem. If brown tips keep returning, check your care routine. Aloe prefers bright light, excellent drainage, and soil that dries out between waterings. A pot without a drainage hole is basically a swamp with decorative intentions.
What to Do After Trimming Aloe Vera
After pruning, give your aloe a few days of peace. Do not water immediately unless the soil is completely dry and the plant was already due for water. Fresh cuts need time to callus, and overly wet conditions can encourage rot.
Post-trim care checklist
- Keep the plant in bright, indirect light.
- Let the cut areas dry naturally.
- Avoid splashing water into the crown.
- Do not fertilize immediately after heavy pruning.
- Check the plant over the next week for soft spots or discoloration.
If you trimmed because of rot, remove the plant from its pot and inspect the roots. Healthy aloe roots should look firm, not black, slimy, or foul-smelling. Trim mushy roots with a sterile blade, let the plant dry briefly, and repot it in a cactus or succulent mix with a drainage hole.
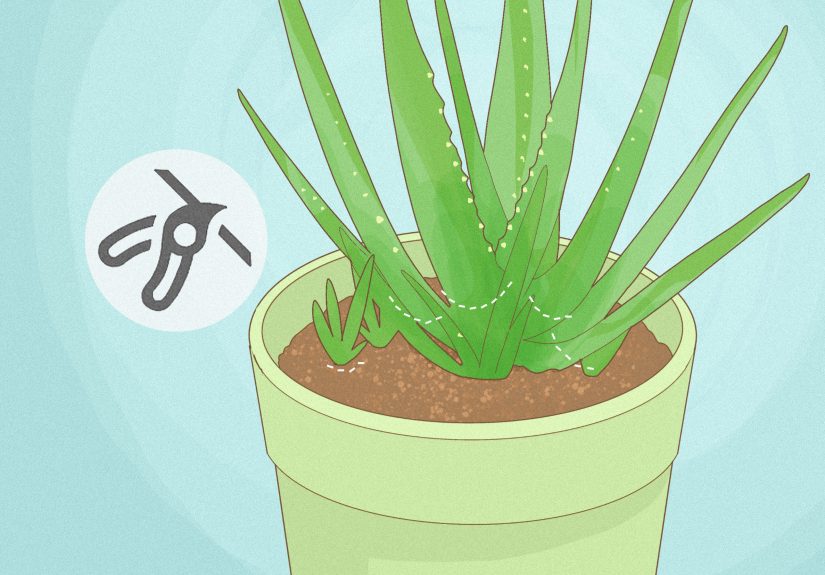
How to Trim Aloe Pups
Aloe vera often produces pups around the base of the mother plant. These small offsets are one of the easiest ways to propagate aloe. If the pot is crowded, or if pups are stealing the spotlight from the main plant, you can separate them.
How to remove aloe pups
Choose pups that are a few inches tall and, ideally, have some roots of their own. Remove the mother plant from the pot, loosen the soil, and gently separate the pup. If it does not come away easily, use a clean knife to cut it from the parent plant. Let the cut area dry and callus for a day or longer before potting the pup in well-draining succulent soil.
Do not water the newly potted pup heavily right away. Give it time to settle, then water lightly when the soil is dry. Aloe pups are cute, but they are still succulents, not tropical drama queens.
Common Aloe Trimming Mistakes to Avoid
Cutting the center leaves
The center leaves are new growth. Cutting them can damage the plant’s growing point and ruin its shape. Always harvest from the outside.
Using dirty tools
Dirty scissors or knives can spread disease. Clean the blade before every pruning session.
Harvesting too often
If you cut leaves faster than the plant can grow them, the aloe will weaken. Give it recovery time between harvests.
Leaving partial leaf stubs
Partial cuts often scar and look unattractive. For harvesting, remove the whole leaf close to the base.
Ignoring the cause of damage
If leaves are mushy, brown, or floppy, pruning alone will not fix the plant. Check watering, light, drainage, temperature, and pests.
Safety Notes Before Using Fresh Aloe
Fresh aloe gel is widely used topically, but natural does not automatically mean risk-free. Do a small patch test before applying it more broadly. Do not apply fresh aloe to deep wounds, severe burns, or infected skin. If symptoms are serious, get medical advice.
Do not ingest aloe latex or whole-leaf homemade aloe preparations. Aloe latex can cause stomach cramps, diarrhea, and more serious problems. Aloe vera is also listed as toxic to dogs, cats, and horses, so keep trimmed leaves, plant scraps, and curious pets separated. Your cat does not need a wellness shot from the windowsill.
Experience Notes: What Trimming Aloe Vera Teaches You Over Time
The first time many people trim an aloe vera plant, they cut too timidly. They snip off a brown tip, stare at the plant for five minutes, then wonder why the leaf still looks strange. Aloe is not like a leafy herb where every snip blends into new growth. Once an aloe leaf is damaged, the mark usually remains. That is why experienced growers often remove an entire damaged outer leaf instead of trying to sculpt it into perfection.
One practical lesson is that aloe tells the truth about your care routine. If the lower leaves are plump and firm, the plant is probably happy. If they are thin and curling inward, it may be thirsty or root-bound. If they are yellow and mushy, the plant may be sitting in too much moisture. Trimming gives you a reason to inspect the plant closely, and that inspection is often more valuable than the cut itself.
Another experience-based tip is to harvest with a purpose. Do not cut a leaf just because the plant is large. Choose a mature outer leaf when you actually plan to use the gel. A fresh cut leaf can be stored for a short time, but aloe is best when handled cleanly and used promptly. If you only need a small amount of gel, it is still usually better to remove one whole outer leaf and store the unused portion carefully rather than repeatedly nicking leaves on the plant.
Growers also learn that aloe plants recover best when they are not fussed over after trimming. The temptation is to water, fertilize, rotate, repot, and emotionally support the plant all in one afternoon. Resist. After a trim, place the aloe back in bright light, keep the soil on the dry side, and let the cuts callus naturally. Aloe vera evolved to handle dry conditions, not constant attention. Sometimes the best plant care is stepping away with confidence.
If your aloe produces pups, trimming becomes part of a larger maintenance rhythm. Every year or two, you may remove old leaves, separate crowded offsets, refresh the soil, and reset the plant lower in the pot if it has become top-heavy. This turns one stretched, crowded aloe into several healthier plants. It also explains why aloe owners always seem to be offering baby plants to friends, coworkers, delivery drivers, and anyone who makes accidental eye contact near the windowsill.
The biggest lesson is simple: trim aloe vera slowly and intentionally. Use clean tools, cut mature outer leaves close to the base, avoid the center, and let the plant rest afterward. Do that, and your aloe will remain both attractive and useful for years.
Conclusion
Learning how to trim an aloe vera plant is really about learning how the plant grows. Aloe stores water in its thick leaves, produces new growth from the center, and naturally sheds older outer leaves over time. When you prune with that pattern in mind, trimming becomes easy. Remove dead, damaged, or mature outer leaves with a clean sharp blade. Cut close to the base. Avoid the central growth. Drain and rinse harvested leaves before collecting gel. Most importantly, do not overdo it.
A well-trimmed aloe vera plant should still look full, balanced, and healthy when you are finished. Give it bright light, dry soil between waterings, and a pot that drains well, and it will reward you with steady growth, useful gel, and possibly enough pups to start your own small aloe empire.