Table of Contents >> Show >> Hide
- What Is a Blending Stump?
- Why Artists Use Blending Stumps
- How to Use a Blending Stump Step by Step
- Best Shading Techniques to Pair With a Blending Stump
- Choosing Paper for Better Blending
- How to Clean and Sharpen a Blending Stump
- Common Mistakes When Using Blending Stumps
- When Not to Use a Blending Stump
- Simple Practice Exercises
- Final Thoughts
- Common Beginner Experiences With Blending Stumps
If you have ever looked at a smooth graphite portrait and thought, “Wow, that shading is softer than a marshmallow wearing silk pajamas,” there is a good chance a blending stump helped make it happen. This humble rolled-paper tool does not look glamorous. It looks like a pencil that forgot to bring its graphite to work. But in drawing, a blending stump can be incredibly useful for softening edges, smoothing value transitions, and pushing dry media deeper into the tooth of the paper.
The trick is that a blending stump is not magic. It is not a shortcut for good drawing, and it definitely is not a get-out-of-practice-free card. Used well, it supports solid shading technique. Used badly, it can turn a crisp drawing into a gray fog bank. In this guide, you will learn how to use blending stumps the right way, when to use them, when to put them down, and how to make your shading look intentional instead of accidentally elbow-smeared.
What Is a Blending Stump?
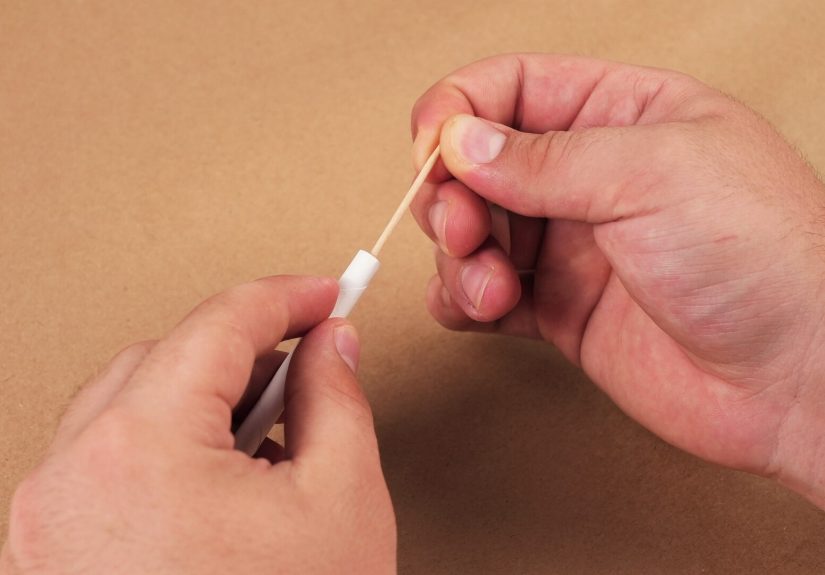
A blending stump is a tightly rolled paper tool with pointed ends, designed for blending dry drawing materials such as graphite, charcoal, and pastel. It is often confused with a tortillon. They are related, but not exactly twins. A blending stump is usually denser and pointed on both ends, while a tortillon is often smaller, looser, and pointed on one end. In practical terms, artists often use stumps for broader, smoother blending and tortillons for tighter details.
Think of a blending stump as a controlled smudger. It helps move pigment already on the paper, soften visible pencil lines, and create smoother transitions between lights, midtones, and shadows. It can also be sharpened and cleaned, which is one reason artists often prefer it over fingers, tissues, or cotton swabs.
Why Artists Use Blending Stumps
Blending stumps are popular because they offer control. When you use your finger to blend, the oils from your skin can transfer to the paper and make graphite harder to erase or rework later. Fingers also tend to flatten everything. A stump gives you a smaller, cleaner point of contact, so you can blend exactly where you want instead of turning the whole drawing into one giant soft-focus filter.
They are especially helpful for:
soft skin tones in portraits, gentle shading on spheres and cylinders, smooth background gradations, charcoal transitions, subtle form modeling, and blending in small areas like eyelids, nostrils, lips, and folds of fabric.
That said, a blending stump works best when it supports structure and value. It should help reveal form, not hide weak drawing underneath. If the proportions are off, the stump will not rescue you. It will simply blend your mistake into a smoother mistake.
How to Use a Blending Stump Step by Step
1. Start With a Good Base Layer
A blending stump should not be the first thing touching your paper. Lay down graphite or charcoal first using light, even shading. Work gradually. If you go in too dark too fast, blending can create a slick, muddy patch that is hard to control. Begin with lighter layers and build value slowly.
This is why many artists practice value scales and gradients before tackling finished drawings. If you can control your light-to-dark transitions with a pencil, the stump becomes a helpful assistant instead of a desperate rescue team.
2. Choose the Right Stump Size
Use a large stump for broad areas like backgrounds, cheeks, or drapery shadows. Use a small stump for details like eyelashes, eye sockets, reflected highlights, or tight corners around features. A giant stump on a tiny drawing is like trying to frost a cupcake with a snow shovel. Technically possible. Emotionally upsetting.
3. Blend With Light Pressure
Use gentle pressure and move the stump in small circles, short sweeps, or strokes that follow the shape of the form. Do not mash the tip into the paper. Pressing too hard can burnish the surface, flatten the paper tooth, and make it harder to add more graphite later.
If you are shading a round object, let the motion support that roundness. If you are blending fabric folds, follow the direction of the fold. If you are drawing an iris, pull the stump in the same direction as the pencil marks so the texture still reads naturally.
4. Blend Selectively, Not Everywhere
One of the biggest beginner mistakes is blending the entire drawing. Not every mark should be softened. Sharp edges, visible pencil texture, and crisp transitions are part of what makes a drawing feel alive. Blend only where softness improves the form or where the paper texture is distracting.
A good rule is this: preserve variety. Let some edges stay hard, let some shading stay textured, and let some passages remain visibly drawn. Realistic drawing is not about making everything equally smooth. It is about controlling where the eye goes.
5. Rebuild the Drawing After Blending
Blending often lightens contrast or softens dark accents. That is normal. After using the stump, go back in with your pencil or charcoal to restore the darkest darks, reinforce important edges, and add selective texture. The best results usually come from layering: draw, blend, redraw, lift highlights, and refine.
In other words, do not stop at the smudge. The smudge is the middle of the story, not the ending.
Best Shading Techniques to Pair With a Blending Stump
Layered Value Building
Light layers are your best friend. Build tone with multiple passes instead of trying to get full darkness in one dramatic pencil attack. This keeps your drawing flexible and gives the blending stump something workable without grinding graphite into the paper.
Value Scales and Gradients
Practice a simple gradient from white paper to your darkest graphite. Then use a stump to soften the transitions while keeping the values distinct. This teaches you a key lesson: blending should improve gradation, not erase it. If all the boxes in your value scale start looking the same, the stump has gone rogue.
Directional Shading
Before blending, shade in a way that supports the object’s form. For example, curved strokes around a cheek or rounded vase help suggest volume. Then blend lightly without destroying the directional logic. The stump should support the illusion of form, not smear it into generic gray mush.
Lifted Highlights
After blending, use a kneaded eraser or precision eraser to lift highlights from graphite. This works beautifully for shiny metal, skin highlights, reflected light, or the little spark that makes an eye look alive instead of existentially tired.
Choosing Paper for Better Blending
Paper matters more than many beginners realize. Smooth paper usually produces cleaner, more polished blends. It is especially useful for graphite portraits and detailed shading. More textured paper grabs more pigment and can create a broken, grainy look. That can be beautiful, especially with charcoal, but it also changes how the stump behaves.
If you want velvety smooth shading, try a smoother drawing surface like Bristol smooth or a fine drawing paper. If you want visible tooth and a rougher, more expressive texture, choose a paper with more surface. Neither is universally better. They just produce different personalities. One says, “soft realism.” The other says, “I enjoy a little drama in my shadows.”
How to Clean and Sharpen a Blending Stump
A dirty stump can ruin light areas fast. If you drag a graphite-loaded stump through a highlight, congratulations, you now have a shadow where no shadow was invited.
To clean the stump, rub it on scrap paper or a sanding block until the tip lightens and sharpens again. Many artists keep separate stumps for different values or media, such as one for graphite, one for charcoal, and one reserved for lighter areas. This saves time and reduces accidental muddy blending.
You can sharpen the tip with a sandpaper block or a craft knife used carefully. The goal is not to create a spear worthy of mythology. You just want a clean, functional point that matches the scale of your drawing.
Common Mistakes When Using Blending Stumps
Using the Stump Like It Is a Pencil
A stump can move leftover graphite around, but it is not a substitute for actually laying down value. If you rely on the dark residue in the tip instead of applying fresh media, your shading will look weak, dirty, and inconsistent.
Blending Too Early
If your drawing is still structurally shaky, blending too soon can lock in confusion. Establish your shapes, values, and major light direction first. Then blend selectively.
Overblending
Not every drawing benefits from ultra-smooth shading. Hair, bark, cloth, stubble, stone, and textured backgrounds often need visible marks. If you blend every inch, you risk losing energy, texture, and edge contrast.
Using Too Much Pressure
Heavy pressure can flatten paper tooth and create shiny, waxy graphite spots. Once that happens, adding more layers becomes harder. Gentle blending is usually more effective and easier to control.
Ignoring Edge Quality
Great drawing is not only about values. It is also about edges. Some edges should fade softly. Others should stay crisp and clear. The blending stump is powerful precisely because it helps you choose which edges whisper and which ones speak up.
When Not to Use a Blending Stump
Sometimes the best use of a blending stump is not using it at all. If your drawing depends on visible line work, hatching, cross-hatching, or gritty texture, blending may weaken the effect. Some artists prefer small circular pencil strokes instead of stump blending because that method keeps more direct control over value and surface quality.
So if your drawing already has beautiful mark-making, do not smooth it out just because you own a stump. Ownership is not a command.
Simple Practice Exercises
Sphere Study
Draw a sphere with a single light source. Shade lightly, blend the midtones and shadow transition, then deepen the core shadow and lift the highlight. This teaches value control and soft edges.
Eye Study
Sketch an eye and use a small stump to soften the iris and eyelid shading. Blend in the same direction as the existing marks so the texture remains believable.
Drapery Study
Draw folded fabric. Blend only the softer shadow transitions, leaving sharper creases and edges alone. This teaches restraint, which every artist needs and every blending stump politely tests.
Value Scale
Create a scale from white to dark graphite. Blend between values without losing separation. It sounds basic, because it is. It is also one of the fastest ways to improve your shading.
Final Thoughts
Blending stumps are simple tools, but they can seriously elevate your drawing when used with intention. The secret is not aggressive smudging. It is control: control of value, edge, texture, pressure, layering, and timing. Start light, blend gently, preserve structure, and always return with your pencil or charcoal to sharpen the story.
If you remember only one thing, let it be this: a blending stump is there to support the drawing, not replace drawing skills. It is a helper, not the hero. The hero is still your eye, your hand, and your ability to notice how light rolls across form. The stump just shows up carrying snacks and making transitions look smoother.
Common Beginner Experiences With Blending Stumps
Most beginners have a very similar first experience with blending stumps. They open a sketch set, spot the mysterious rolled-paper stick, and immediately assume it is the shortcut to realism. Five minutes later, their drawing looks less like a graceful portrait and more like it survived a small dust storm. That is normal. In fact, it is almost a rite of passage.
One common experience is surprise at how little pressure is needed. New artists often expect the stump to behave like a pencil, so they press hard and scrub. The result is usually a dark, flattened patch with very little subtlety. Once they ease up and use lighter pressure, everything changes. Suddenly, the stump begins to soften tone instead of bulldozing it.
Another frequent experience is discovering that the stump gets dirty fast. Artists learn this the hard way when a clean highlight turns gray after one careless swipe. This usually leads to an important habit: testing the stump on scrap paper before touching the actual drawing. It also teaches the value of keeping more than one stump nearby, especially if the drawing includes both delicate light passages and rich dark shadows.
Beginners also tend to overblend at first. There is something oddly satisfying about making scratchy pencil marks disappear, so many people blend every surface equally. Then they step back and realize the drawing has lost its sparkle. Hair looks too soft, fabric looks tired, and features that once had structure now seem vague. This is the moment many artists begin to understand that realism is not about making everything smooth. It is about creating contrast between soft and sharp, blended and unblended, quiet and crisp.
A more encouraging experience comes when artists start using blending stumps in layers. Instead of doing all the shading first and all the blending last, they begin to work in stages. They add a light value, blend gently, redraw into it, lift a highlight, then darken a shadow. This back-and-forth process often produces the first drawing that truly feels dimensional. It is also the point where the stump stops feeling like a novelty and starts feeling like a real tool.
Many people also notice that different papers create completely different blending experiences. On smooth paper, the stump can make graphite look polished and soft. On rougher paper, it may skip across the tooth and leave a grainier result. That discovery can be frustrating at first, but it eventually becomes empowering. Artists learn that the paper is not fighting them; it is simply part of the effect.
Perhaps the most useful experience of all is learning when not to blend. After enough practice, artists begin to enjoy visible pencil strokes, textured shadows, and deliberate mark-making. The blending stump becomes one option among many, not the only answer. And that is usually the turning point. Once you stop trying to blend everything, your drawings start to look more intentional, more confident, and much more alive.