Table of Contents >> Show >> Hide
- Why Cornflakes Make an Awesome Pie Crust
- Ingredients for a Simple Cornflake Pie Crust
- How to Make Cornflake Crumbs (Without Making a Mess)
- Step-by-Step: Simple Cornflake Pie Crust Recipe
- No-Bake vs. Quick-Bake: Choose Your Crunch Level
- How to Prevent a Soggy Cornflake Crust
- Flavor Variations That Actually Make Sense
- What to Fill It With
- Storage and Make-Ahead Tips
- Troubleshooting: Common Cornflake Crust Problems
- Quick Recipe Card: Simple Cornflake Pie Crust
- My Real-Life Cornflake Crust Notes (Experience + Lessons Learned)
- Conclusion
If graham cracker crusts are the reliable sedan of the pie world, a cornflake crust is the fun convertible you borrow for the weekend: loud, crunchy, and
somehow nostalgic even if you can’t remember what you ate yesterday. This is a simple cornflake pie crust recipe that’s fast, forgiving,
and surprisingly versatilesweet enough for pudding pies, sturdy enough for no-bake cheesecakes, and crisp enough to make your fork go “snap” in a
satisfying way.
You’ll learn two routes: a no-bake cornflake crust you chill (great for icebox pies), and a quick-bake cornflake crust
that takes a few minutes in the oven for extra crunch. Along the way, I’ll show you the “pinch test,” how to avoid a soggy bottom, and a few flavor
upgrades that make people ask, “Wait… what is this crust made of?” (That’s your cue to act mysterious.)
Why Cornflakes Make an Awesome Pie Crust
Cornflakes bring a light, toasty crispness that cookie crumbs don’t always deliver. When crushed and mixed with melted butter (and a little sugar), they
behave like a classic press-in pie crustno rolling pin, no flour on your shirt, no existential pastry crisis.
Best pies for a cornflake crust
- Icebox pies (lemon, lime, chocolate, peanut butter, strawberry)
- Pudding or cream pies (vanilla, coconut, banana)
- No-bake cheesecake (especially citrus or berry)
- Lightly baked custard-style fillings if you pre-bake the crust first
Ingredients for a Simple Cornflake Pie Crust
This recipe is intentionally minimal. If you can operate a measuring cup and resist eating the cornflakes straight from the box (no judgment), you’re good.
Base ingredients (fits one 9-inch pie plate)
- 1 1/2 cups cornflake crumbs (measured after crushing)
- 1/3 cup granulated sugar (reduce to 1/4 cup for less-sweet fillings)
- 1/3 cup (about 5 1/3 tbsp) unsalted butter, melted
- Pinch of salt (optional, but highly recommended for balance)
Optional upgrades
- 1/2 tsp cinnamon (great with apple, pumpkin, or anything “cozy”)
- 1 tsp vanilla (stirs into melted butter)
- 1/3 to 1/2 cup finely chopped nuts (almonds or pecans add extra crunch)
- 1–2 tbsp brown sugar (swap for part of the white sugar for a caramel note)
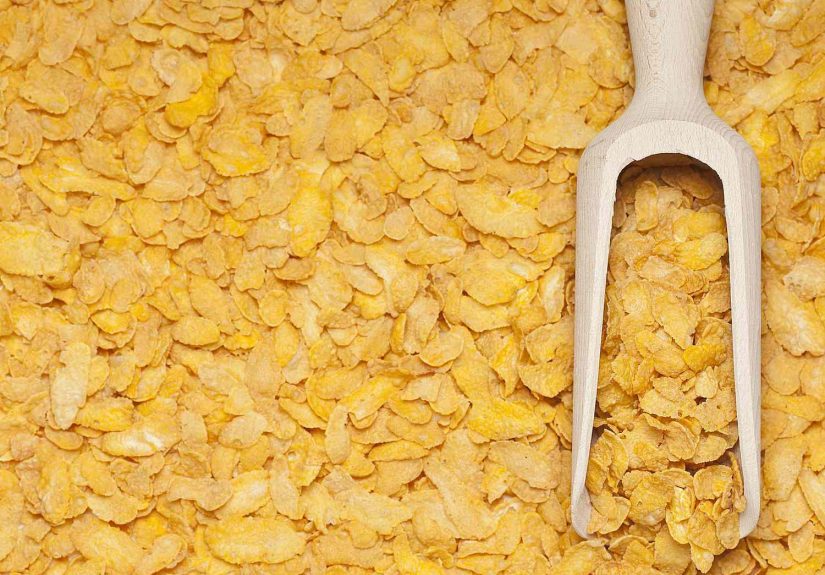
How to Make Cornflake Crumbs (Without Making a Mess)
Option A: Food processor (fastest)
- Add cornflakes and pulse until you get a mix of fine crumbs and a few tiny crunchy bits.
- Measure crumbs after processing so your crust isn’t accidentally too dry.
Option B: Zip-top bag (most therapeutic)
- Put cornflakes in a zip-top bag, press out air, seal.
- Crush with a rolling pin, skillet, or your life choices.
- Stop when crumbs look like coarse sand with a few pebble-sized pieces.
Pro tip: If your crumbs are ultra-fine powder, the crust can turn dense. If your crumbs are too chunky, the crust can crumble (ironically).
Aim for “beach sand,” not “gravel driveway.”
Step-by-Step: Simple Cornflake Pie Crust Recipe
Step 1: Mix
In a medium bowl, stir together the cornflake crumbs, sugar, and salt. Drizzle in the melted butter and mix until the crumbs look evenly moistened.
Step 2: The Pinch Test (your crust’s lie detector)
Grab a small handful and pinch it between your fingers. If it holds together like damp sand, you’re ready. If it falls apart instantly, add melted butter
1 teaspoon at a time. If it feels greasy and slumps, add a tablespoon of crumbs.
Step 3: Press
Pour the mixture into a 9-inch pie plate. Press firmly into the bottom first, then up the sides. Use the flat bottom of a measuring cup to compact the
crustthis helps it slice cleanly instead of “crumbling artistically.”
No-Bake vs. Quick-Bake: Choose Your Crunch Level
Method 1: No-bake (chill and fill)
- After pressing the crust, refrigerate for at least 30–60 minutes (2 hours is even better).
- Fill with your no-bake filling and chill until set.
Best for: icebox pies, pudding pies, no-bake cheesecake. The texture is slightly chewier and more “vintage dessert table,” in a good way.
Method 2: Quick-bake (extra crisp)
- Preheat oven to 350°F.
- Bake the pressed crust for 5–9 minutes, just until lightly toasted and fragrant.
- Cool completely before filling.
Best for: cream pies, custardy fillings, anything where you want maximum crunch and less risk of sogginess.
How to Prevent a Soggy Cornflake Crust
Soggy crust happens when moisture moves from filling to crust. Cornflakes are crunchy… until they aren’t. Here’s how to keep them in their crisp era.
Use one (or more) of these tactics
- Quick-bake the crust for a toasted, sturdier base.
- Cool fully before adding fillingwarm crust invites steam, and steam is basically a soggy-crust intern.
- Add a “barrier” layer: melted chocolate (chill to set) or a thin swipe of nut butter works great for creamy pies.
- Fill close to serving time for delicate fillings, especially if your pie will sit overnight.
Flavor Variations That Actually Make Sense
1) Cinnamon-Maple Cornflake Crust
Add 1/2 teaspoon cinnamon and swap 1 tablespoon of sugar for 1 tablespoon maple sugar (or use brown sugar). Perfect for pumpkin, apple, or chai-style pies.
2) Toasted Nut Cornflake Crust
Stir in 1/3 cup finely chopped toasted almonds or pecans. This adds structure and turns the crust into a “people will remember this” crust.
3) Chocolate-Sealed Cornflake Crust
After baking and cooling, brush on 2–3 ounces of melted semisweet chocolate. Chill until firm, then fill. This is elite for peanut butter or banana cream.
4) Less-Sweet, More-Savory (Yes, Really)
Reduce sugar to 1–2 tablespoons and add a pinch more salt. Use for a sweet-and-salty vibe with caramel, chocolate, or certain cheesecake flavors.
What to Fill It With
Need ideas? Here are fillings that play nicely with the cornflake crunch:
- Lemon or key lime icebox pie (bright citrus + toasty flakes = magic)
- Chocolate pudding pie with whipped cream and shaved chocolate
- Banana cream with extra banana slices right before serving
- No-bake cheesecake topped with berries
- Peanut butter mousse pie (if you like desserts that feel like a hug)
Storage and Make-Ahead Tips
Can I make the crust ahead?
Yes. For the no-bake version, press and chill up to 2 days (covered) before filling. For baked crusts, bake and cool, then cover tightly
and store at room temp for 1 day or refrigerate for 2–3 days.
Can I freeze it?
You can freeze an unfilled crust for up to 1 month. Wrap the pie plate well (plastic wrap + foil). Thaw in the fridge before filling.
Crunch is best when not repeatedly thawed and refrozenyour crust has boundaries.
Troubleshooting: Common Cornflake Crust Problems
“My crust crumbled when I sliced it.”
Usually: not enough butter, not pressed firmly enough, or sliced before fully chilled. Next time, compact harder and chill longer. Also, use a sharp knife
and confident energy.
“My crust is too hard.”
This can happen if crumbs were pulverized super fine and the crust was over-baked. Keep some texture in the crumbs and bake just until lightly toasted.
“It tastes bland.”
Add a pinch of salt, a splash of vanilla, or a small cinnamon hit. Cornflakes are polite; they sometimes need an invitation to be interesting.
Quick Recipe Card: Simple Cornflake Pie Crust
Ingredients
- 1 1/2 cups cornflake crumbs
- 1/3 cup granulated sugar
- 1/3 cup unsalted butter, melted
- Pinch of salt (optional)
Directions
- Mix crumbs, sugar, and salt in a bowl.
- Stir in melted butter until evenly moistened. Do the pinch test.
- Press firmly into a 9-inch pie plate (bottom first, then sides).
-
Choose one:
- No-bake: Chill 30–120 minutes, then fill.
- Quick-bake: Bake at 350°F for 5–9 minutes, cool completely, then fill.
My Real-Life Cornflake Crust Notes (Experience + Lessons Learned)
The first time I made a cornflake crust, I treated it like a graham cracker crust’s weird cousin who shows up unannounced but ends up being the life of the
party. I crushed the flakes with a rolling pin, felt very capable for about thirty seconds, and then learned my first lesson: cornflakes have opinions about
texture. If you crush them into dust, the crust presses beautifullybut it can eat like a pressed sandcastle: sturdy, a little dense, and not as crunchy as
you imagined. If you leave them too chunky, you’ll get excellent crunch… and a crust that may crumble when you lift the first slice, like it’s trying to
become a topping instead of a base.
My “sweet spot” is what I call sand with freckles: mostly fine crumbs with a handful of tiny, irregular bits. When you press that mix into the pan,
it locks together with butter, but it still has enough structure to snap a little when you cut into it. And yes, pressing matters more than you think.
I used to do a gentle pat, because I’m an optimist. Now I press like I’m sealing an envelope that contains a check I really don’t want to write. A flat
measuring cup makes the bottom compact and smooth, which helps the crust slice cleanly and keeps fillings from sneaking into little air pockets.
The bake-or-no-bake question is where my kitchen habits got very honest. For ultra-cold fillings (icebox lemon, whipped mousse, no-bake cheesecake), chilling
works fine and gives the crust a nostalgic, slightly chewy vibe. But if I want “movie-trailer crunch”the kind where you can practically hear the crispnessI
do a quick bake. Five to nine minutes doesn’t sound like much, but it transforms the flavor from “sweet cereal” to “toasty, caramel-adjacent crunch.”
The key is cooling completely. I once added a filling while the crust was still warm and basically invented cornflake pudding paste. Delicious? Sure. Crisp?
Absolutely not.
I also learned that cornflake crust loves a little drama in the form of a barrier layer. Melted chocolate is the obvious flex: brush it on, chill, then
fill. It’s especially good under peanut butter, banana cream, or anything with a lot of dairy. If you’re not in a chocolate mood, a thin swipe of nut butter
works toopeanut butter under chocolate mousse is a very “I came to win” combination. For citrus pies, I usually skip heavy barriers and lean on baking the
crust, because citrus fillings can be a bit wet and I’d rather solve the problem before it starts.
When it comes to sweetness, I don’t treat the sugar measurement as a lawmore like a friendly guideline. If the filling is very sweet (think caramel or
chocolate fudge situations), I reduce the sugar in the crust slightly and add a pinch more salt. That salty edge makes the cornflake flavor pop and keeps the
whole pie from tasting like it’s trying to bribe you. If the filling is tart (lemon, key lime, passion fruit), I keep the sugar closer to the full amount so
the crust balances the zing.
Last thing: cornflake crust is secretly the best “use what you have” crust. I’ve made it with generic cornflakes, with leftover cereal that was going a bit
stale (stale is actually fineless moisture), and with a handful of chopped nuts when I wanted it to feel fancy. It’s the crust I make when I want pie
without the commitment of pie dough. It shows up fast, it behaves well if you treat it firmly, and it makes people weirdly happyprobably because it tastes
like a throwback, but with enough crunch to feel new. If you’re the kind of person who likes recipes that leave room for personality, cornflake crust is
basically your edible sidekick.
Conclusion
A simple cornflake pie crust recipe checks all the boxes: fast prep, minimal ingredients, big crunch, and flexibility for no-bake or baked
desserts. Crush, mix, press, and choose your adventure (chill for easy, bake for extra crisp). Once you’ve made it once, you’ll start eyeing every pudding,
mousse, and icebox filling like, “You. Get in my crust.”