Table of Contents >> Show >> Hide
- What Is the Acupuncturist Event in Umamusume?
- All Acupuncturist Event Choices, Explained
- Which Acupuncturist Option Is Actually Best?
- Why the Acupuncturist Event Matters More Than It First Appears
- Common Mistakes Players Make
- Final Verdict: What Should You Choose?
- Player Experience: What the Acupuncturist Event Feels Like in Real Runs
If you have spent more than ten minutes in Umamusume: Pretty Derby, you already know this game has two favorite hobbies: making you feel brilliant and making you feel like a raccoon who just knocked over its own trash can. The Acupuncturist event lives right in that sweet spot. It shows up, offers suspiciously dramatic chakra choices, and dares you to gamble your run on vibes, needles, and questionable confidence.
So what exactly is the Acupuncturist event? Is it worth taking the risk? And why do experienced players talk about Charm Chakra and Winning Chakra like they are discussing stock options during a market panic? Let’s break it all down in plain English.
What Is the Acupuncturist Event in Umamusume?
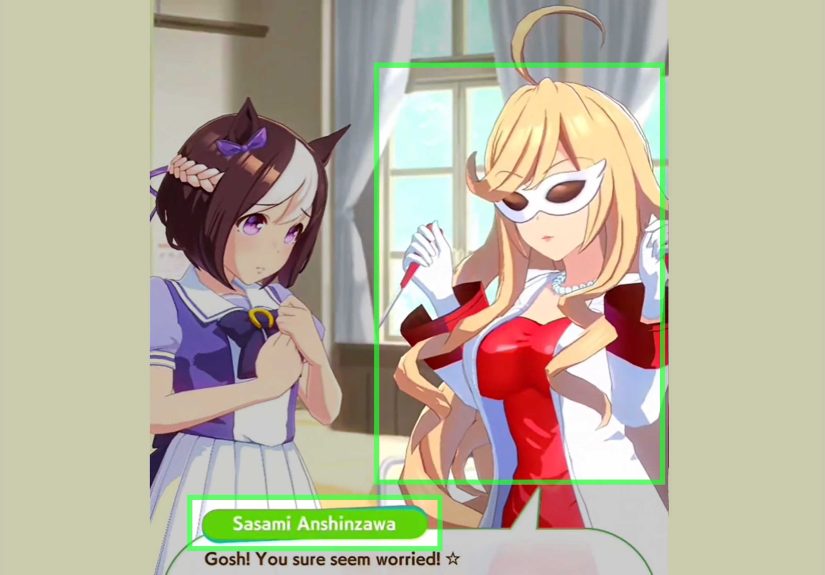
The Acupuncturist event is a random Career Mode event featuring Sasami Anshinzawa, the game’s wonderfully sketchy, chaos-powered needle specialist. She appears at random during a run and offers your trainee several “chakra” options. Each one has a possible upside and a possible downside, except for the safe exit option, which gives a small guaranteed reward.
That is why players remember this event so vividly. It is not just another flavor-text pop-up. It can seriously affect your training pace, mood, energy economy, support bonding, and even your long-term skill plan. In a game where every turn matters, one weird acupuncture appointment can feel like destiny wearing a lab coat.
Most guides place the event’s appearance rate in the low-double-digit range, roughly around 10% to 20% per Career run. In other words, you will not see it every time, but you will see it often enough that it pays to know what you are doing before the needles come out.
All Acupuncturist Event Choices, Explained
1. Strength Chakra
This is the “go big or go home and cry in the stables” option. On success, you get a juicy boost of +20 to all stats. That sounds fantastic, because it is. A full-stat increase is one of the juiciest possible rewards in a game built around squeezing value out of every turn.
The problem is the failure state. If Strength Chakra goes badly, you can lose mood, lose stats across the board, and pick up Night Owl, a bad condition that can chip away at your energy or mood later. In practical terms, this is the event’s high-volatility, low-forgiveness play.
Best use case: You are already behind, your run is shaky, and you need a miracle more than stability.
Worst use case: Your run is smooth, your support bonds are developing nicely, and you would prefer not to set your own furniture on fire.
2. Winning Chakra
Winning Chakra is the event’s most straightforward skill play. On success, it gives recovery skills such as Corner Recovery and Straightaway Recovery. Those are useful because stamina management is one of the quiet run-killers in Umamusume. Your trainee can look amazing on paper, then completely run out of gas and lose to someone whose stat sheet looks like it was assembled during a coffee break.
The downside is still real, but cleaner than the Strength Chakra disaster package. If it fails, you typically lose energy and mood, but you do not usually get hit with the nastier status baggage tied to some other options.
Best use case: Mid-to-late run, especially if your build wants stamina recovery and you have not secured enough sustain skills yet.
Why players like it: It helps stabilize race performance without requiring a giant stat gamble.
3. Health Chakra
Health Chakra is the “please rescue this run from accumulated nonsense” option. On success, it can increase maximum energy, restore a chunk of current energy, and remove negative conditions. That combination is excellent, especially early or mid-run when bad conditions can quietly snowball into missed training value.
If it fails, though, you can lose energy, lose mood, and gain Practice Poor, which increases your chance of training failure. That is a rude outcome in a game where low energy already makes your training turns feel like loaded dice.
Best use case: You are carrying a bad condition, your energy situation is ugly, or you want to set yourself up for a cleaner training block.
Why it matters: Unlike flashy stat spikes, energy and condition control often pay off over several future turns. Health Chakra is not glamorous, but it can save a run from death by a thousand annoying penalties.
4. Charm Chakra
Charm Chakra is the option that experienced players often praise, and for good reason. On success, it gives energy, a mood increase, and the Charming condition. Charming boosts friendship bond gain with supports, which sounds nice in theory and is downright nasty in practicein a good way.
Why? Because support bonding is one of the main engines of a strong Career run. The faster you build friendship, the sooner you unlock stronger support synergy and “rainbow” training opportunities. That means better stat gains, better turn efficiency, and a smoother path to a powerful build. In other words, Charm Chakra is not just a reward for the current turn; it can improve the rest of the run.
Its failure state is still unpleasant, usually involving lost energy, lower mood, and sometimes Practice Poor, but compared with Strength Chakra’s brutal stat crash, Charm Chakra is usually viewed as a more forgiving gamble.
Best use case: Early in the run, when support bond growth is still a top priority.
Why players love it: It helps your whole Career snowball instead of solving only one immediate problem.
5. “This Is Too Sketchy. Let’s Quit While We Still Can.”
This is the safe option. No drama. No chakra philosophy. No emotional damage. You simply take a small energy gain and walk away with your kneecaps, dignity, and future intact.
It is not exciting, but sometimes safe is smart. If your run is already humming, you are near a key race, or one bad event would wreck your setup, the guaranteed option is absolutely defensible. Not every decision in Umamusume needs to be a casino visit.
Which Acupuncturist Option Is Actually Best?
The honest answer is that there is no universal best option. The event is context-sensitive, and that is exactly why it sparks so much debate. Still, there are some reliable rules of thumb.
Pick Charm Chakra Early
If the event appears in the early part of a Career run, Charm Chakra is often the best overall value. The reason is simple: early bond acceleration matters a lot. Faster support friendship means faster access to better training, better skill hints, and stronger tempo for the rest of the campaign.
Pick Winning Chakra When Your Build Needs Recovery Skills
If you are training a runner who is vulnerable to stamina problems, Winning Chakra makes a lot of sense. Recovery skills can be worth more than a flashy stat bump if they help you survive key objective races. This is especially true for trainees targeting longer distances or builds that are a little light on natural sustain.
Pick Health Chakra If Your Run Is Messy
If your trainee is carrying a bad condition, sitting on shaky energy, or flirting with a dangerous training schedule, Health Chakra becomes very attractive. It is the cleanup crew option. It may not create a highlight reel, but it can quietly rescue several future turns.
Pick Strength Chakra Only If You Accept Chaos
Strength Chakra is a desperation play or a gambler’s play. It can absolutely hit. But when it misses, it does not politely miss. It kicks your run down a staircase. Choose it only if your current situation justifies the risk.
Take the Safe Exit If Your Run Is Already Excellent
A guaranteed energy bump is boring, yes. It is also useful when you are already ahead. The worst mistake in Umamusume is sometimes getting greedy when a clean, winning line is already right in front of you.
Why the Acupuncturist Event Matters More Than It First Appears
What makes this event so interesting is that it touches multiple hidden currencies at once. In Umamusume, raw stats matter, sure. But so do energy, mood, conditions, support friendship, and skill access. The Acupuncturist event pokes all of those systems at once, which is why it can feel much bigger than a single pop-up choice.
For example, gaining Charming early can indirectly create several stronger training turns later. Likewise, curing a bad condition through Health Chakra can reduce future failures and protect your schedule. On the other hand, eating a bad outcome can force extra Rest turns, weaken a critical race window, or delay your support bond progression.
That is the real lesson: the Acupuncturist event is not only about “What do I gain right now?” It is also about “What does this do to my next five turns?” Smart players think in that second language.
Common Mistakes Players Make
Treating Every Run the Same
A lot of players look for a single permanent answer, but the best choice depends on the trainee, the support deck, the race goals, and the current shape of your run. Blindly picking the same chakra every time is like wearing rain boots to a beach wedding. Technically possible. Spiritually questionable.
Undervaluing Charm Chakra
Newer players sometimes dismiss Charming because it is not a direct stat spike. That is a mistake. Friendship bond growth is one of the biggest long-term accelerators in the game, and Charming helps you get there faster.
Overvaluing Strength Chakra
“All stats +20” looks irresistible. It is supposed to. That is how the trap works. Unless your run can absorb a nasty failure or truly needs a huge swing, this is often the least efficient risk on the menu.
Forgetting Mood and Energy Are Real Resources
Players sometimes focus only on skills and stats, but mood and energy control the quality of your training turns. A bad failure result is not just a sad number on a screen. It can ripple into weaker training, more downtime, and worse race outcomes.
Final Verdict: What Should You Choose?
If you want the cleanest practical answer, here it is:
Early run: Charm Chakra is usually the smartest high-upside choice.
Need recovery skills: Winning Chakra is often the best tactical pick.
Bad condition or rough energy state: Health Chakra is your repair button.
Need a miracle: Strength Chakra is the reckless lottery ticket.
Already winning and do not want nonsense: take the safe energy option and leave the needles to somebody else.
That is the beauty of the Acupuncturist event. It is memorable not because it has one perfect answer, but because it forces you to think about what your run actually needs. Sometimes that means choosing long-term bond value. Sometimes it means grabbing recovery skills. Sometimes it means surviving with dignity. And sometimes, yes, it means pressing the big red chaos button and hoping destiny enjoys comedy.
Player Experience: What the Acupuncturist Event Feels Like in Real Runs
In actual play, the Acupuncturist event has a way of showing up at the exact moment your confidence starts to become suspicious. You are cruising through Career Mode, your support cards are finally clustering where you want them, your trainee’s mood is decent, and suddenly here comes Sasami Anshinzawa with the energy of someone who absolutely should not be allowed near sharp objects. It is one of the few events in Umamusume: Pretty Derby that instantly changes your posture. Even veteran players stop, stare, and start doing mental math like they are defusing a bomb.
Early in a run, the event often feels oddly hopeful. If you are still building support bonds, Charm Chakra can feel like the jackpot because it promises momentum, not just a one-turn benefit. When that pick succeeds, the rest of the Career can suddenly feel smoother. Your supports start turning orange faster, rainbow training appears earlier, and the run gains that magical “everything is clicking” feeling that makes you think maybe, just maybe, you are a genius. You are probably not. But the game is kind enough to let you feel that way for a while.
Mid-run, the experience becomes much more tactical. By then, players usually know where the pressure points are. Maybe stamina is starting to look scary for upcoming goals. Maybe a bad condition is hanging around like an unwanted party guest. Maybe your energy economy is a mess because you got a little too ambitious during a good training streak. That is when Winning Chakra or Health Chakra starts to feel less like a gamble and more like a calculated business decision made by a very tired sports manager.
Then there is Strength Chakra, the choice that whispers, “What if this works, though?” Every player who has taken it knows the emotional arc. First comes temptation. Then comes rationalization. Then comes either triumph or immediate regret. When it hits, it feels amazing, like the game just handed you a golden ticket and a small parade. When it fails, it feels personal. Suddenly your stats are down, your mood is wrecked, and your trainee looks like she is reconsidering the entire trainer relationship. It is the kind of result that makes you sit back in your chair and say, out loud, to nobody, “Well, that was deeply unwise.”
The safe option has its own emotional flavor too. Choosing the guaranteed energy and walking away can feel boring in the moment, but experienced players know that boring is sometimes beautiful. There is a quiet satisfaction in protecting a strong run instead of feeding it to randomness. It is not flashy, but it is the kind of discipline that wins more often than highlight-reel decisions do.
That is why the Acupuncturist event sticks in people’s memory. It is funny, stressful, strategic, and weirdly dramatic all at once. It captures what makes Umamusume so compelling: success is never only about big stats. It is about timing, judgment, momentum, and knowing when to gamble versus when to keep your horse girl very far away from an enthusiastic stranger with needles.