Table of Contents >> Show >> Hide
- Why White Button Mushrooms Are a Smart Beginner Crop
- What You Need Before You Start
- How to Grow White Button Mushrooms in 13 Steps
- Step 1: Choose Good Spawn From a Reputable Source
- Step 2: Pick the Right Container
- Step 3: Fill the Container With Compost-Based Substrate
- Step 4: Warm the Substrate for the Spawn Run
- Step 5: Add the Spawn Evenly
- Step 6: Keep the Bed Dark, Warm, and Slightly Moist
- Step 7: Watch for White Mycelium
- Step 8: Add a Casing Layer
- Step 9: Lower the Temperature
- Step 10: Maintain Humidity Without Overwatering
- Step 11: Wait for Pins to Form
- Step 12: Harvest at the Right Time
- Step 13: Encourage Additional Flushes
- Common Mistakes That Can Ruin a Good Mushroom Bed
- What Growing White Button Mushrooms Actually Feels Like
- Conclusion
Growing white button mushrooms at home feels a little like running a tiny underground spa. Your crop wants darkness, moisture, warmth, cooler air later on, and a cozy bed of compost. In other words, these mushrooms are high-maintenance only in the way a cat is high-maintenance: they know what they like, and they expect you to figure it out.
The good news is that white button mushrooms are one of the most beginner-friendly edible mushrooms you can grow indoors. They do not need sunlight, they do not demand a huge garden, and they are familiar enough that you will actually use them in soups, omelets, pizza, pasta, and whatever else is happening in your refrigerator at 9 p.m. If you are curious about mushroom growing but not quite ready to transform your garage into a full-scale fungus lab, this is a great place to start.
This guide walks you through the process in 13 practical steps, from choosing spawn to harvesting your first flush. Along the way, you will learn how to avoid common mistakes, keep the growing bed healthy, and give your mushrooms the best possible chance to thrive without turning your project into a compost-scented mystery.
Why White Button Mushrooms Are a Smart Beginner Crop
White button mushrooms are the young form of Agaricus bisporus, the same species that later becomes cremini and portobello if allowed to mature longer. They are popular for a reason: they are mild, versatile, and relatively manageable for home growers. Unlike shiitake mushrooms that prefer wood-based substrates or oysters that love straw, white button mushrooms thrive in compost-rich growing media, especially composted manure blends.
That makes them different from most potted plants you have ever babied. You are not growing leaves, stems, or roots. You are managing fungal life. Instead of seeds, you use spawn. Instead of potting mix, you use a nutrient-dense substrate. Instead of full sun, you aim for darkness, humidity, and stable temperatures. Once that mental switch flips, the whole process makes a lot more sense.
What You Need Before You Start
- White button mushroom spawn or a reliable growing kit
- A shallow tray, wooden box, or plastic container about 6 inches deep
- Composted manure-based mushroom substrate
- Casing material such as damp peat-based mix
- A thermometer
- A spray bottle or mister
- Clean water
- A dark or low-light growing area, such as a basement, closet, or insulated room
- A clean cloth, newspaper, or breathable cover
If this is your first time, buying pre-made button mushroom spawn and prepared substrate is the easiest route. You can make substrate at home, but that is the part where many beginners accidentally create either a science fair or a smell complaint. Starting with ready-to-use materials is faster, cleaner, and much more likely to end in dinner.
How to Grow White Button Mushrooms in 13 Steps
Step 1: Choose Good Spawn From a Reputable Source
Your mushrooms are only as good as the spawn you start with. Always buy from a reputable supplier that clearly labels the species and provides growing instructions. Do not scrape mystery bits from grocery store mushrooms and hope for the best. That is not mushroom cultivation. That is a gamble with compost.
Healthy spawn should look vigorous and well-colonized, not slimy, sour-smelling, or patchy in a suspicious way. When in doubt, fresh commercial spawn beats creative improvisation.
Step 2: Pick the Right Container
White button mushrooms do well in trays or shallow boxes because they spread through the substrate horizontally. A container about 6 inches deep works well. It should be clean, sturdy, and easy to place somewhere with controlled conditions. You do not need a fancy setup. A simple tray on a shelf in a cool basement can work beautifully.
If you use an old container, wash and sanitize it first. Mushrooms are delicious, but so are bacteria and mold, apparently. Keep the competition low.
Step 3: Fill the Container With Compost-Based Substrate
White button mushrooms prefer composted manure-based substrate rather than ordinary garden soil. Fill the container with the prepared substrate, leaving a little space at the top. Gently level the surface without packing it like a brick. The substrate should be moist but not soggy. If water drips out when you squeeze a handful, it is too wet.
This nutrient-rich growing medium is what feeds the fungal network. Think of it as the mushroom version of a stocked pantry. If the pantry is balanced and moist, the mycelium can move in and start doing its thing.
Step 4: Warm the Substrate for the Spawn Run
Once your tray is filled, place it in a warm area so the spawn can colonize the substrate. Many home growers aim for roughly 70 degrees Fahrenheit during this stage. The goal is steady warmth, not tropical chaos. A seed-starting heat mat or heating pad placed carefully underneath can help, but monitor the temperature closely. Too much heat can damage the developing mycelium.
This stage is sometimes called the spawn run, which sounds dramatic, but really means the fungal growth spreading through the compost.
Step 5: Add the Spawn Evenly
Sprinkle or mix the spawn into the top layer of the substrate according to the supplier’s instructions. Even distribution matters because it helps the mycelium colonize the bed uniformly. If one area gets overloaded and another gets ignored, your tray may fruit unevenly, and nobody wants mushroom real estate with weird zoning laws.
After adding the spawn, lightly press the surface so there is good contact between the spawn and the substrate.
Step 6: Keep the Bed Dark, Warm, and Slightly Moist
Now the waiting game begins. During colonization, keep the tray in a dark or very dim place. Mist lightly as needed so the surface stays damp, but never water so heavily that the bed becomes muddy. Covering the tray loosely with damp newspaper, cloth, or another breathable layer can help hold moisture without sealing in stale air.
You are aiming for consistency here. Sudden swings in temperature or moisture make mushroom growing harder than it needs to be. Fungi are not fans of drama.
Step 7: Watch for White Mycelium
After a couple of weeks, you should begin to see fine, white, threadlike growth spreading across the substrate. That is mycelium, the fungal network that eventually produces mushrooms. If the surface smells earthy and fresh, you are on the right track. If it smells rotten or looks green, black, or slimy, contamination may have crashed the party.
Do not poke it constantly. Admiring from a respectful distance is one of the most underrated gardening skills on earth.
Step 8: Add a Casing Layer
Once the substrate is colonized, add a casing layer over the top. This is usually a damp peat-based mix, often balanced with limestone in professional systems. For the home grower, the main goal is a light, moisture-holding top layer that supports pin formation. Spread it evenly over the mycelium without packing it down too hard.
This layer does not primarily feed the mushrooms. Instead, it helps regulate moisture and creates the right surface conditions for fruiting. Think of it as the mushroom nursery blanket.
Step 9: Lower the Temperature
After casing, move the tray into cooler conditions, around 55 to 60 degrees Fahrenheit if possible. This temperature shift helps trigger fruiting. If the colonization stage is the mushrooms moving in, the cooler stage is them deciding it is finally time to show up in public.
Keep the environment humid, but allow gentle airflow. Stale, overly wet air can encourage disease and surface problems. Mushrooms like moisture, not swamp vibes.
Step 10: Maintain Humidity Without Overwatering
Mist the casing layer lightly whenever it starts to dry out. The surface should remain evenly moist, never crusty and never drenched. A fine mist works much better than pouring water over the tray. Heavy watering can compact the casing, stress the mycelium, and create conditions that invite contamination.
If you are unsure whether the tray needs water, touch the casing gently. It should feel cool and damp, like a wrung-out sponge, not like soup.
Step 11: Wait for Pins to Form
Tiny mushroom beginnings, often called pins, should start to appear after the environment settles into its cooler, moist rhythm. These little bumps are where patience pays off. Once pinning starts, growth can seem surprisingly fast. One day you have weird dots. A few days later, you are squinting at actual mushrooms and feeling like a wizard.
Keep conditions steady during this stage. Avoid moving the tray around too much or letting the casing dry out.
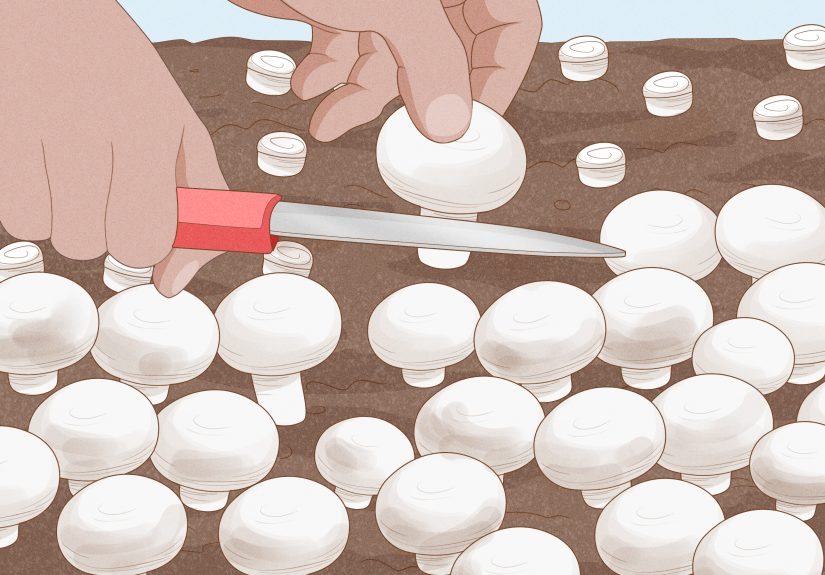
Step 12: Harvest at the Right Time
Harvest white button mushrooms when they are full-sized but still firm, usually before the caps flatten out too much. Many growers like to pick them when the veil under the cap is still mostly intact or just beginning to loosen. Gently twist the mushroom out or cut it cleanly with a sharp knife, depending on your preference and the instructions for your setup.
Try not to yank them aggressively. You are harvesting dinner, not starting a lawn mower. Clean removal protects nearby developing mushrooms and helps the bed keep producing.
Step 13: Encourage Additional Flushes
Do not toss the tray after the first harvest. White button mushrooms often produce more than one flush if conditions remain good. Continue to mist lightly, keep the casing moist, and remove any old stems or debris. Yields usually decline over time, but you may get several rounds before the bed is spent.
When the tray stops producing, the leftover material can often be used as a garden amendment outdoors. Your mushrooms may be done fruiting, but the substrate still has value.
Common Mistakes That Can Ruin a Good Mushroom Bed
Using regular potting soil: White button mushrooms want compost-rich substrate, not ordinary houseplant soil.
Overwatering: This is probably the classic beginner mistake. Wet does not mean soaked.
Ignoring temperature shifts: Warm for colonization, cooler for fruiting. Mushrooms notice the difference even if you do not.
Poor hygiene: Dirty containers, dirty hands, and dirty tools increase the chance of contamination.
Too much light or heat: They do not need direct sun, and they definitely do not want to roast near a heater.
What Growing White Button Mushrooms Actually Feels Like
Growing white button mushrooms at home is not hard in the same way building a deck is hard. It is hard in the way baking bread can be hard: the ingredients are simple, but timing, temperature, and moisture matter more than your confidence level. The first time I think about mushroom growing, I imagine a dramatic reveal, like one tray and suddenly I am supplying an entire neighborhood pizza party. Real life is less glamorous and more educational, which honestly is part of the fun.
One of the first lessons people learn is that mushroom growing rewards observation more than impatience. You set up the tray, tuck it into a dark corner, and then begin checking on it with the intensity of a detective on a cold case. For days, nothing looks different. Then suddenly, a faint white web appears. That moment is weirdly exciting. It feels like the project has finally answered you back.
Another common experience is realizing that moisture is trickier than it sounds. Most beginners assume more water equals more growth. Mushrooms politely disagree. Too little moisture dries out the casing layer, but too much turns the surface soggy and can lead to disease or contamination. Many home growers end up learning the same habit: mist lightly, check often, and resist the urge to “help” too much. The mushroom bed usually does better when you stop fussing over it every fifteen minutes.
Temperature management can be another humbling part of the process. Basements sound ideal until you realize one corner is cooler than another, or the room changes more than expected during the day. Some growers discover they need to move the tray, add a thermometer, or improvise better insulation. This is normal. Mushroom growing often feels like making small adjustments until the fungi decide you have finally earned their cooperation.
There is also the smell. A healthy mushroom bed should smell earthy, rich, and composty, which some people find delightful and others describe as “surprisingly farm-like.” That is part of the charm, assuming the smell stays fresh rather than sour. When the tray is thriving, it develops a kind of quiet presence. It is not decorative like a pothos, but it makes you feel strangely competent every time you walk by.
The best moment, of course, is the first harvest. White button mushrooms tend to appear modestly at first, and then all at once you realize they are ready. Harvesting them feels satisfying in a very practical way because you can clean them, slice them, and cook them almost immediately. Homegrown mushrooms have a freshness that store-bought ones rarely match. They feel firm, lively, and somehow more flavorful, even before they hit the pan with butter.
People also learn that success rarely looks perfect. Maybe the mushrooms are slightly uneven in size. Maybe one flush is fantastic and the next is just decent. Maybe a corner of the tray underperforms for reasons known only to the fungal gods. That does not mean you failed. It means you grew food from fungus in a box in your house, which is objectively impressive.
Over time, the experience becomes less about following rules and more about reading the bed. You start noticing when the casing dries a little faster, when the air feels stale, or when the caps are just the right stage for picking. That is when mushroom growing turns from a project into a skill. And once that happens, you may find yourself looking at every cool, dark corner of your home and thinking, “Interesting. Potential mushroom real estate.”
Conclusion
If you want a productive indoor crop that does not need sunlight and can fit into a small space, white button mushrooms are a great place to start. The process is not complicated, but it does reward careful attention to substrate, casing, temperature, and moisture. Give the mycelium a warm start, shift to cooler fruiting conditions, keep the casing gently moist, and harvest with patience. Do that well, and your reward is a steady supply of fresh mushrooms that taste better because you grew them yourself.
And if your first tray is not perfect, welcome to the club. Mushroom growing is part gardening, part observation, and part learning not to overreact when fungi take their sweet time. Stick with it. The next flush may be even better.