Table of Contents >> Show >> Hide
- Why a New Piercing and Bathwater Don’t Always Get Along
- How to Take a Bath with a New Piercing: 11 Steps
- Step 1: Check your piercing type and how new it is
- Step 2: Wash your hands first (seriously, first)
- Step 3: Clean the bathtub before you fill it
- Step 4: Gather your aftercare supplies before you get in
- Step 5: Keep the piercing out of the water if possible
- Step 6: Use lukewarm water and keep the bath short
- Step 7: Skip bubble bath, bath bombs, and scented products
- Step 8: Don’t twist, spin, or “check” the jewelry in the tub
- Step 9: Rinse off after the bath (even if you kept it dry)
- Step 10: Do your normal aftercare and dry the area gently
- Step 11: Watch for warning signs after the bath
- Common Bath Mistakes That Slow Piercing Healing
- Bath vs. Shower: What’s Better for a New Piercing?
- Experience-Based Tips: What People Usually Learn the Hard Way (About )
- Conclusion
Got a fresh piercing and now you’re staring at your bathtub like it’s a suspicious swamp? Fair. A new piercing is basically a tiny wound with jewelry in it, which means your usual “long bubble bath and a playlist” routine needs a few upgrades.
The good news: you can take a bath with a new piercing in many cases, but you have to do it carefully. The even better news: it’s not complicated once you know what matters mostclean hands, clean water, less soaking, and zero chaos around the piercing.
This guide walks you through 11 practical steps to bathe safely with a new piercing, reduce your infection risk, and avoid the classic mistakes that slow healing. It also covers what to do after the bath, when to skip the tub entirely, and what warning signs mean it’s time to call a doctor.
Why a New Piercing and Bathwater Don’t Always Get Along
A fresh piercing needs time to heal, and during that time it’s more vulnerable to bacteria, friction, and irritation. That’s why most piercing aftercare advice treats a new piercing like a healing wound, not just a fashion accessory (even if it looks amazing already).
Showers are usually safer than baths because bathwater and tubs can hold bacteria. Add bath bombs, bubble bath, hot water, and a little overconfidence, and suddenly your piercing is having a rough day. If you do choose a bath, the goal is simple: keep the piercing clean, avoid submerging it, and keep the whole process short and gentle.
One more thing before we start: if your professional piercer or healthcare provider gave you site-specific aftercare instructions (for example, for a navel, nipple, or cartilage piercing), follow those first. Placement matters, and healing times vary a lot.
How to Take a Bath with a New Piercing: 11 Steps
Step 1: Check your piercing type and how new it is
Before you run the water, do a quick reality check. A brand-new cartilage piercing (like a helix, tragus, or conch) is usually more sensitive and slower to heal than a basic earlobe piercing. Navel and body piercings can also be harder to keep dry in a tub.
If your piercing is only a few days old, extra caution is smart. If it’s cartilage, be even more careful because cartilage has less blood flow and tends to heal slower. Translation: it gets annoyed more easily and forgives less quickly.
Step 2: Wash your hands first (seriously, first)
Before touching your piercing, jewelry, towel, bandage, or anything near the area, wash your hands well with soap and water. This is one of the easiest ways to prevent infection, and it takes about 20 seconds.
Do this before you “just quickly check” whether the jewelry is still sitting right. Clean hands are non-negotiable for new piercing care.
Step 3: Clean the bathtub before you fill it
If you’re taking a bath with a new piercing, a clean tub matters. Bathtubs can collect soap residue, body oils, and bacteria. Give the tub a proper clean and rinse before use.
You don’t need to turn your bathroom into a surgical suite, but don’t skip this step. A quick wipe is not the same as cleaning. Think “fresh reset,” not “good enough.”
Step 4: Gather your aftercare supplies before you get in
Set yourself up so you’re not rummaging around with wet hands afterward. Place these nearby:
- A clean towel (or better yet, clean paper towels for drying the piercing area)
- Sterile saline wound wash (0.9% sodium chloride) if that’s part of your aftercare plan
- A mild, fragrance-free cleanser (if your piercer recommended gentle washing)
- A clean change of clothes
Skip DIY salt mixes. It’s easy to make them too strong, which can dry out and irritate healing skin.
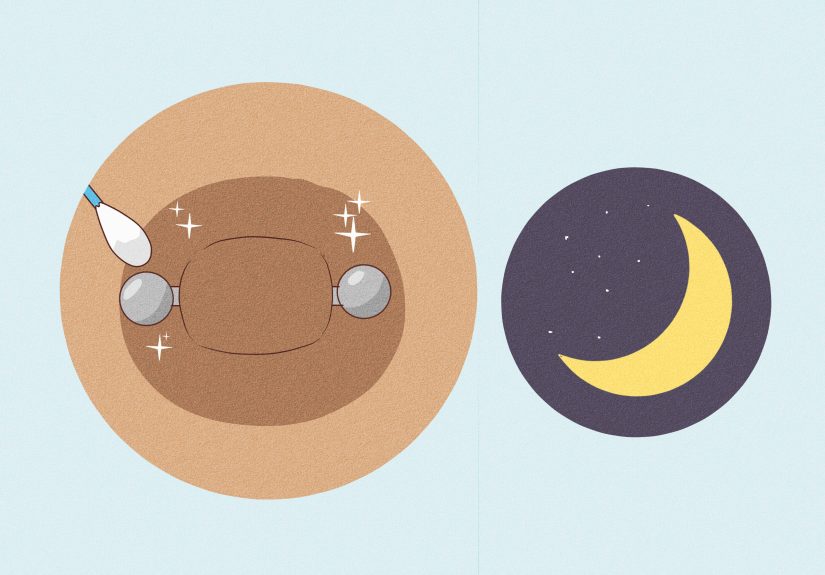
Step 5: Keep the piercing out of the water if possible
This is the big one. The safest approach is to avoid submerging the new piercing. If you can position yourself so the piercing stays above the waterline, do it.
Examples:
- Ear piercing: keep your head above water
- Navel piercing: sit upright and keep the water level lower
- Body piercing: adjust your position so the area stays dry
If you absolutely cannot avoid exposure (certain placements make that tough), some piercers recommend using a waterproof transparent film dressing for temporary protectionbut it has to be applied correctly and removed carefully. If you’re unsure, choose a shower instead.
Step 6: Use lukewarm water and keep the bath short
Hot water feels great, but fresh piercings are not impressed. Very hot water can increase irritation and swelling, and long soaks aren’t your friend during healing.
Use lukewarm water and keep your bath short and practical. This is not the week for a 90-minute “I live here now” soak. Think “clean and out,” not “spa day.”
Step 7: Skip bubble bath, bath bombs, and scented products
Bath products can be rough on a healing piercingespecially anything heavily scented, foamy, dyed, or “tingly.” If the product sounds fun, your new piercing may vote no.
Avoid letting soaps, body wash, shampoo, lotion, or bath additives sit on or around the piercing. Harsh products (including hydrogen peroxide, alcohol, iodine, and strong antibacterial soaps) can damage healing skin and slow recovery.
Step 8: Don’t twist, spin, or “check” the jewelry in the tub
Old advice used to tell people to rotate earrings or twist jewelry while cleaning. Current piercing aftercare guidance is much more conservative: leave it alone unless you’re cleaning it.
Twisting a new piercing can irritate the channel, cause micro-tears, and drag bacteria into the wound. In other words, it feels productive but usually makes healing take longer.
Step 9: Rinse off after the bath (even if you kept it dry)
When you get out, rinse the piercing area gently with clean running water (a quick shower rinse works great). This helps remove any bath residue, cleanser, or accidental splash from the tub water.
This step is especially helpful if you used soap elsewhere in the bath or if the piercing might have been exposed to bathwater for a few seconds. Tiny rinse, big payoff.
Step 10: Do your normal aftercare and dry the area gently
After the bath, follow your normal piercing aftercare routine:
- Use sterile saline wound wash if recommended
- Or gently cleanse with a mild, fragrance-free cleanser and water (depending on your piercer’s guidance)
- Rinse well
- Pat dry with clean paper towel or a clean disposable product
Avoid scrubbing. Avoid rubbing with a used towel. And avoid over-cleaning “just to be safe,” because too much cleaning can irritate the skin too.
Step 11: Watch for warning signs after the bath
Some redness, tenderness, and mild swelling can be normal early on. But certain symptoms suggest your piercing may be irritated or infected, especially if they get worse instead of better.
Watch for:
- Redness that spreads
- Increasing warmth, swelling, or throbbing pain
- Yellow or green pus (or foul-smelling discharge)
- Fever
- Skin swelling over jewelry
If you notice these signs, especially with a cartilage piercing, contact a healthcare provider. Cartilage infections can become serious faster than people expect.
Common Bath Mistakes That Slow Piercing Healing
1) “It was just one quick soak”
Even short submersion can irritate a fresh piercing, especially if the tub wasn’t freshly cleaned. One soak may not cause a problem, but repeat exposure can increase risk.
2) Cleaning too aggressively afterward
People often panic-clean with multiple productssoap, alcohol, peroxide, ointment, then saline “for extra safety.” That’s a lot. Gentle, consistent care works better than a chemistry experiment.
3) Removing jewelry too early
If a piercing looks irritated, some people take the jewelry out right away. Don’t do that unless a healthcare professional tells you to. Removing jewelry too early can trap infection or cause the hole to close.
4) Going from bathtub to hot tub to pool
This is the “I feel fine, so it’s probably healed” mistake. A new piercing may look better before it’s truly healedespecially cartilage. Pools, hot tubs, lakes, and rivers should wait until healing is complete.
Bath vs. Shower: What’s Better for a New Piercing?
For most people, showers are the better choice during the healing period. They’re quicker, easier to keep clean, and less likely to leave the piercing soaking in standing water.
If you love baths, you don’t necessarily have to avoid them foreverjust adjust while your piercing heals. A practical rule is:
- Choose showers by default
- Use baths only when you can keep the piercing out of the water
- Avoid pools, hot tubs, lakes, and oceans until fully healed
Healing timelines vary. Earlobes may heal in weeks, while cartilage can take many months. If you’re unsure whether your piercing is healed enough for full submersion, ask your piercer before testing your luck in a bubble bath.
Experience-Based Tips: What People Usually Learn the Hard Way (About )
The examples below are composite, real-world style situations based on common aftercare patterns people run into with new piercings.
Experience #1: The “It’s Just an Ear Piercing” Bath
A lot of people assume an ear piercing is low maintenance because it’s small. Then they take a long bath, wash their hair, lean back in the water, and accidentally soak the piercing for half the evening. Nothing dramatic happens at firstjust a little redness. The next day it feels warmer, crustier, and more tender.
What usually helps? Going back to basics. Keep the ear out of water, stop touching it, clean it gently once or twice a day, and change the pillowcase. The biggest surprise for most people is that less handling helps more than constant checking. Another big lesson: cartilage piercings can seem okay for days and then get irritated fast if you keep bumping or soaking them.
Experience #2: The Bath Bomb Betrayal
Someone gets a navel piercing, then a few days later takes a bath with a colorful bath bomb because “the piercing isn’t even in the water that much.” The skin around the jewelry gets itchy and puffy afterward. Sometimes that’s bacteria, sometimes irritation, sometimes a reaction to fragrance or dyebut either way, the piercing is not happy.
The fix is usually boring but effective: plain baths only (or better, showers), gentle aftercare, and no scented products near the site. New piercings really do better with a bland routine. Think plain, clean, and consistent. Your piercing does not need lavender glitter foam. It needs peace.
Experience #3: The Over-Cleaning Spiral
This one is super common. A person notices a little crusting (which can be normal) and goes into full panic mode. They clean with soap, then saline, then alcohol, then ointment, then clean again before bed “just in case.” Within two days, the skin is dry, angry, and more irritated than before.
What they learn: a healing piercing is not a stain you can scrub out. Crusting alone does not always mean infection. Gentle cleaning, a good rinse, and leaving the jewelry alone is often the best move. If symptoms worsenspreading redness, heat, pus, feverthat’s when it’s time for medical care, not more random products.
Experience #4: The “It Looked Healed” Pool Day
A few weeks after a lobe piercing (or a couple of months after cartilage), everything looks fine, so the person goes swimming. Then the piercing gets irritated again. This happens because surface healing and full healing are not the same thing. The outside can look calm while the inside is still healing.
The takeaway is simple and worth remembering: healing is a timeline, not a vibe. A piercing that looks okay can still be vulnerable. When in doubt, protect it, keep it dry, and ask your piercer before returning to full soaking, swimming, or hot tubs.
Conclusion
Taking a bath with a new piercing is possible, but it takes a little strategy. The safest move is usually to shower, but if you do bathe, keep the tub clean, keep the piercing out of the water, use gentle aftercare, and watch for signs of infection.
If you remember only one thing, make it this: treat a new piercing like a healing wound, not a finished accessory. A few careful habits now can save you weeks of irritation laterand let your piercing heal the way it’s supposed to.