Table of Contents >> Show >> Hide
- Why Anchoring a Trampoline Matters
- Best Ways to Anchor a Trampoline
- 1. Use a Purpose-Built Trampoline Anchor Kit
- 2. Match the Anchor Type to Your Ground Conditions
- 3. Anchor the Frame Evenly at Multiple Points
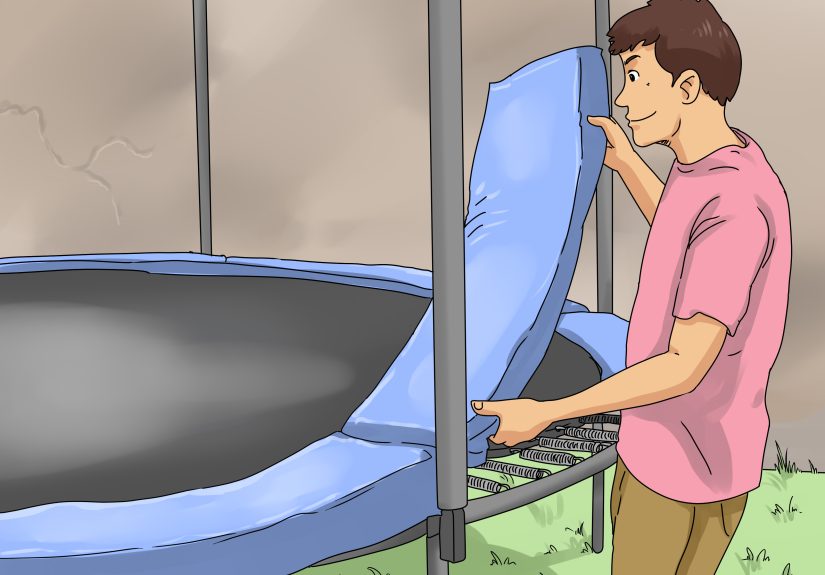
- 4. Attach the Anchors to the Right Part of the Trampoline
- 5. Tighten Straps Firmly, But Do Not Overdo It
- 6. Reduce Wind-Catching Parts Before a Storm
- 7. Disassemble or Relocate the Trampoline for Severe Weather
- How to Anchor a Trampoline Step by Step
- Common Trampoline Anchoring Mistakes to Avoid
- Best Anchoring Approach by Yard Type
- Do Sandbags, Weights, or DIY Tie-Downs Work?
- How Often Should You Check Trampoline Anchors?
- Final Thoughts
- Homeowner Experiences and Practical Lessons From the Backyard
- SEO Tags
A trampoline is supposed to launch laughter, not itself. Yet every year, strong winds turn backyard trampolines into oversized metal frisbees with terrible decision-making skills. If you live anywhere that gets gusty afternoons, storm season drama, or one neighbor who says, “That breeze is nothing,” it is smart to learn how to anchor a trampoline the right way.
This guide breaks down the best ways to anchor a trampoline, when anchors are enough, when they are not, and how to keep your backyard fun from becoming your insurance adjuster’s newest hobby. Whether you have a round trampoline on grass, a large rectangular model in a windy area, or a family trampoline that gets used every weekend, these practical tips will help you secure it more safely and more effectively.
Why Anchoring a Trampoline Matters
Trampolines are light enough to move, wide enough to catch wind, and stubborn enough to wait until 2 a.m. to cause trouble. Once wind gets underneath the frame or pushes against the net enclosure, the trampoline can shift, tip, drag, or lift. That is not just bad for the trampoline. It can damage fences, siding, windows, cars, landscaping, and anything else standing nearby minding its own business.
Anchoring helps reduce movement by holding the frame down at multiple points. A properly installed anchor system can make a major difference in everyday windy conditions and moderate storms. But here is the important part: anchoring is not magic. It lowers risk. It does not make a trampoline storm-proof, hurricane-proof, or “I can ignore the weather forecast” proof.
That is why the best approach is not just buying anchors. It is choosing the right anchor type, installing it correctly, checking it regularly, and knowing when to remove wind-catching parts or take the trampoline down altogether.
Best Ways to Anchor a Trampoline
1. Use a Purpose-Built Trampoline Anchor Kit
The best way to anchor a trampoline is to use an anchor kit designed specifically for trampolines. These kits are made to work with trampoline frames, leg shapes, and outdoor weather conditions. They usually come in one of two common styles:
- Auger-style anchors: These screw into the ground like giant corkscrews and connect to the trampoline with straps.
- U-shaped wind stakes: These are hammered over or beside the trampoline legs to pin the frame down.
Purpose-built kits are usually better than improvised solutions because they are designed to grip soil, distribute tension, and attach to the frame without damaging it. They also tend to be more durable than random hardware-store rope experiments that look fine until the first serious gust arrives.
2. Match the Anchor Type to Your Ground Conditions
Not all yards behave the same. Anchors that hold beautifully in firm clay may feel loose in sandy soil. In soft or loose ground, auger anchors often work better than simple stakes because they twist deeper and create more resistance. In firmer soil, heavy U-stakes can be a good fit, especially if your trampoline has U-shaped legs.
If your yard has especially loose, sandy, or recently disturbed soil, do not assume one basic kit is enough. You may need deeper anchors, more anchor points, or even a second kit. And if your trampoline sits near coastal weather, open fields, or a hilltop with strong exposure, your wind risk is automatically higher.
If the trampoline is going on concrete, pavers, or a mixed surface, do not guess. Use only manufacturer-approved hardware or consult a qualified installer. A bad anchor setup on a hard surface can fail fast and create a bigger mess.
3. Anchor the Frame Evenly at Multiple Points
One lonely anchor on one side of the trampoline is not a strategy. It is optimism. To anchor a trampoline effectively, distribute the tie-down points evenly around the frame. Most families do best when they anchor opposite sides to balance the pull and keep the frame from twisting.
For many backyard trampolines, that means using at least one anchor point per side or around several legs, depending on the design and the manufacturer instructions. Large rectangular trampolines and taller enclosure models often benefit from more anchor points because they present more surface area to the wind.
The goal is simple: keep the frame low, stable, and evenly restrained so wind cannot easily roll or lift one side and start the chain reaction.
4. Attach the Anchors to the Right Part of the Trampoline
This is where many good intentions go wrong. Anchors should secure the main frame, not flimsy accessories or random parts that are easier to reach. The strongest connection point is usually the main frame near the legs or at designated anchor locations shown by the manufacturer.
If you are using straps, run them so they pull the frame downward without rubbing harshly against springs, tearing the pad, or creating a tripping hazard. If you are using wind stakes, place them where the instructions recommend, usually centered over or around the trampoline leg area.
Never assume “close enough” is good enough. A poorly placed anchor can slip, bend, or place stress on the wrong component.
5. Tighten Straps Firmly, But Do Not Overdo It
Once the anchors are in, the straps should be snug and secure. You want tension that holds the trampoline down without distorting the frame. If you ratchet the straps so hard that the frame looks warped, the legs tilt, or the padding shifts, you have gone from “safe” to “why is this shaped like a potato chip?”
Good tension means the trampoline does not wobble excessively at the anchor points and the straps do not flap wildly in the wind. Recheck the tension a day or two after installation, especially after the first rain or a windy afternoon, because the soil can settle and create slack.
6. Reduce Wind-Catching Parts Before a Storm
An enclosure net is great for jumpers and terrible at pretending it is not a sail. In strong winds, the net, shade cover, basketball hoop, weather cover, and other accessories can catch air and increase strain on the frame and anchors.
If a real storm is coming, remove or lower wind-catching parts whenever your manufacturer recommends it. This one step can dramatically reduce pressure on the anchor system. Think of it as telling the wind, “No, you may not borrow my trampoline for aviation experiments.”
7. Disassemble or Relocate the Trampoline for Severe Weather
Anchors help in windy conditions. They are not a substitute for common sense during severe storms, hurricane conditions, or extreme gusts. If a major weather event is expected, the safest option may be to move the trampoline to a more sheltered location, partially disassemble it, or fully take it down and store it.
This is especially important if you live in hurricane-prone regions, open plains, or any area where high-wind warnings are a seasonal personality trait. In short: anchor for daily life, but plan beyond anchors for serious weather.
How to Anchor a Trampoline Step by Step
- Read your trampoline manual first. Frame shapes, leg positions, and approved anchor locations vary by brand and model.
- Choose the right anchor kit. Pick augers for loose soil or high wind areas, or heavy wind stakes if they fit your frame and ground conditions.
- Mark the anchor points. Space them evenly around the trampoline to create balanced hold.
- Install the anchors fully. Screw augers deep into the ground or hammer stakes in according to the product instructions.
- Attach straps to the main frame. Avoid connecting them to weak accessories or sharp contact points.
- Tighten the system. Make it snug, secure, and balanced without bending the frame.
- Test stability. Gently shake the frame to check for obvious movement, slack straps, or uneven pull.
- Inspect after weather. Recheck the anchors after rain, wind, or ground softening.
Common Trampoline Anchoring Mistakes to Avoid
Using Cheap Tent Stakes
Regular tent pegs are often too short or too light for a full-size trampoline. They may hold a camping tarp. They are not always ready for a steel frame plus a windy backyard.
Anchoring Only Two Points
Two points can still allow twisting, rocking, and lift on the unanchored sides. More balanced coverage is usually safer.
Ignoring Soil Quality
Soil is not just dirt. It is the entire success or failure of the setup. Loose soil, soggy ground, and fresh landscaping beds reduce holding power fast.
Leaving the Net Up in Every Storm
The net can become a wind catcher. If storms are coming, deal with the net before the net deals with you.
Assuming Anchors Eliminate All Risk
This is the biggest mistake of all. Anchors reduce movement. They do not guarantee survival in severe weather.
Best Anchoring Approach by Yard Type
Grass Yard With Firm Soil
This is the easiest setup for most homeowners. Either auger anchors or heavy wind stakes can work well. Inspect a few times a year and after major rain.
Sandy or Loose Soil
Use deeper auger anchors and consider extra anchor points. A basic four-point setup may not be enough in a coastal or loose-soil yard.
Clay or Hard-Packed Ground
Installation can be tougher, but holding strength can be excellent once anchors are installed correctly. Just do not force hardware at odd angles.
Windy Open Areas
Use more anchor points, reduce accessories, and be more aggressive about storm prep. If you are buying a new trampoline, a lower-profile or in-ground model may be worth considering.
Patio or Hard Surface Placement
This setup requires extra caution. Use only approved mounting solutions and professional guidance if needed. Never improvise with random masonry hardware unless the manufacturer specifically allows it.
Do Sandbags, Weights, or DIY Tie-Downs Work?
Sometimes, sort of. But they are usually backup options, not the best long-term solution. Sandbags can add weight, and ropes can provide temporary restraint, but they are generally less reliable than a proper anchor kit installed into suitable ground. They may shift, degrade in weather, or fail in the very conditions you were trying to prepare for.
If you need a short-term emergency setup before a storm, extra weight and temporary tie-downs can be better than doing nothing. But for everyday safety, purpose-built anchors are still the smarter move.
How Often Should You Check Trampoline Anchors?
At minimum, inspect them:
- after installation
- after the first strong wind event
- after heavy rain or soil saturation
- at the start of spring and storm season
- any time the trampoline looks tilted, loose, or shifted
Look for bent stakes, pulled-out augers, frayed straps, rust, ground movement, and loosened buckles. A two-minute check can prevent a very expensive neighborhood apology.
Final Thoughts
The best ways to anchor a trampoline all come down to one principle: match the anchoring method to the trampoline, the yard, and the weather. For most families, the smartest solution is a trampoline-specific anchor kit, installed at multiple balanced points, checked regularly, and paired with storm prep when bad weather is on the way.
If you live in a windy area, do not wait until your trampoline starts scooting across the grass like it suddenly remembered an important appointment. Secure it early, maintain it often, and treat anchors as part of a larger safety plan. Done right, anchoring helps protect your trampoline, your yard, and your peace of mind.
Homeowner Experiences and Practical Lessons From the Backyard
Ask enough trampoline owners about wind, and you will notice a pattern. Nobody worries much on the calm Saturday when the kids are bouncing and the lemonade is cold. The worry starts when the forecast says “gusts,” the patio umbrella is already leaning like it has had a long week, and the trampoline suddenly looks less like play equipment and more like a large circular kite with ambition.
One common experience is the family who assumes a heavy trampoline does not need anchoring because it feels sturdy. It sits there all spring, solid as a rock, until the first serious storm pushes it six feet across the yard. Nothing breaks, luckily, but the trampoline twists just enough to scare everyone into finally buying an anchor kit. The lesson is simple: weight alone is not the same thing as stability under wind load.
Another frequent story comes from homeowners who bought a cheap set of stakes online and pushed them halfway into the ground because the soil was hard and dinner was almost ready. For a week, everything looked fine. Then a windy night loosened one corner, the frame shifted, and the straps started rubbing in all the wrong places. The next weekend became a do-over project. Their big takeaway? Half-installed anchors are basically decorative optimism.
People in coastal and open rural areas often learn a tougher version of the same lesson. In those places, anchoring is not a bonus feature. It is part of owning the trampoline. Families there tend to get serious fast: deeper anchors, more frequent checks, and early storm prep. Many also become experts in removing nets, basketball hoops, and covers before the weather gets dramatic. The smart ones do it while the sky is still blue instead of during a sideways rain audition.
There are also homeowners who discover that soil matters more than they expected. In one yard, anchors feel rock solid. In another, the ground stays soft after rain and the same setup starts loosening every few weeks. Those families usually settle into a routine: inspect, tighten, check again, and stop pretending all dirt is created equal. Once they accept that the ground is part of the system, their results improve.
Parents also talk about the peace of mind that comes from a well-anchored trampoline. It is not glamorous. Nobody posts a triumphant social media reel of “look at these properly tensioned straps.” But when the wind picks up and the trampoline stays put, the quiet confidence is real. Good anchoring does not look exciting. That is kind of the point.
Perhaps the most useful experience of all is what long-time owners say after a few seasons: anchoring is not a one-time job. It is maintenance. The people who have the fewest problems are the ones who treat the trampoline like any other outdoor structure. They check the straps, watch the weather, inspect the frame, and make adjustments before something fails. In other words, they do not wait for chaos to become a teacher.
And that may be the best real-world lesson behind all of this. The right anchor kit matters. Proper installation matters. But the habit of paying attention matters just as much. Because in backyard life, as in many things, the easiest repair is the one you never have to make.