Table of Contents >> Show >> Hide
- What Is DIY Glitter Gem Stone Soap?
- Why Melt-and-Pour Soap Is Best for This Project
- Supplies You Need
- Choose Skin-Safe Glitter and Colorants
- Best Color Ideas for Gemstone Soap
- Step-by-Step: How to Make DIY Glitter Gem Stone Soap
- How to Create a Realistic Gemstone Effect
- Common Mistakes to Avoid
- Fragrance Ideas for Glitter Gem Stone Soap
- Packaging Ideas for Handmade Gem Soap
- Can You Sell DIY Glitter Gem Stone Soap?
- Cleaning Up After Soap Making
- Experience Notes: What I Learned Making DIY Glitter Gem Stone Soap
- Conclusion
If regular soap is the sensible white sneaker of the bathroom counter, DIY glitter gem stone soap is the dramatic friend who arrives wearing rhinestone boots and somehow makes everyone else look underdressed. These handmade bars shimmer, glow, and look like tiny treasures pulled from a very glamorous cave. The best part? You do not need a chemistry degree, a soap-making studio, or a wizard license to make them. With melt-and-pour soap base, skin-safe colorants, cosmetic glitter, and a little patience, you can create sparkling gemstone soaps that look boutique-worthy but are surprisingly beginner-friendly.
This guide walks you through how to make DIY glitter gem stone soap from start to finish, including the supplies you need, the safest materials to choose, design ideas, troubleshooting tips, gift packaging suggestions, and practical experience-based advice. Whether you want amethyst-inspired purple soap, rose quartz-style pink bars, emerald green gems, or icy blue crystal soaps, this project is flexible, affordable, and delightfully hard to mess up. Even the “imperfect” cuts usually look like natural stone, which is the crafting equivalent of getting extra credit for being messy.
What Is DIY Glitter Gem Stone Soap?
DIY glitter gem stone soap is usually made with a clear melt-and-pour soap base that is colored, layered, swirled, cut, and shaped to resemble crystals, gemstones, geodes, or polished minerals. Unlike cold process soap, melt-and-pour soap has already gone through saponification, so you simply melt the base, customize it, pour it into molds, and let it harden. That makes it one of the easiest soap-making methods for beginners.
The gemstone effect comes from three main design tricks: transparency, color variation, and angled cutting. Clear glycerin soap gives the bar a glassy, crystal-like appearance. Mica powder, liquid soap colorant, or cosmetic pigment adds depth. Fine cosmetic glitter creates sparkle without making the soap feel like a craft-store explosion. Once the soap sets, trimming the edges into uneven facets makes the bar look more like a hand-cut gem than a plain rectangle.
Why Melt-and-Pour Soap Is Best for This Project
Melt-and-pour soap is ideal for glitter gemstone soap because it is simple, quick, and visually forgiving. Clear soap base captures color beautifully, while white soap base can be used for cloudy layers that mimic quartz, opal, or milky stone. You can re-melt small pieces, pour multiple colors, and embed soap shards inside larger bars to create crystal clusters.
Another advantage is safety. Cold process soap requires handling lye, which demands strict safety gear and careful measuring. Melt-and-pour soap skips that step, making it more approachable for casual crafters, gift makers, and beginners. You still need to be careful with hot soap, sharp tools, and fragrance usage, but the process is much less intimidating.
Supplies You Need
Basic Ingredients
- Clear melt-and-pour soap base
- White melt-and-pour soap base, optional for cloudy stone effects
- Skin-safe mica powder or soap colorant
- Cosmetic-grade glitter or biodegradable cosmetic glitter
- Skin-safe fragrance oil or essential oil approved for soap
- 99% isopropyl alcohol in a spray bottle
Tools
- Microwave-safe measuring cups or heat-safe bowls
- Silicone soap molds
- Sharp knife or soap cutter
- Cutting board
- Small spoons or stir sticks
- Digital scale or measuring spoons
- Plastic wrap or airtight bags for storage
Choose silicone molds whenever possible. They make unmolding easier and reduce the chance of cracking your finished soap. Rectangular molds, loaf molds, cube molds, and round molds all work. If you want soaps that look like raw crystals, a loaf mold is especially useful because you can cut the hardened soap into chunks and shape each one individually.
Choose Skin-Safe Glitter and Colorants
This is the part where sparkle needs supervision. Not all glitter belongs in soap. Craft glitter may look pretty, but it is often made from plastic or metalized materials that are not designed for skin. For DIY glitter gem stone soap, use cosmetic-grade glitter that is labeled safe for bath and body products. Fine glitter usually works better than chunky glitter because it spreads evenly and feels smoother during use.
Mica powder is another favorite for gemstone soap because it creates a luminous shimmer. Purple mica can mimic amethyst, green mica can suggest emerald or jade, blue mica can create aquamarine or sapphire, and pink mica can create rose quartz. For a realistic gem effect, mix two or three shades instead of using one flat color. Real stones rarely look like one solid crayon shade, and your soap should not have to either.
Best Color Ideas for Gemstone Soap
Amethyst Glitter Soap
Use clear soap base with purple mica, a tiny touch of silver shimmer, and fine iridescent glitter. Pour a pale lavender layer first, then a deeper purple layer, and finish with a nearly clear layer for dimension.
Rose Quartz Soap
Combine white soap base with clear soap base to create a soft cloudy pink effect. Use pink mica sparingly, then swirl in a few translucent pieces to make the bar look like polished rose quartz.
Emerald Gem Soap
Use green mica with a small amount of blue or gold shimmer. Cut the soap into angular shapes after it hardens. Emerald-inspired soap looks especially good with sharp edges and deep transparent color.
Aquamarine Crystal Soap
Try pale blue, turquoise, and clear layers with a touch of silver glitter. This style looks clean, fresh, and spa-like, especially when paired with a light ocean, mint, or cucumber fragrance.
Opal-Inspired Glitter Soap
Use mostly clear soap with tiny amounts of white, pink, blue, and violet shimmer. The goal is a soft rainbow flash, not a full unicorn paradeunless, of course, unicorn parade is your brand.
Step-by-Step: How to Make DIY Glitter Gem Stone Soap
Step 1: Cut the Soap Base
Cut your melt-and-pour soap base into small cubes. Smaller pieces melt more evenly and reduce the risk of overheating. Place the cubes in a microwave-safe measuring cup or heat-safe bowl.
Step 2: Melt Slowly
Heat the soap in short bursts of about 20 to 30 seconds, stirring between each round. Do not boil the soap. Overheating can cause moisture loss, bubbles, rubbery texture, and cloudy results. Stop heating when a few small pieces remain, then stir until fully melted.
Step 3: Add Color
Add a small amount of mica powder or soap colorant and stir gently. Start with less than you think you need. You can always add more color, but you cannot easily convince neon purple soap to become “subtle lavender” once it has committed to the drama.
Step 4: Add Glitter
Sprinkle in cosmetic glitter and stir slowly. For a suspended glitter effect, let the soap cool slightly before adding glitter. If the soap is too hot and thin, glitter may sink to the bottom. If it is slightly thicker, the glitter stays distributed more evenly.
Step 5: Add Fragrance
Add only skin-safe fragrance oil or essential oil suitable for soap. A common guideline for melt-and-pour soap is about 0.3 ounces of fragrance per pound of soap base, though exact usage depends on the specific fragrance and manufacturer recommendation. Too much fragrance can make soap soft, oily, or irritating to skin.
Step 6: Pour the First Layer
Pour a thin layer of colored soap into the mold. Spray the top lightly with isopropyl alcohol to pop bubbles. Let it cool until a skin forms on the surface. This layer becomes the first visible depth in your gemstone design.
Step 7: Add More Layers or Soap Shards
Pour another color on top, or add chopped pieces of previously hardened soap to create crystal inclusions. Spray alcohol between layers to help them stick. You can use jagged soap scraps, glittery cubes, or thin translucent slices to imitate natural mineral patterns.
Step 8: Let the Soap Harden
Allow the soap to cool completely at room temperature. Depending on mold size, this may take one to several hours. You can place the mold in the refrigerator briefly to speed things up, but avoid freezing the soap because extreme temperature changes may cause sweating or texture issues.
Step 9: Unmold and Cut Facets
Once the soap is firm, remove it from the mold. Use a sharp knife to trim the edges at random angles. These cuts create a faceted gemstone look. Save the small trimmings; they can be embedded into another batch as sparkly gem dust.
How to Create a Realistic Gemstone Effect
The secret to realistic DIY glitter gem stone soap is controlled imperfection. Natural crystals are uneven, layered, cloudy, streaked, and full of small surprises. If every bar looks identical, it may look more like candy than stone. Use slightly different shades in each pour. Tilt the mold gently to create diagonal layers. Add soap chunks in uneven sizes. Cut the finished bars at different angles.
For extra depth, make a batch of dark, medium, and light soap in the same color family. Pour them in irregular layers, then chop the finished block into jagged pieces. Embed those pieces into clear soap for a geode-style effect. The clear soap acts like glass around the colored crystals, while the glitter catches light from different angles.
Common Mistakes to Avoid
Using Craft Glitter
Craft glitter is for greeting cards, ornaments, and projects that do not touch wet skin repeatedly. Use cosmetic glitter for soap. Your hands deserve sparkle, not scratchy regret.
Overheating the Soap
Too much heat can make melt-and-pour soap dry, bubbly, or cloudy. Use short heating intervals and stir often. Gentle melting gives you smoother, clearer bars.
Adding Too Much Fragrance
More fragrance does not always mean better soap. Excess fragrance can affect texture and may bother sensitive skin. Follow the supplier’s recommended usage rate.
Skipping Alcohol Spray
Isopropyl alcohol helps pop surface bubbles and can help layers adhere. If your layers separate after unmolding, you may not have sprayed enough between pours, or the earlier layer may have cooled too much before the next layer was added.
Cutting Too Soon
If the soap is still warm or soft, it may dent instead of slice cleanly. Let it harden fully before shaping. Patience is not glamorous, but neither is a squashed emerald.
Fragrance Ideas for Glitter Gem Stone Soap
Fragrance can turn a pretty bar into a full sensory experience. For amethyst soap, lavender, vanilla, or violet scents work beautifully. Emerald soap pairs well with eucalyptus, green tea, basil, or cucumber. Rose quartz soap feels natural with rose, peony, grapefruit, or soft musk. Aquamarine soap is lovely with ocean breeze, mint, aloe, or citrus. For opal soap, try pear, white tea, or a clean spa fragrance.
Keep the scent balanced. Gemstone soap already has a strong visual personality, so the fragrance should support the theme instead of wrestling it to the ground. When in doubt, choose a light fresh scent that works for everyday handwashing.
Packaging Ideas for Handmade Gem Soap
Because melt-and-pour soap contains glycerin, it can attract moisture from the air. Wrap each bar tightly in plastic wrap, shrink wrap, or an airtight cello bag after it has fully hardened. This helps prevent sweating and keeps the surface glossy.
For gifting, place each soap in a small kraft box, organza bag, or clear pouch with a label. Add a tag that says “Handmade Glitter Gem Stone Soap” and list the scent. For party favors, match the color to the event theme. Pink rose quartz soaps are charming for bridal showers, purple amethyst soaps feel magical for birthdays, and blue crystal soaps are perfect for beach-themed gifts.
Can You Sell DIY Glitter Gem Stone Soap?
You can sell handmade soap, but you need to be careful with labeling, ingredients, claims, and local business rules. Avoid making medical claims such as “heals eczema,” “treats acne,” or “cures dry skin” unless you understand the legal requirements for cosmetic and drug claims. A safer description would be “handmade scented soap with cosmetic glitter” or “decorative glycerin soap for handwashing.”
If selling, keep records of your formula, supplier information, fragrance usage rates, batch dates, and ingredient list. Consistency matters. Customers may forgive one slightly crooked facet, but they will not love a soap that smells different every time they reorder.
Cleaning Up After Soap Making
Cleanup is refreshingly simple compared with many craft projects. Let leftover soap harden, then peel it out of containers or scrape it off tools. Wash bowls and utensils with warm water. Wipe glitter carefully so it does not travel across your kitchen like tiny disco confetti with ambition. Keep soap-making tools separate from food tools if you make soap often, especially when using fragrance oils and colorants.
Experience Notes: What I Learned Making DIY Glitter Gem Stone Soap
The first thing you learn when making DIY glitter gem stone soap is that clear soap base has a mind of its own. It looks perfectly transparent in the measuring cup, then suddenly every bubble in the room decides to move in. A spray bottle of isopropyl alcohol becomes your best friend. Keep it close and spray lightly after every pour. It is the difference between “luxury crystal soap” and “sparkly bar full of tiny trapped air gremlins.”
The second lesson is that color becomes stronger than expected once the soap hardens. A little mica goes a long way. In one batch, a tiny spoonful of purple looked gentle while melted, but after cooling it turned into a soap that could only be described as royal wizard grape. It was still beautiful, but not exactly the soft amethyst look originally planned. Now, the best approach is to color slowly, test a drop on a white plate, and remember that gemstone soap looks more realistic when some layers are pale and others are bold.
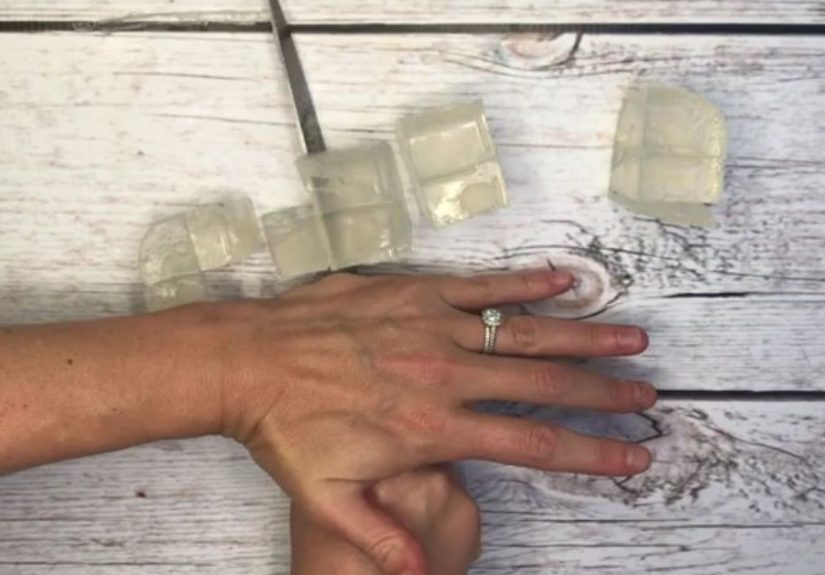
Another useful experience is to make extra soap shards on purpose. Pour a thin sheet of colored soap into a flat mold or silicone tray, let it set, then chop it into rough pieces. These scraps are magic. Add them to clear soap, and suddenly the bar looks like a crystal cluster instead of a simple colored block. The jagged pieces catch light, create depth, and hide small mistakes. Soap scraps are not waste; they are future gemstones waiting for their big break.
Temperature also matters more than beginners expect. If you pour a hot layer over a previous layer that is too soft, the colors may blend completely. Sometimes that creates a dreamy swirl. Other times it creates muddy soap soup. If you wait too long, the layers may separate later. The sweet spot is when the first layer has formed a firm skin but is still slightly warm. Spray with alcohol, pour gently, and avoid dumping the next layer from a great height. Soap appreciates manners.
Cutting the facets is the most satisfying part. Do not aim for perfect symmetry. Real crystals have odd angles, chips, and personality. Trim the corners, slice the top into peaks, and rotate the bar as you work. The small pieces left behind can be sprinkled into another mold. If a bar looks boring, cut one more angle. If it still looks boring, add glitter to the next batch and pretend the first one was a “minimalist mineral study.”
Packaging teaches another important lesson: wrap melt-and-pour soap quickly after it cures. In humid rooms, glycerin soap may develop moisture beads on the surface. This does not usually mean the soap is ruined, but it can make gift soaps look less polished. Airtight wrapping keeps the bars shiny and clean. For gifting, a clear wrap works best because the whole point is to show off the sparkle. Hiding glitter gemstone soap in opaque packaging is like inviting a peacock to a party and asking it to stand in the closet.
Finally, this project is ideal for experimenting in small batches. Make two or three bars at a time instead of committing to a giant loaf right away. Try one fragrance, one glitter level, and one color combination. Take notes. The best-looking soap often comes from happy accidents, but notes help you repeat the accident later and pretend it was skill all along.
Conclusion
DIY glitter gem stone soap is the perfect blend of craft, beauty, and practical gift-making. It looks impressive, but the process is beginner-friendly when you use melt-and-pour soap base, skin-safe glitter, cosmetic colorants, and careful layering. With a few simple techniquesslow melting, light fragrance use, alcohol spray, uneven soap shards, and faceted cuttingyou can create handmade soaps that resemble amethyst, rose quartz, emerald, aquamarine, opal, or your own imaginary luxury mineral.
These soaps are excellent for birthdays, holidays, wedding favors, spa baskets, craft fairs, or simply making your bathroom sink look like it belongs to someone who has their life beautifully organized. Even if your first batch is not perfect, the gemstone style is forgiving. Uneven colors, random cuts, and little sparkles often make the soap look more natural. In other words, this is one DIY project where mistakes can genuinely shine.
Note: This article is written for web publication and is based on practical melt-and-pour soap-making guidance, cosmetic ingredient safety principles, and real handmade soap techniques. Always use skin-safe materials and follow supplier usage recommendations.