Table of Contents >> Show >> Hide
- Why Build a Coffee Table Instead of Buying One?
- Start With a Plan Before You Touch a Saw
- Best Wood for a DIY Coffee Table
- Tools and Materials You Will Likely Need
- How to Build a Coffee Table Step by Step
- Common Mistakes to Avoid
- Easy Upgrades That Make a Coffee Table Look Custom
- What the Experience of Building a Coffee Table Is Really Like
- Conclusion
Building your own coffee table is one of those projects that feels suspiciously fancy for how practical it really is. You get a custom piece of furniture, you control the size, the color, and the style, and you get the quiet bragging rights of saying, “Oh, that old thing? I built it.” Better yet, a coffee table is one of the most approachable furniture builds for a DIYer. It is big enough to look impressive, small enough to finish in a weekend or two, and simple enough that you do not need a medieval guild certificate to pull it off.
If you have been wondering how to build a coffee table without turning your garage into a stress laboratory, this guide will walk you through the entire process. We will cover planning, sizing, wood choice, tools, step-by-step assembly, finishing, and the real-world lessons people learn halfway through the project while staring at a slightly uneven board and pretending everything is fine. By the end, you will have a clear plan for building a DIY coffee table that looks polished, feels sturdy, and fits your living room instead of bullying it.
Why Build a Coffee Table Instead of Buying One?
A store-bought coffee table can absolutely do the job, but building one gives you flexibility that mass-produced furniture often cannot match. You can make it narrow for a small apartment, longer for a sectional, lower for a lounge-style room, or sturdier if your household treats furniture like gym equipment. You can also choose whether you want storage, open shelving, chunky farmhouse legs, sleek hairpin legs, or a clean modern base.
Then there is the money question. A high-quality solid-wood coffee table can get expensive fast. Building your own can be far more budget-friendly, especially if you keep the design simple or use pine, reclaimed lumber, or a good plywood-and-hardwood-trim combination. Even when you splurge on better wood and a durable finish, you usually end up with a piece that feels more personal and more solid than many flat-pack options.
Start With a Plan Before You Touch a Saw
Choose the Right Size
The best coffee table is not just attractive. It fits the room like it was invited. In most living rooms, a coffee table looks and works best when it is roughly in line with the sofa seat height or slightly lower. A common sweet spot is around 16 to 18 inches tall, though you can go a little lower for a relaxed, modern look.
Length matters too. A table that is too short looks like it got lost on the way to the room. A table that is too long turns every shin into a test subject. As a general rule, aim for a length that feels proportional to your sofa. If you are working with a standard couch, something around 36 to 48 inches long often works beautifully. Leave enough room around it for people to move comfortably, and do not forget to measure the walkway before you fall in love with a giant design on paper.
Pick a Style That Matches Your Skill Level
If this is your first furniture project, keep the design honest. A simple rectangular top with four legs and aprons is beginner-friendly, timeless, and hard to mess up beyond repair. If you want something more modern, a slab-style top with hairpin legs is even easier. If you have a little more experience, you can add a lower shelf, angled legs, decorative trim, or joinery details that make woodworkers nod approvingly from across the room.
Good beginner styles include:
- Simple farmhouse coffee table
- Hairpin-leg coffee table
- Modern box coffee table
- Coffee table with a lower shelf
- Reclaimed wood coffee table
Decide What It Needs to Do
A coffee table can be more than a place for mugs, remotes, and that one decorative book nobody has actually opened. Think about function before you build. Do you want hidden storage for blankets? A bottom shelf for baskets? Rounded corners because children move like caffeinated pinballs? A tough topcoat because your household believes coasters are a myth? These decisions affect materials, size, and the kind of finish you will use.
Best Wood for a DIY Coffee Table
The best wood depends on your budget, tools, and patience level.
Pine
Pine is affordable, easy to cut, and beginner-friendly. It is a great choice for painted tables or rustic stained finishes. It dents more easily than hardwood, but for many DIYers, that trade-off is worth it.
Oak
Oak is durable, attractive, and excellent for staining. It has more weight and character than pine, but it also costs more and takes a bit more effort to work with.
Maple
Maple gives a smooth, clean look and is very durable. It can be trickier to stain evenly, so it is often a better pick if you want a natural or lightly tinted finish.
Plywood With Solid Wood Trim
If you want stability and value, plywood can be a smart option for the top or shelf, especially when edged with solid wood. This combination can create a modern, polished result without the cost of full hardwood construction.
Reclaimed Wood
Reclaimed wood adds instant personality. Every knot, dent, and weathered patch tells a story, even if that story is mostly “former fence with a second chance.” Just make sure the wood is dry, clean, and free of hidden fasteners before cutting.
Tools and Materials You Will Likely Need
You do not need a giant pro shop to build a coffee table, but you do need a few basics:
- Tape measure
- Pencil
- Miter saw or circular saw
- Drill/driver
- Pocket-hole jig or drill bits for screws
- Clamps
- Orbital sander or sanding block
- Wood glue
- Screws
- Sandpaper in multiple grits
- Wood filler
- Stain or paint
- Protective topcoat
- Safety glasses and dust mask
If you want to simplify the project even more, pre-made metal legs can save time and give the table a clean, modern look.
How to Build a Coffee Table Step by Step
1. Create a Cut List
Before you cut anything, write down every part and every measurement. For a basic coffee table, that usually includes:
- Tabletop boards or one solid top panel
- Four legs
- Four aprons or stretchers beneath the top
- Optional lower shelf pieces
- Optional trim pieces
This is the stage where smart DIYers avoid expensive mistakes. Double-check your measurements. Then check them again because lumber is cheaper than regret, but not by much.
2. Cut the Wood
Cut each piece carefully and label it. If your cuts are even slightly off, tiny errors can stack up into a table that wobbles like it has emotional baggage. Use a square to verify straight cuts, especially for aprons and tabletop pieces.
3. Dry Fit Everything
Lay out the parts before assembly. This dry fit helps you catch alignment issues, board direction problems, and that one leg piece you somehow cut to the wrong length while feeling very confident. If you are gluing up a tabletop from multiple boards, arrange the grain so the top looks balanced and attractive.
4. Assemble the Tabletop
If your top is made from several boards, apply wood glue along the edges, clamp them together, and make sure the faces stay as flush as possible. Pocket holes, dowels, biscuits, or battens on the underside can help reinforce the top depending on your design. Wipe away glue squeeze-out before it hardens into tomorrow’s sanding problem.
5. Build the Base
For a classic table, attach aprons between the legs. Pocket-hole joinery is popular for a reason: it is straightforward, strong, and beginner-friendly. Predrill where needed to prevent splitting. Check for square as you go. Not at the end. Not “later.” Right then, while you can still fix it without composing a dramatic monologue.
If your table uses metal legs, this part gets easier. Build and finish the top first, then attach the legs according to the hardware pattern. Make sure each leg is positioned evenly from the edges and that the screws are appropriate for the tabletop thickness.
6. Attach the Top to the Base
Once the base is solid, attach the top. Center it carefully so the overhang is even on all sides. Fasten it with screws, figure-eight fasteners, tabletop clips, or another method that suits your construction style. If you are using solid wood, allow for seasonal wood movement rather than locking the top down too rigidly.
7. Sand Like You Mean It
This is where a decent project becomes a great-looking one. Start with a coarser grit if needed to flatten joints or remove saw marks, then move gradually to finer grits for a smooth finish. Sand with the grain, ease any sharp corners, and pay special attention to the tabletop because that surface gets the most attention and abuse.
If you plan to stain the table, good sanding matters even more. A sloppy sanding job can create blotchy color, visible scratches, and an overall finish that says, “close enough,” in the rudest possible tone.
8. Fill Holes and Imperfections
Use wood filler on screw holes, nail holes, or small dents if your design calls for a cleaner look. Let it dry fully, then sand it flush. If you are going for a rustic style, you can leave some character marks in place. Not every nick is a flaw. Sometimes it is just furniture developing a personality.
9. Apply Paint or Stain
Now the table starts looking like something you would actually bring into the house. If you are staining, test the color on scrap wood first. That “warm walnut” can look dramatically different depending on the species. Apply stain evenly, wipe off excess, and let it dry fully before adding a topcoat.
If you are painting, consider primer first, especially on softwood or MDF. Then use a durable furniture paint and allow enough drying time between coats. Sand lightly between coats if needed for a smoother finish.
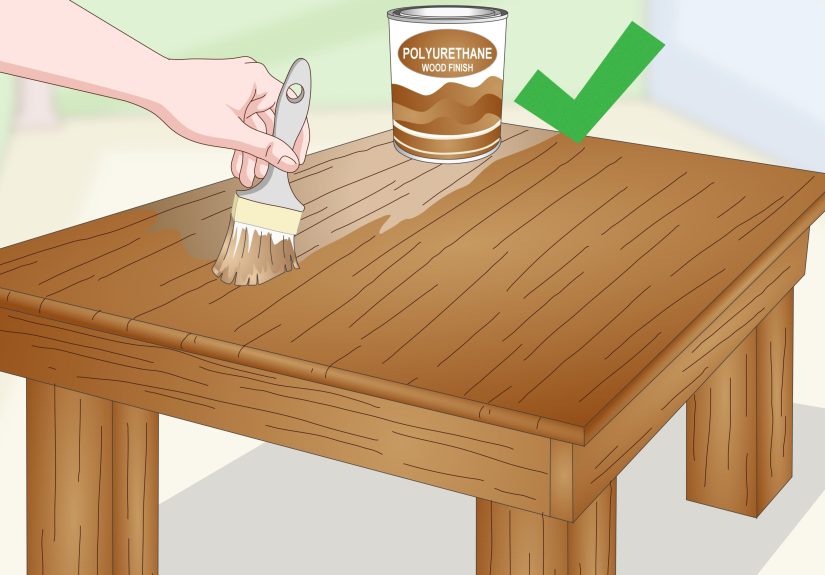
10. Protect It With a Durable Topcoat
A coffee table lives a hard life. It handles drinks, feet, books, snacks, laptops, board games, and the occasional mysterious sticky ring. A proper topcoat is not optional if you want it to last. Polyurethane is a popular choice because it is durable and practical. Water-based versions dry faster and stay clearer; oil-based versions often offer warmer tone and longer working time.
Apply thin, even coats and sand lightly between them when recommended. Do not rush this stage. The finish is what makes a handmade table feel complete rather than merely assembled.
Common Mistakes to Avoid
- Skipping the plan: Eyeballing furniture dimensions is a thrilling way to end up with a table fit for a dollhouse or a hotel lobby.
- Using twisted boards: Check lumber before you buy it. Warped boards fight back.
- Ignoring square: Measure diagonals and use clamps. A base that is out of square creates headaches all the way to final assembly.
- Rushing the finish: Most DIY finish disasters happen because someone was “basically done.”
- Choosing beauty over practicality: A glossy top with no protection may look great for one glorious afternoon.
Easy Upgrades That Make a Coffee Table Look Custom
If you want your DIY coffee table to look less “weekend project” and more “boutique furniture showroom,” small upgrades go a long way:
- Add a lower shelf for baskets or books
- Use contrasting wood tones
- Round over or soften the top edge
- Install hairpin or tapered legs
- Add hidden casters for mobility
- Use a tray-style top or lift-top design
- Try a stained top with painted base
These details do not just improve style. They also help the piece look intentional and tailored to your space.
What the Experience of Building a Coffee Table Is Really Like
Building a coffee table is one of those DIY experiences that teaches you more than the project description promises. At first, it feels simple. It is “just a table,” after all. Then you start measuring your living room and realize coffee tables are oddly emotional. Suddenly you care deeply about whether 42 inches is elegant or excessive, whether the legs should feel chunky or airy, and whether your stain choice says “modern warmth” or “cabin that serves excellent soup.”
The early part of the build is exciting because everything still exists in the magical land of possibility. Fresh boards look clean, straight, and full of promise. You imagine the finished piece in your living room, topped with a candle, a stack of books, and exactly zero clutter. Then the real work begins. You cut your pieces, dry fit them, and discover that wood is a natural material with opinions. One board is slightly bowed. One cut is just a hair off. One clamp refuses to behave. This is the moment many builders learn that patience is not a personality trait. It is a tool.
Then comes the surprise joy of assembly. Once the base starts looking like actual furniture, the project becomes less theoretical and more thrilling. You stop seeing a pile of boards and start seeing your table. It is a fantastic feeling. Even better is the moment you flip the piece upright for the first time. There is always a tiny ceremony in that moment. Sometimes it is graceful. Sometimes it is you crouching awkwardly in the garage whispering, “Please do not wobble.”
Sanding is where the relationship gets serious. Nobody daydreams about sanding, yet it is the stage that quietly decides whether the final piece will look polished or homemade in the wrong way. Builders often say this is where they learn discipline. You cannot fake a good finish over a rough surface. You have to put in the time, and that effort shows.
The finishing stage is pure drama. Stain can make ordinary lumber look rich and expensive in minutes, which feels like legal cheating. Paint can completely shift the mood of the piece. A clear coat gives the table that satisfying finished glow that makes you want to run your hand across the top every six minutes. And once the hardware goes on, or the legs are attached, the project suddenly crosses a line. It is no longer a build. It is furniture.
But the best part of the experience happens later, after the sawdust is gone. You use the table. Your family uses the table. Friends set down drinks on it. Someone compliments it. And you get to say you made it. That changes the way you look at the piece. A handmade coffee table is never just décor. It becomes a story, a skill milestone, and a reminder that making useful things with your own hands is still one of the most satisfying kinds of work there is.
Conclusion
If you want a project that is practical, creative, and deeply satisfying, learning how to build a coffee table is a great place to start. It is approachable for beginners, customizable enough for experienced DIYers, and useful in a way that decorative projects can only dream about. Start with the right dimensions, choose materials that match your budget and style, build carefully, and do not skimp on sanding or finish work. That combination is what turns a few boards and screws into a table you will genuinely be proud to use every day.
Most of all, remember this: perfection is not the goal. A strong, well-finished, thoughtfully sized coffee table with a little handmade character is often far more charming than something factory-perfect and forgettable. Build it well, finish it properly, and let it earn its place in the room one coffee mug at a time.