Table of Contents >> Show >> Hide
- Why Pork Chops Dry Out So Easily
- Choose the Right Pork Chops First
- Seasoning: The Secret That Starts Before the Pan
- How to Fry Pork Chops: Step-by-Step
- Timing Guide for Pan-Fried Pork Chops
- Should You Bread Pork Chops?
- Common Mistakes That Ruin Juicy Pork Chops
- Flavor Variations for Fried Pork Chops
- What to Serve with Fried Pork Chops
- Kitchen Lessons Everyone Learns the Juicy Way
- Final Thoughts
- SEO Tags
Frying pork chops sounds wonderfully simple until dinner turns into a dry, chewy life lesson. One minute you are dreaming of a golden-brown crust and juicy center; the next, you are chewing with the determination of someone trying to win an arm-wrestling match against dinner. The good news is that juicy pork chops are not a restaurant-only miracle. They are a repeatable, weeknight-friendly result when you choose the right cut, season it properly, control the heat, and stop cooking by guesswork.
If you have ever wondered how to fry pork chops so they stay tender inside and beautifully crisp outside, this guide is your skillet-side survival manual. We will cover the best pork chops for pan frying, the biggest mistakes that cause dryness, step-by-step cooking instructions, timing tips, seasoning ideas, and the small details that separate “pretty good” from “why is this so ridiculously good?”
Why Pork Chops Dry Out So Easily
Pork chops are leaner than many people think. That is excellent news for a quick dinner, but it also means there is less margin for error. Leave them on the heat too long, and they go from juicy to disappointing faster than a group text that starts with, “We need to talk.”
The usual culprits are simple: chops that are too thin, a pan that is too cool or way too hot, skipping seasoning time, overcrowding the skillet, and cooking until the meat looks “extra done just to be safe.” Ironically, that last move is often what ruins them. Properly cooked pork chops can be tender, flavorful, and still moist without being undercooked.
Choose the Right Pork Chops First
Best thickness for juicy fried pork chops
If your goal is always-juicy perfection, look for pork chops that are about 3/4 inch to 1 inch thick. Thin chops cook very fast, which is fine when you want dinner in a hurry, but they can dry out before you even locate the tongs. Slightly thicker chops give you more control and a much better chance of getting a browned crust without overcooking the center.
Bone-in vs. boneless
Bone-in pork chops are usually the juicier choice because the bone and surrounding fat help protect the meat during cooking. They also bring more flavor, which is always welcome. Boneless chops are convenient and cook quickly, but they need a little extra attention because they can dry out faster. If you are new to pan-frying pork chops, bone-in center-cut chops are a very forgiving place to start.
Look for some fat, not a pork postcard
The prettiest ultra-lean chops are not always the tastiest. A little marbling and a fat edge are your friends. Fat equals flavor, and flavor is the entire reason any of us are washing a skillet in the first place.
Seasoning: The Secret That Starts Before the Pan
Great fried pork chops do not begin in hot oil. They begin with salt. Seasoning the chops ahead of time gives the meat a head start on flavor and helps it hold onto moisture better as it cooks.
Quick seasoning option
If you are cooking tonight and patience is limited, season both sides generously with kosher salt, black pepper, garlic powder, and a little paprika 30 minutes before frying. Let the chops sit uncovered in the refrigerator or on a rack in a cool kitchen spot for a short rest. Even this small step makes a real difference.
Best option: dry brine
If you have time, dry-brining is the overachiever move. Salt the pork chops and let them rest uncovered in the refrigerator for several hours or overnight. This helps the chops season more deeply, improves moisture retention, and encourages better browning in the pan. In other words, it is a low-effort trick with very high main-character energy.
Should you use a wet brine?
You can, especially for lean boneless chops, but it is not mandatory. A quick wet brine can add moisture, yet dry-brining is usually easier, less messy, and better for building a gorgeous crust. Wet surfaces and crisp browning are not exactly best friends.
How to Fry Pork Chops: Step-by-Step
What you need
- 4 pork chops, 3/4 to 1 inch thick
- Salt and black pepper
- Garlic powder
- Paprika
- 1 to 2 tablespoons neutral oil, such as canola or vegetable oil
- 1 tablespoon butter
- Optional: thyme, rosemary, smashed garlic cloves
- Instant-read thermometer
- Heavy skillet, preferably cast iron or stainless steel
Step 1: Pat the chops dry
Before they go anywhere near the pan, pat the pork chops very dry with paper towels. Moisture on the surface creates steam, and steam is the sworn enemy of a crisp, golden crust. If you want that irresistible sear, dry the chops like you mean it.
Step 2: Season confidently
Use salt, pepper, garlic powder, and paprika as a simple base. You can add onion powder, cayenne, dried sage, or a little brown sugar if you want more personality. Pork plays nicely with savory, smoky, sweet, and herb-forward flavors, so this is an easy place to customize.
Step 3: Heat the skillet properly
Set a heavy skillet over medium-high heat and add oil. Wait until the oil shimmers before adding the chops. Not smokes-like-a-campfire, not sits-there-looking-bored. Shimmering. That is your cue that the pan is ready for browning instead of sad gray steaming.
Step 4: Lay the chops in the pan without crowding
Place the pork chops in the skillet with space between them. If the pan is crowded, the temperature drops and the chops release moisture faster than they brown. Cook in batches if needed. Yes, it is less convenient. Yes, it is worth it.
Step 5: Fry until deeply golden
For chops around 3/4 to 1 inch thick, cook the first side for about 3 to 4 minutes, then flip and cook the second side for another 3 to 4 minutes. Thin chops may need only 2 to 3 minutes per side. Breaded chops often land around 3 to 4 minutes per side, depending on thickness and oil depth.
If the crust is browning too fast, lower the heat slightly. If the chops look pale and sleepy, bump the heat a touch. A good pork chop sizzle should sound confident, not chaotic.
Step 6: Add butter and aromatics near the end
Once both sides have browned, add butter, garlic, and fresh herbs to the pan. Tilt the skillet and spoon the melted butter over the chops for 30 to 60 seconds. This adds flavor, encourages even cooking, and makes your kitchen smell like you absolutely know what you are doing.
Step 7: Check the internal temperature
This is where juicy pork chops are won. Insert an instant-read thermometer into the thickest part of the chop, avoiding the bone. The target is 145°F after resting. Many experienced cooks pull chops from the pan in the low 140s and let carryover heat finish the job, but the final goal is juicy pork that reaches the proper temperature without overshooting into toughness.
Step 8: Rest before serving
Transfer the chops to a plate or rack and let them rest for at least 3 to 5 minutes. Do not slice into them immediately unless you enjoy watching their juices run away. Resting lets the meat reabsorb moisture and finish cooking gently.
Timing Guide for Pan-Fried Pork Chops
Thin pork chops
Thin chops, especially around 1/2 inch, cook fast. Expect roughly 2 to 3 minutes per side over medium-high heat. These are good for breaded or quick weeknight pork chops, but they require your full attention. Blink too long and they are suddenly “historical.”
Medium-thick pork chops
At 3/4 inch to 1 inch, most chops need about 3 to 4 minutes per side, sometimes a little more depending on the pan and starting temperature. This is the sweet spot for juicy skillet pork chops.
Very thick chops
If your chops are thicker than 1 inch, give them a hard sear on both sides, then lower the heat or finish them briefly in the oven. That prevents the outside from getting too dark before the inside is properly cooked.
Should You Bread Pork Chops?
Absolutely, if you want a crisp coating and a little Southern comfort energy. A simple dredge of seasoned flour works beautifully. For more crunch, use flour, egg, and breadcrumbs or panko. Breaded pork chops are delicious, but remember that the crust can make it harder to judge doneness by appearance alone. A thermometer is still your best friend.
For breaded chops, let the coating sit for 5 to 10 minutes before frying so it adheres better. Fry in a shallow layer of hot oil until crisp and golden, then drain briefly on a wire rack. That keeps the crust crunchy instead of soggy.
Common Mistakes That Ruin Juicy Pork Chops
1. Buying ultra-thin chops
They cook too quickly and give you almost no margin for error.
2. Skipping the thermometer
Color is not a perfect doneness test. Timing helps, but temperature is the gold standard.
3. Not drying the meat
Wet chops steam instead of sear. Dry chops brown beautifully.
4. Using a cold pan
A properly heated pan creates crust. A lukewarm pan creates regret.
5. Overcooking “just to be safe”
Modern pork chops do not need to be cooked into oblivion. Cook them carefully, check the temperature, and let them rest.
6. Cutting too soon
Resting is not optional drama. It is part of the recipe.
Flavor Variations for Fried Pork Chops
Classic skillet pork chops
Salt, pepper, garlic powder, paprika, butter, and thyme. Simple, reliable, and never boring.
Southern-style fried pork chops
Buttermilk soak, seasoned flour, a little cayenne, and shallow frying until crisp. Serve with gravy if you want applause.
Garlic herb pork chops
Add rosemary, thyme, butter, and smashed garlic at the end for rich, aromatic flavor.
Sweet and smoky pork chops
Try paprika, black pepper, garlic powder, and a touch of brown sugar for a caramelized edge.
What to Serve with Fried Pork Chops
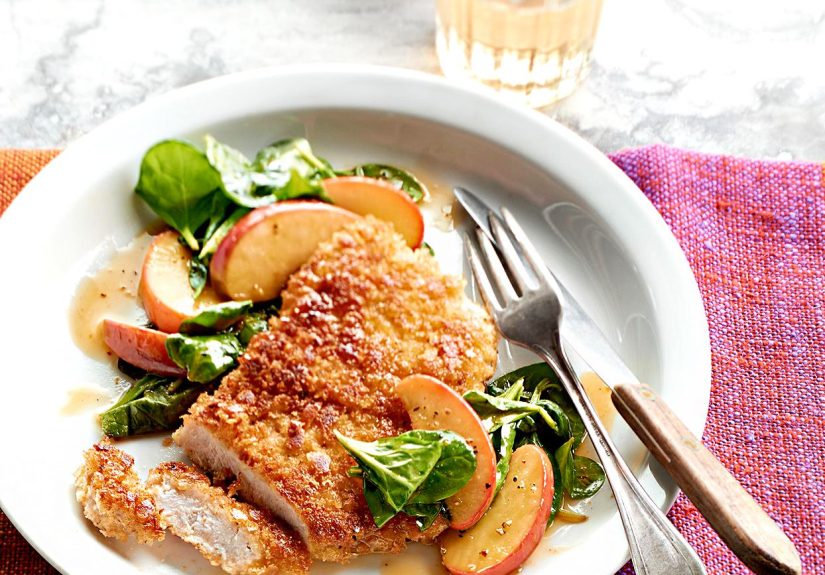
Pan-fried pork chops pair beautifully with mashed potatoes, green beans, roasted carrots, mac and cheese, cornbread, applesauce, collard greens, rice pilaf, or a crisp salad. Pork and apples are a classic combo for a reason, so an apple slaw or sautéed apples can make the plate feel extra polished without much effort.
Kitchen Lessons Everyone Learns the Juicy Way
There is a very specific kind of optimism that shows up when someone fries pork chops for the first time. It usually sounds like this: “How hard can it be?” Twenty minutes later, that same person is chewing thoughtfully and pretending the chop is “rustic.” Pork chops have humbled plenty of confident home cooks, and honestly, that is part of their charm.
One of the most common experiences is buying the thinnest chops in the store because they look quick and convenient. And to be fair, they are quick. They are so quick that by the time the table is set, they have already sprinted past juicy and landed squarely in dry territory. That first mistake teaches an unforgettable lesson: thickness matters. A slightly thicker chop is not being dramatic. It is giving you a chance.
Then there is the pan issue. Many people start with a skillet that is not hot enough, because hot oil feels suspicious and everyone has a healthy respect for splatter. The result is pale pork chops that sit there releasing moisture like they are trying to create their own weather system. Once you finally learn what shimmering oil looks like, everything changes. Suddenly the crust appears, the browning improves, and dinner starts to taste like a reward instead of a rescue mission.
Another classic experience is overcooking out of caution. This one is deeply understandable. Nobody wants undercooked pork. So people keep cooking “for one more minute,” then one more minute after that, and eventually they create a chop with the texture of a sturdy work boot. The turning point usually comes when someone uses an instant-read thermometer for the first time and discovers that pork can be safe, tender, and still juicy. That tiny tool saves more pork chops than inspirational quotes ever will.
Seasoning is another place where experience talks back. A chop seasoned right before it hits the pan can still be good, but a chop salted ahead of time is often noticeably better. Home cooks who try dry-brining once tend to become very smug about it, and frankly, they have earned that right. The flavor goes deeper, the browning gets better, and the whole thing tastes more polished with almost no extra effort.
Perhaps the funniest lesson is the rest time. Nearly everyone cuts into pork chops too early at least once. You spend all that time trying to keep the meat juicy, then slice immediately and watch the juices flood the plate like they are making a dramatic exit. After that, the resting period starts to feel less like waiting and more like protecting your investment.
In the end, frying pork chops well is not about culinary magic. It is about a handful of repeatable habits: buy better chops, season early, heat the pan properly, trust the thermometer, and let the meat rest. Once those habits click, juicy pork chops stop being a lucky accident and start becoming your standard move. That is when frying pork chops becomes genuinely fun, because dinner no longer feels like a gamble. It feels like a victory lap in a cast-iron skillet.
Final Thoughts
If you have been chasing juicy fried pork chops and somehow ending up with dry disappointment, the fix is simpler than it seems. Start with thicker chops, season them ahead of time, pat them dry, fry them in a properly heated skillet, and rely on temperature instead of guesswork. Add a short rest at the end, and suddenly pork chops stop being the meal people tolerate and start being the meal people request.
So the next time you stand at the stove wondering how to fry pork chops to always-juicy perfection, remember this: you are only a good pan, a decent thermometer, and a little self-control away from greatness.