Table of Contents >> Show >> Hide
- Before You Move a Radiator, Know What Type You Have
- Should You Move a Radiator Yourself?
- Why People Move Radiators
- Plan the New Radiator Location Carefully
- Tools and Materials You May Need
- Safety First: Old Homes Need Extra Caution
- How to Move a Radiator: Step-by-Step Overview
- Step 1: Turn Off the Heating System
- Step 2: Isolate or Drain the System
- Step 3: Disconnect the Radiator
- Step 4: Remove and Move the Radiator
- Step 5: Reroute the Pipes
- Step 6: Reinstall the Radiator
- Step 7: Refill the System
- Step 8: Bleed Air from Hot-Water Radiators
- Step 9: Test for Leaks
- Step 10: Balance the Heating System
- How Much Does It Cost to Move a Radiator?
- Common Mistakes to Avoid
- Can You Move a Radiator Without Draining the Whole System?
- What About Replacing Instead of Moving?
- After the Move: Maintenance Tips
- Real-World Experience: What Moving a Radiator Teaches You
- Conclusion
Note: This guide focuses on moving a home heating radiator, such as a cast-iron steam radiator, hot-water radiator, or hydronic wall radiator. If your “radiator” belongs to a car, please step away from the pipe wrench and slowly close this tab.
Moving a radiator sounds simple at first. You look at the room, point to a better wall, and say, “That would look nicer over there.” The radiator, unfortunately, does not share your enthusiasm. It is heavy, connected to a heating system, full of plumbing consequences, and sometimes old enough to have witnessed several generations of questionable wallpaper.
The good news? A radiator can be moved. Homeowners do it during remodels, floor-plan updates, kitchen renovations, bathroom expansions, and furniture layout rescues. The not-so-good news? It is rarely a “just drag it across the room” project. Moving a radiator requires planning, safe shutdown, pipe rerouting, leak prevention, system refilling, bleeding, balancing, and sometimes a licensed plumber or HVAC professional.
This in-depth guide explains how to move a radiator safely, when to call a pro, what tools are usually needed, what mistakes to avoid, and how to make sure your heating system works properly afterward.
Before You Move a Radiator, Know What Type You Have
The first step is identifying the radiator system. Different systems behave differently, and treating them all the same is how nice floors become indoor splash parks.
Hot-Water Radiators
Hot-water radiators are part of a hydronic heating system. A boiler heats water, and a pump circulates that water through pipes and radiators. These radiators usually have two pipe connections: one for supply and one for return. After moving one, the system must be refilled, bled of trapped air, and checked for proper pressure.
Steam Radiators
Steam radiators are common in older homes, especially in the Northeast and Midwest. A boiler creates steam, which travels through pipes and fills the radiator. Steam systems may have one pipe or two pipes. A one-pipe steam radiator must usually sit at a slight pitch toward the supply valve so condensed water can drain back properly. If the pitch is wrong, the radiator may bang, spit, hiss, or perform its best impression of a haunted tea kettle.
Electric Radiators or Baseboard Heaters
Electric radiators are not connected to boiler plumbing, but they are connected to electrical wiring. Moving one may require an electrician, especially if the circuit needs extending or local code requires hardwired heating equipment to be handled by a licensed professional.
Should You Move a Radiator Yourself?
You may be able to handle part of the job if you are experienced with plumbing, understand your heating system, and are moving the radiator only a short distance. However, many radiator relocation projects are best left to a licensed plumber or HVAC technician.
Call a professional if you have a steam system, old galvanized or black iron pipes, unknown shutoff valves, visible corrosion, asbestos-like pipe insulation, lead-painted surfaces, a radiator on an upper floor, or a move that requires opening walls or floors. Also call a pro if you are unsure how to drain, refill, repressurize, or balance your system.
In many U.S. areas, moving heating pipes may require permits or code-compliant materials. If you live in a condo, co-op, historic home, or rental property, you may also need approval before touching the system. Nothing says “renovation regret” like successfully moving a radiator and then discovering the building manager wanted paperwork first.
Why People Move Radiators
Radiators are often placed under windows because older homes were designed to counteract cold drafts. But modern insulation, new windows, and updated room layouts can make the original placement less practical. Common reasons to relocate a radiator include:
- Making room for cabinets, built-ins, or appliances
- Opening wall space for furniture or a larger bed
- Improving traffic flow in a narrow room
- Remodeling a bathroom, kitchen, mudroom, or attic
- Replacing an oversized old radiator with a slimmer model
- Improving heating performance in a cold area
Before you decide on the new spot, remember that the radiator still needs to heat the room evenly. Hiding it behind a sofa, tucking it behind long curtains, or boxing it into a decorative cabinet with poor airflow can reduce heat output. A radiator is not a shy houseplant. It needs breathing room.
Plan the New Radiator Location Carefully
The new location should be practical, accessible, and compatible with your heating system. Start by measuring the radiator, wall space, pipe routes, floor structure, and clearance around furniture.
Consider Heat Distribution
A radiator works best when warm air can circulate freely. Avoid placing it directly behind large furniture or inside a tight enclosure. If you use a radiator cover, choose one with proper vents at the bottom and top so air can flow through naturally.
Check Pipe Access
The shorter the pipe reroute, the easier and cheaper the job usually is. Moving a radiator a few inches may require only small pipe adjustments. Moving it across the room may require lifting flooring, cutting into walls, drilling joists correctly, and extending supply and return lines.
Think About Service Access
You need access to valves, unions, air vents, and bleed valves. Do not bury shutoff valves inside a wall or behind permanent cabinetry. Future-you will not admire present-you for that choice.
Tools and Materials You May Need
The exact tools depend on the system and pipe material, but radiator relocation commonly involves:
- Adjustable wrench and pipe wrench
- Radiator key or flat-head screwdriver for bleeding
- Bucket, towels, and plastic sheeting
- Furniture dolly or appliance dolly
- Pipe cutter or reciprocating saw, depending on pipe type
- Thread sealant or PTFE tape rated for heating systems
- New valves, fittings, unions, or pipe sections
- Level and measuring tape
- Stud finder and drill
- Protective gloves and eye protection
Cast-iron radiators are extremely heavy. Even a small one can be awkward, and larger units may weigh several hundred pounds. Use help, lift carefully, protect floors, and never trust an old radiator foot to slide gracefully across hardwood. It will not.
Safety First: Old Homes Need Extra Caution
Many radiator systems live in older homes, and older homes come with older-home surprises. Before disturbing pipes, walls, flooring, or painted radiator surfaces, watch for lead paint and asbestos-containing insulation.
Homes built before 1978 may contain lead-based paint. Sanding, scraping, drilling, or cutting near painted surfaces can create hazardous dust. If you are disturbing old paint, use lead-safe practices or hire an EPA-certified renovation professional.
Old pipe insulation may also contain asbestos. It is often found around heating pipes in basements, crawl spaces, and walls. Do not cut, tear, or remove suspicious insulation. Have it tested or handled by a qualified abatement professional.
Finally, never disconnect a radiator while the system is hot or pressurized. Turn off the boiler, let everything cool completely, and confirm pressure is relieved before opening the system.
How to Move a Radiator: Step-by-Step Overview
The following steps describe the general process. Your home may require a different approach depending on system design, pipe material, valve condition, and local code.
Step 1: Turn Off the Heating System
Turn off the thermostat and shut down the boiler or electrical supply to the heating system. Let the radiator cool fully. This may take several hours. Do not rush this step. Hot water and steam can cause serious burns.
Step 2: Isolate or Drain the System
If the radiator has working shutoff valves, you may be able to isolate it. However, many older valves do not seal perfectly. For hot-water systems, you may need to drain part or all of the system. For steam systems, water may still be present in low sections of pipe or inside the radiator.
Place towels and a bucket near the valve connections before loosening anything. Even a “drained” radiator can hide enough water to make your socks regret being born.
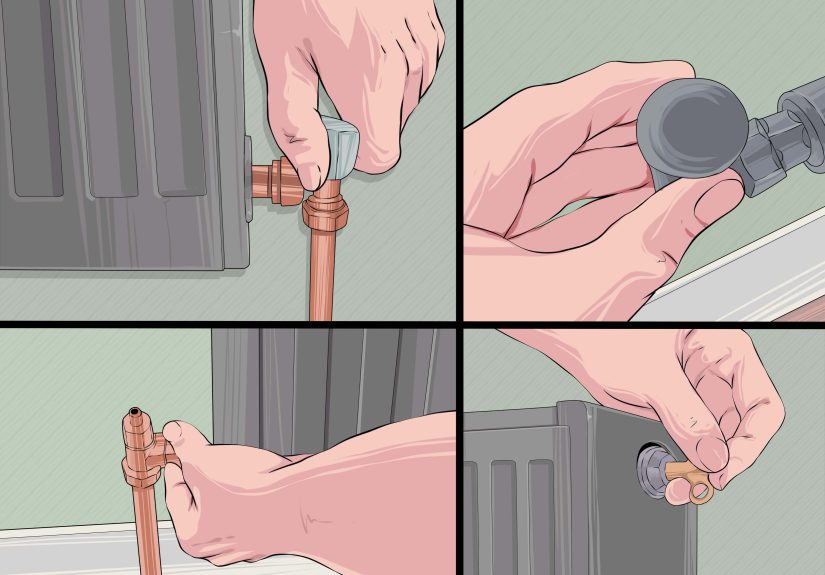
Step 3: Disconnect the Radiator
Loosen the union nuts that connect the radiator to the valves or pipework. Use two wrenches when needed: one to hold the valve steady and one to turn the nut. This helps prevent twisting old pipes inside the wall or floor.
If fittings are stuck, do not apply heroic force immediately. Old pipes can crack, valves can shear, and radiator spuds can become damaged. Penetrating oil, patience, and professional help are better than turning one project into three.
Step 4: Remove and Move the Radiator
Once disconnected, tilt the radiator carefully to drain remaining water into a pan or bucket. Cap or plug open connections temporarily to prevent drips. Move the radiator using a dolly and at least one helper. Protect floors with plywood or thick moving blankets.
Keep cast-iron radiators upright when possible. They are strong, but old sections and joints can be brittle. Avoid dropping, dragging, or using decorative feet as handles.
Step 5: Reroute the Pipes
This is the heart of the job. New pipe runs must match the system type, material, diameter, and flow requirements. Hot-water systems need proper supply and return connections. Steam systems need correct pipe sizing, slope, and drainage. Improper steam piping can cause water hammer, poor heating, and noisy operation.
For moves across a room, pipes may need to pass through joists, walls, or floors. Joists should never be cut or drilled randomly. Structural rules matter. If you are not sure where holes can go, hire a professional.
Step 6: Reinstall the Radiator
Set the radiator in its new position. Use a level to confirm placement. A hot-water radiator can usually sit level, while a one-pipe steam radiator typically needs a slight pitch back toward the supply valve so condensate can return. Reconnect valves and unions with appropriate sealant on threaded connections where required.
Do not overtighten fittings. Over-tightening can damage threads, crack fittings, or distort old connections. The goal is snug, sealed, and alignednot “tightened by someone angry at plumbing.”
Step 7: Refill the System
For a hot-water system, refill the boiler loop according to the manufacturer’s instructions or your technician’s guidance. Watch the pressure gauge and do not exceed recommended operating pressure. Many residential hydronic systems operate around low pressure compared with domestic water systems, but the correct number depends on your home and boiler setup.
For steam systems, make sure boiler water level is correct before firing the boiler. Steam boilers are sensitive to water level, venting, and piping configuration.
Step 8: Bleed Air from Hot-Water Radiators
Hot-water radiators often need bleeding after work is done. Open the bleed valve slowly with a radiator key or screwdriver until air escapes. When steady water appears, close the valve. Keep towels nearby and check boiler pressure afterward, because bleeding can lower system pressure.
Steam radiators are different. They typically use air vents, not manual bleeding in the same way hot-water radiators do. If a steam radiator is not heating, the vent, valve, pitch, or boiler pressure may be the issue.
Step 9: Test for Leaks
Run the system and inspect every joint, valve, union, and new pipe connection. Use a dry paper towel to check for tiny leaks. Look again after the system heats fully and again after it cools. Some leaks only appear during expansion and contraction.
Step 10: Balance the Heating System
After moving a radiator, the heating balance may change. One room may heat faster, another may become cooler, or air may collect in a high radiator. Hot-water systems may need balancing at the valves. Steam systems may need vent adjustments. The goal is even heat without noise, cold spots, or pressure problems.
How Much Does It Cost to Move a Radiator?
The cost to move a radiator varies widely. A small move with accessible piping may cost only a few hundred dollars in labor and materials. A larger relocation involving wall repair, floor removal, new valves, pipe rerouting, and system balancing can cost much more. Complex steam work, corroded fittings, old pipe replacement, or hidden hazardous materials can increase the price quickly.
Budget for more than the pipe work. You may also need drywall repair, flooring repair, painting, radiator refinishing, new valves, permit fees, or professional system service. A smart approach is to get at least two quotes from licensed plumbers or HVAC contractors familiar with radiator heating systems, not just general plumbing.
Common Mistakes to Avoid
Choosing the Location Based Only on Looks
Yes, the radiator should stop ruining your furniture layout. But it also needs to heat the room. A beautiful location that blocks airflow or creates long inefficient pipe runs may not be worth it.
Ignoring Steam Radiator Pitch
Steam systems rely on drainage. If condensate cannot return properly, the system may bang loudly or heat unevenly. That noise is not “old-house charm.” It is physics filing a complaint.
Reusing Bad Valves
Old radiator valves may look fine until disturbed. Once moved, they may leak around the stem, union, or packing nut. If valves are corroded, seized, or unreliable, replacing them during relocation is often smarter than reopening the job later.
Forgetting About Air
After pipe work, hot-water systems often trap air. Air reduces heating performance and can make radiators gurgle. Bleed radiators carefully and check system pressure afterward.
Skipping the Leak Watch
A connection may look dry at first and drip later. Inspect the area during the first few heating cycles. A tiny leak near hardwood flooring is not tiny for long.
Can You Move a Radiator Without Draining the Whole System?
Sometimes, but not always. If the radiator has working isolation valves and the pipework can be modified without opening the rest of the system, a limited drain may be possible. However, older valves often do not shut completely. In many hot-water systems, draining at least part of the loop is the safer choice.
Steam systems may not require the same kind of full-system drain, but they still require careful handling, correct boiler shutdown, and proper pipe work. When in doubt, assume water is present and prepare accordingly.
What About Replacing Instead of Moving?
Sometimes the best way to move a radiator is to replace it with a better-sized unit in a better location. Modern panel radiators, low-profile hydronic baseboards, or correctly sized replacement cast-iron radiators may fit your room more neatly.
Before replacing, calculate heat output needs. A radiator that is too small will leave the room chilly. One that is too large may overheat the space or make balancing harder. A heating professional can perform a room-by-room heat-loss calculation and recommend the right size.
After the Move: Maintenance Tips
Once the radiator is moved and working, keep it efficient with simple maintenance. Clean dust from the fins or sections, keep furniture and curtains away, check valves for leaks, and bleed hot-water radiators when they develop cold spots at the top. Schedule boiler maintenance according to the manufacturer’s recommendations and local professional guidance.
If you hear banging, hissing, rushing water, or repeated gurgling after the move, do not ignore it. Those sounds may point to trapped air, incorrect pitch, pressure issues, a bad vent, or poor circulation.
Real-World Experience: What Moving a Radiator Teaches You
Anyone who has moved a radiator learns one lesson quickly: the radiator is never “just sitting there.” It may look calm and innocent, but it is part of a whole-house heating system. Touch one connection, and suddenly you are thinking about boiler pressure, floor joists, old paint, pipe slope, and why the previous owner used seven layers of flooring like geological sediment.
One common experience is underestimating the weight. A cast-iron radiator can look manageable until it is two inches off the floor and everyone involved begins communicating only through strained eyebrows. The safest projects are the ones where homeowners plan the lift before disconnecting anything. That means clearing the path, protecting the floor, having a dolly ready, and recruiting real helpnot asking one sleepy neighbor in flip-flops.
Another lesson is that old fittings have personalities. Some union nuts loosen with a polite turn of the wrench. Others behave as if they were installed by a blacksmith with a grudge. Experienced plumbers know when to apply pressure and when to stop before a pipe breaks inside the wall. DIYers often learn this difference after a dramatic creak, which is not the sound you want from hidden plumbing.
Homeowners also discover that the best new location is not always the prettiest one. During remodel planning, it is tempting to hide the radiator behind a cabinet, tuck it into a corner, or place it where it looks “less radiator-ish.” But heat needs airflow. A radiator stuffed behind furniture becomes an expensive metal sculpture that occasionally makes the wall warm. Good placement balances design with performance.
The cleanup phase is another surprise. Even careful draining can release dark water from old hydronic systems. That water may contain rust and sediment, and it has a special talent for finding pale rugs. Smart remodelers use drop cloths, plastic sheeting, buckets, and old towels before opening any connection. The towel you do not place is always the towel you need most.
Then there is the first heating cycle after the move. This is the moment of truth. You listen for bangs, inspect for leaks, check for warmth, and stare at every fitting like a detective in a plumbing mystery. A dry joint after ten minutes is encouraging. A dry joint after several full heat-and-cool cycles is better. Patience matters because metal expands, contracts, and occasionally reveals a slow drip only after the system has settled.
Finally, moving a radiator teaches respect for tradespeople. A good plumber or heating technician is not just connecting pipes. They are reading the system: pressure, flow, pitch, venting, pipe size, access, safety, and long-term serviceability. A clean radiator move feels simple when finished, but that simplicity is the result of many small correct decisions.
So yes, moving a radiator can improve a room dramatically. It can free a wall, rescue a furniture plan, make a kitchen remodel work, or turn an awkward bedroom into a usable space. Just treat it like a heating project, not a furniture shuffle. Plan carefully, work safely, respect the system, and do not pick a fight with cast iron unless you brought friends.
Conclusion
Moving a radiator is absolutely possible, but it is not a casual weekend task for every homeowner. The project involves heating-system knowledge, safe shutdown, careful disconnection, heavy lifting, pipe rerouting, leak testing, refilling, bleeding, and balancing. Hot-water radiators and steam radiators each have their own rules, and older homes may add lead paint, asbestos insulation, corroded fittings, or permit requirements to the mix.
If the move is short, the system is modern, and you have real plumbing experience, you may be able to handle part of the work. If the system is steam, old, corroded, hard to drain, or tied into a larger renovation, hiring a licensed professional is usually the smarter and safer route. A properly moved radiator should heat evenly, stay quiet, remain leak-free, and look like it always belonged in its new spot.