Table of Contents >> Show >> Hide
- Before You Touch Anything: Identify What Type of Insert You Have
- Safety First (Not Fun, But Necessary)
- Tools and Supplies You’ll Actually Use
- Step-by-Step: How to Remove the Insert (The General Flow)
- Wood-Burning Fireplace Insert Removal (Most Common DIY Scenario)
- Gas Fireplace Insert Removal (Where DIY Gets Risky)
- Electric Fireplace Insert Removal (The “Finally, a Win” Category)
- What About the Damper, Block-Off Plate, and Fireplace Opening?
- Disposal, Selling, or Reusing Your Old Insert
- Troubleshooting: Common “Why Won’t It Come Out?” Problems
- FAQs (Because Everyone Asks These)
- Conclusion: The Clean Exit Strategy
- Real-World Experiences ( of “What People Learn the Hard Way”)
- SEO Tags
Fireplace inserts are like big, cozy space heaters that decided to move in and never pay rent. They’re greatuntil you need to remove one for a remodel, a replacement, a chimney repair, or because you discovered the insert is older than your Wi-Fi password. The tricky part is that “fireplace insert” can mean three very different beasts: a wood-burning insert (usually vented with a liner), a gas insert (gas line + venting + sometimes electricity), or an electric insert (power cord and vibes).
This guide walks you through removal the smart way: safely, with minimal damage to your hearth and surround, and without turning your living room into a soot-themed escape room. You’ll also learn when removal is a solid DIY joband when it’s time to tap a certified pro (especially for gas).
Before You Touch Anything: Identify What Type of Insert You Have
1) Wood-burning insert (aka “wood stove insert”)
Usually heavy cast iron or steel. Often has a stainless steel chimney liner running from the insert up the flue to a cap on the chimney top. May have a surround panel (“trim kit”) covering the gap between insert and fireplace opening. Many have a blower that plugs into an outlet.
2) Gas fireplace insert
Connected to a gas shutoff (often in the firebox, nearby wall, basement, or crawlspace), plus a venting system (co-linear pipes or a liner setup), and frequently an electrical plug for the blower or ignition. The unit may slide out once the surround and connections are removed.
3) Electric insert
The easiest to remove in most homes: unplug, unscrew, slide out. Still heavy sometimes, but it’s usually a “furniture removal” problem, not a “combustion appliance” problem.
Safety First (Not Fun, But Necessary)
- Let everything cool completely. If it was used recently, give it a full day. Ashes and metal can hold heat longer than expected.
- Shut off power. Unplug the insert if possible. If it’s hard-wired (rare), shut off the breaker.
- For gas inserts: do not DIY gas disconnection unless you’re qualified. Turning off a shutoff valve is one thing; disconnecting piping is another.
- Protect your lungs and eyes. Wear a respirator or quality dust mask, safety glasses, and gloves. Soot is sneaky.
- Plan for weight. Many inserts are 250–500+ pounds. Recruit help, use a dolly, and don’t trust your back to “positive thinking.”
- Expect sharp edges. Sheet metal surrounds, brackets, and liners can cut like they’re auditioning for a horror movie.
Tools and Supplies You’ll Actually Use
- Work gloves, safety glasses, dust mask/respirator
- Drop cloths or plastic sheeting + painter’s tape (contain the soot)
- Shop vacuum with a fine dust bag/filter (HEPA is ideal)
- Screwdrivers (Phillips and flat), nut drivers, socket set
- Allen keys (common on trim kits)
- Adjustable wrench, pliers
- Pry bar (gentle persuasion), rubber mallet
- Cardboard, plywood, or a moving blanket to protect hearth/floor
- Furniture dolly or appliance dolly + ratchet straps
- Flashlight/headlamp
- For liner work: ladder/roof safety gear (or hire outno shame)
Step-by-Step: How to Remove the Insert (The General Flow)
Most inserts come out the same way: remove the trim/surround, disconnect power and venting (and gas if applicable), then slide the unit forward. The details depend on the type.
Step 1: Prep the room like you’re about to bake with flour
Soot travels. Cover nearby furniture, roll up rugs if possible, and tape plastic sheeting around the fireplace opening to reduce dust migration. Put cardboard or a moving blanket on the hearth and floor to prevent scratches when the insert slides out.
Step 2: Remove decorative parts (front, surround panels, trim)
Many inserts have a front face, screen, or surround that’s held by screws, clips, or brackets. Work slowly, keep hardware in labeled bags, and take photos as you go (future-you will be grateful and slightly less sarcastic).
- Gas inserts: Remove the barrier/screen, then access panels as needed. Some manuals recommend removing logs and glass for service access before pulling the unit.
- Wood inserts: Surround panels usually unscrew from the insert body or brackets inside the opening.
- Electric inserts: Often mounted with a few screws through the surround frame.
Step 3: Disconnect electricity (blowers, igniters, controls)
If it plugs into an outlet inside or near the firebox, unplug it. If the cord disappears behind panels, remove panels until you can safely unplug. Avoid yanking cordsmost inserts have tight routing and sharp metal edges.
Wood-Burning Fireplace Insert Removal (Most Common DIY Scenario)
Wood inserts typically connect to a stainless steel chimney liner. That liner is often the main thing preventing you from simply sliding the insert out. Your job is to detach the liner from the insert (and sometimes from the chimney top), then remove the insert.
Step 4: Empty the insert and lighten the load
Scoop out ash into a metal container with a lid. Remove firebricks if they’re loose and clearly designed to lift out (some are fixed). Take out baffles only if the manual indicates they’re removable. The goal is to reduce weight and messnot to dismantle the insert into a confusing puzzle you can’t reassemble.
Step 5: Locate the flue/liner connection
The liner connection is usually at the top of the insert. Access may be from inside the firebox after removing baffles, or from behind a top panel. Look for a clamp, screws, or a collar connecting the liner to the insert flue outlet.
Step 6: Detach the liner from the insert (and plan for what happens next)
Once detached, you have two common options:
- Leave the liner in place (temporarily). If you’re replacing with another insert soon, you may keep it staged in the flue. Secure it so it can’t drop.
- Remove the liner completely. This often requires accessing the chimney top to detach the cap/top plate and pull the liner up or down.
Important: liners can be sharp and springy. If you’re not comfortable with roof work, hire a chimney pro for the top-side portion. It’s often a short service call compared to the cost of a hospital visit (and the emotional cost of explaining it).
Step 7: Slide the insert forward and out
With surround removed and liner detached, the insert typically slides forward. Some units have mounting brackets or screws anchoring them to the fireplace floor or side rails. Remove any fasteners you find. Then, with helpers, rock the insert gently side-to-side and pull forward onto your cardboard/blanket “runway.”
- Use a pry bar carefully if it’s stuckpry against a scrap wood block, not your finished masonry.
- Keep hands out from under pinch points. Inserts don’t “tap you on the shoulder” before they shift.
- Once on the hearth, transfer to a dolly for transport.
Gas Fireplace Insert Removal (Where DIY Gets Risky)
Gas inserts can often be removed mechanically in a similar waysurround off, slide forwardbut the gas line and venting are the big deal. Turning off a shutoff valve is generally straightforward; disconnecting gas piping is a licensed-job in many places and a bad DIY gamble.
Step 4: Shut off the gas supply
Locate the shutoff valve. Turn it to the off position. If you don’t know where it is, stop and locate it before proceeding. If the valve is inaccessible, corroded, or you smell gas at any point, stop immediately and call a licensed professional.
Step 5: Disconnect electricity and accessories
Unplug the blower/controls if present. Remove the front barrier, glass, and log set only if needed for access (and follow manufacturer guidance). These parts can be fragile and expensive, and they tend to chip at exactly the moment you say, “This will be fine.”
Step 6: Venting considerations (co-linear vents, liners, caps)
Many gas inserts vent through liners or a co-linear system that terminates at the chimney top. Like wood inserts, detaching venting may require roof access. If you’re not comfortable on a roof, don’t force it. A pro can disconnect and cap safely.
Step 7: Slide the unit out (only after gas is handled correctly)
Once gas and venting are properly disconnected by a qualified person (or if your setup uses a connector designed for safe disconnection by a trained tech), remove any remaining mounting screws/brackets. Then pull the insert forward with helpers.
Electric Fireplace Insert Removal (The “Finally, a Win” Category)
- Unplug the unit (or shut off the breaker if hardwired).
- Remove trim/surround screws holding the insert to the framing or fireplace opening.
- Slide the insert out and disconnect any remaining cable management.
Your biggest risks are scratches, weight, and pinching a cordnot combustion hazards.
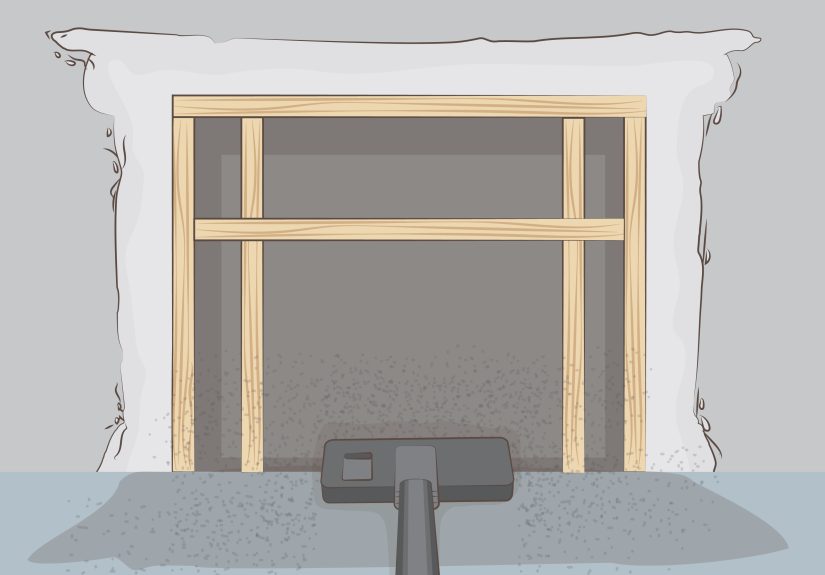
What About the Damper, Block-Off Plate, and Fireplace Opening?
Many wood insert installations involve sealing the damper area or adding a block-off plate to reduce drafts and improve performance. When removing an insert, you may find sheet metal plates, insulation, or hardware around the damper throat. Expect soot, debris, and fasteners hidden in strange places.
Removing a damper (only if necessary)
If a liner was threaded through a tight damper, the damper may have been modified, removed, or cut. If you need to remove remaining damper parts, it can involve lifting out a flapper from its guides or cutting/grinding a frame. This is one of the messiest and sparkliest jobs you can do inside a firebox, so protect nearby surfaces and use appropriate PPE.
After removal: inspect the firebox and chimney path
Once the insert is out, you can finally see what’s going on: cracked firebrick, damaged mortar joints, gaps around the old liner pass-through, or signs of moisture. If you’re reinstalling a new insert or returning to open-fireplace use, this is the time to get a professional chimney inspection.
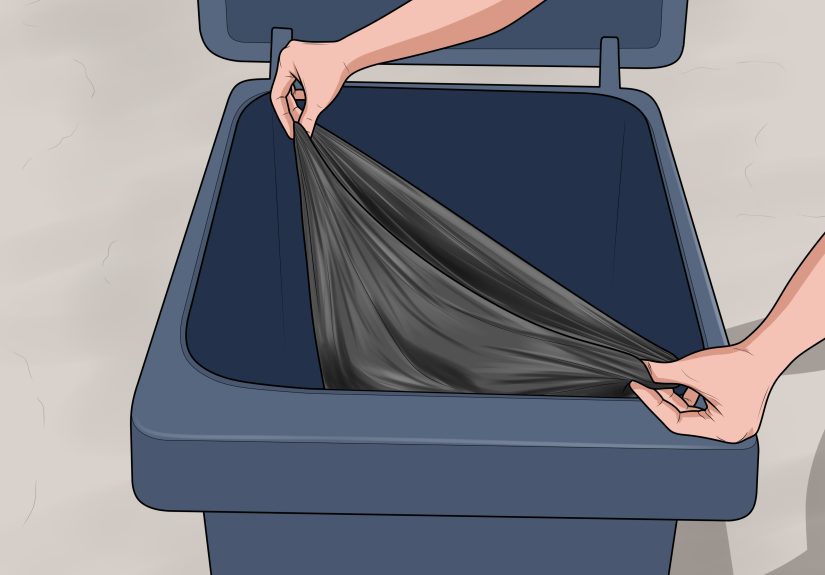
Disposal, Selling, or Reusing Your Old Insert
- Scrap metal: Many inserts are mostly steel/cast iron and can be recycled (call your local scrap yard for rules).
- Resale: If it’s EPA-certified and in good condition, you may be able to sell it locally. Be honest about age, model, and issues.
- Donation: Some reuse centers accept inserts; others don’t due to safety/liability. Call first.
- Gas inserts: If removing permanently, ensure gas lines are properly capped by a licensed pro.
Troubleshooting: Common “Why Won’t It Come Out?” Problems
It moves an inch and stops
Look for hidden screws or brackets inside the surround area. Also check for a blower cord, thermostat wire, or gas line slack getting snagged. Don’t keep pullingtrace the resistance.
The liner won’t detach
Some connections are accessed from inside the firebox after removing baffles. Others require pulling the insert forward slightly to reach the collar. If the liner is bound up above the damper area, you may need professional help to avoid tearing or collapsing it.
The surround won’t come off
Many surrounds hang on tabs after screws are removed. Lift slightly, then pull outward. If you force it, thin metal corners bend easily (and will never look square again).
FAQs (Because Everyone Asks These)
Can I remove a gas fireplace insert myself?
You can often remove trim and gain access, but gas disconnection and safe capping should be handled by a licensed professional. If you’re unsure at any point, treat it as a pro job.
Do I need to remove the chimney liner too?
Not always. If you’re replacing the insert soon, you may keep the liner if it’s the correct size and in good condition. If you’re abandoning the appliance or changing fuel types, a pro can advise on removal, relining, or proper termination.
Will removing an insert damage my fireplace?
It shouldn’tif you protect surfaces, remove fasteners carefully, and don’t pry directly against finished masonry. Most damage comes from rushing, not from the insert itself.
Conclusion: The Clean Exit Strategy
Removing a fireplace insert is part demolition, part archaeology, and part “why is there a screw back there?” The winning formula is simple: identify your insert type, shut off power (and gas, safely), remove the surround, disconnect venting/liner, then slide the unit out with help and protection. Wood inserts are often doable for skilled DIYers; gas inserts are where you should lean heavily on licensed pros for disconnection and safety.
Real-World Experiences ( of “What People Learn the Hard Way”)
The first surprise most homeowners have is how much stuff lives behind a fireplace insert. Even a well-maintained unit tends to hide an impressive blend of soot, dust bunnies, and the occasional mysterious screw that looks like it came from a 1987 VCR. People often assume the mess will stay inside the firebox, but the moment you pull the surround panel, fine black dust tries to redecorate your living room. The best “experience-based” tip is also the least glamorous: hang plastic, seal edges with painter’s tape, and keep a shop vac nearby. It’s not overkillit’s future sanity.
The second lesson is that inserts are heavier than they look. Many folks begin with optimism (“My buddy and I can totally lift this.”) and end with a sore back and a new appreciation for appliance dollies. A common workaround is to slide the insert onto a sacrificial layer of cardboard or a moving blanket, then inch it forward like you’re moving a sleeping bear without waking it. When people skip the floor protection, the insert’s bottom edges can scratch stone, crack tile, or chip brickespecially if the unit drops off the hearth lip by half an inch. The fix is simple: build a smooth “runway” from the firebox to the room and keep the motion slow and controlled.
Wood inserts teach a third lesson: the chimney liner is the boss of the operation. Homeowners often assume the insert is “just sitting there,” but the liner connection can hold everything hostage. It’s common to discover a tight clamp you can’t reach, or a connection that requires removing internal panels or baffles first. And then there’s the moment you realize the liner is terminated at the top of the chimney and you may need roof access. In real life, this is where many successful DIY removals become “DIY + one professional service call,” and that’s a totally reasonable hybrid approach. The insert can be your job; the roof portion can be theirs.
Gas inserts add a different kind of wisdom: if you ever smell gas, you stop. Full stop. People who have removed trim panels sometimes find an old, slightly stressed flex connector or a cramped shutoff valve that doesn’t move smoothly. The experienced approach is to avoid heroics. Shut off the valve if it’s accessible and smooth, ventilate, and bring in a licensed tech for disconnection and capping. It’s not about being fearless it’s about being able to sleep later without wondering if you “maybe tightened that fitting enough.”
Finally, there’s the “after” experience: once the insert is out, the fireplace cavity often reveals why the insert was installed in the first place. Some homeowners find cracked mortar joints, old damper parts, water staining, or gaps where cold air has been pouring in for years. The practical takeaway is to treat removal as a checkpoint: clean, inspect, and decide what the fireplace’s next life will benew insert, restored open hearth, or a full remodel. The best removals don’t just end with an empty hole; they end with a plan.