Table of Contents >> Show >> Hide
- Why This Lemon Jelly Recipe Works
- Ingredients for Homemade Lemon Jelly
- How to Make Lemon Jelly Step by Step
- Tips for the Best Lemon Jelly
- Flavor Variations for Lemon Jelly
- How to Use Lemon Jelly
- Troubleshooting Lemon Jelly
- Storage and Food Safety Notes
- Experience Notes: What Making Lemon Jelly Teaches You
- Conclusion
- SEO Tags
Homemade lemon jelly is what happens when sunshine gets a pantry shelf and a respectable little lid. It is bright, sweet, tart, glossy, and dramatic enough to make plain toast feel like it has booked a vacation on the Amalfi Coast. Best of all, this lemon jelly recipe uses simple ingredients: lemon juice, water, sugar, and fruit pectin. No mystery powders from a wizard’s cabinet. No complicated pastry-school vocabulary. Just fresh citrus flavor captured in a jar.
Before we begin, let’s clear up one tiny confusion. In the United States, “lemon jelly” usually means a spreadable fruit preserve, similar to jam but smoother and clearer. It is not the wobbly lemon gelatin dessert you slice at a picnic. This recipe is the kind you spoon onto biscuits, swirl into yogurt, brush over fruit tarts, pair with cheese, or use as a glaze for roast chicken. If your breakfast has been looking bored lately, lemon jelly is the tiny yellow megaphone it needs.
Why This Lemon Jelly Recipe Works
A good lemon jelly recipe depends on balance. Lemon juice brings acidity and sharp citrus flavor. Sugar sweetens the jelly, supports the gel structure, and helps preserve the finished spread. Pectin gives the jelly its firm, spoonable texture. Water softens the lemon’s intensity so the result tastes bright rather than painfully sour. In other words, every ingredient has a job, and nobody is just standing around looking pretty.
Lemons naturally contain acid and some pectin, especially in the peel, pith, and seeds. However, using commercial fruit pectin makes the recipe more reliable for home cooks. It shortens cooking time, helps preserve the fresh lemon flavor, and reduces the guessing game that can happen when you rely only on natural pectin. That means less time staring nervously at a boiling pot and more time admiring your future toast topping.
Ingredients for Homemade Lemon Jelly
This recipe makes about four half-pint jars, depending on how much foam you skim and how accurately you measure. Use fresh, juicy lemons for the cleanest flavor. Meyer lemons create a sweeter, floral jelly, while regular lemons deliver a sharper, classic citrus punch.
Ingredients
- 2 cups fresh lemon juice, strained
- 1 cup water
- 1 tablespoon finely grated lemon zest, optional
- 6 tablespoons powdered fruit pectin, or one standard 1.75-ounce box
- 3 cups granulated sugar
- 1/4 teaspoon butter, optional, to reduce foaming
Equipment
- Large nonreactive saucepan or preserving pot
- Fine-mesh strainer
- Measuring cups and spoons
- Four half-pint canning jars with new lids and bands
- Jar lifter, ladle, and clean towel
- Boiling-water canner or large deep pot with rack
How to Make Lemon Jelly Step by Step
Step 1: Prepare the Lemons
Wash the lemons well, especially if you plan to use zest. Grate only the yellow outer peel, avoiding the bitter white pith underneath. Juice the lemons until you have 2 full cups of juice, then strain the juice through a fine-mesh strainer to remove seeds and pulp. A little pulp will not ruin the jelly, but straining helps create a clearer, more elegant finish.
Step 2: Prepare the Jars
Wash the jars, lids, and bands in hot soapy water. Keep the jars hot until filling time. Hot jelly going into cold jars can lead to cracked glass, and nobody wants their canning project to end with citrus lava and regret. Prepare the boiling-water canner so the water is hot and ready when the jars are filled.
Step 3: Combine Lemon Juice, Water, Zest, and Pectin
In a large nonreactive saucepan, combine the strained lemon juice, water, lemon zest, and powdered pectin. Add the optional butter if you want to reduce foam. Whisk well so the pectin dissolves evenly. Place the pan over high heat and bring the mixture to a full rolling boil, stirring constantly. A full rolling boil means the bubbles keep coming even when you stir.
Step 4: Add the Sugar
Add all the sugar at once. Stir until it dissolves completely. Return the mixture to a full rolling boil and boil hard for 1 minute, stirring constantly. Do not wander away to check your phone, answer the door, or debate whether lemons are emotionally superior to limes. This is one minute of focused stirring, and it matters.
Step 5: Skim and Fill
Remove the pan from the heat. Skim off foam with a spoon if needed. Ladle the hot lemon jelly into hot jars, leaving 1/4 inch of headspace. Wipe the rims with a clean damp towel, center the lids, and screw on the bands until fingertip tight. Do not crank the bands down like you are sealing a submarine.
Step 6: Process the Jars
Place the jars in the boiling-water canner. Make sure the water covers the jars by at least 1 inch. Process half-pint jars for 10 minutes, adjusting for altitude if necessary. When processing time is complete, turn off the heat, remove the canner lid, and let the jars rest for 5 minutes. Carefully remove the jars and place them on a towel. Let them cool undisturbed for 12 to 24 hours.
Step 7: Check the Seal
After the jars cool, check the lids. A sealed lid should not flex up and down when pressed in the center. Label the jars with the date and store sealed jars in a cool, dry, dark place. Any unsealed jar should be refrigerated and used first.
Tips for the Best Lemon Jelly
Use Fresh Lemon Juice When Flavor Matters
Fresh lemon juice gives this jelly its sparkling flavor. Bottled lemon juice has consistent acidity and is useful in many canning recipes, but for a recipe where lemon is the main character, fresh juice offers a cleaner aroma and better finish. If your lemons are dry, roll them firmly on the counter before cutting, or microwave them for about 10 seconds to encourage more juice.
Do Not Reduce the Sugar in a Traditional Jelly Recipe
It is tempting to cut the sugar, especially when the measuring cup looks like it is preparing for a candy parade. However, traditional jelly needs the correct balance of sugar, acid, and pectin to set properly. Reducing sugar can lead to syrup instead of jelly. If you want a lower-sugar lemon jelly, use a pectin specifically designed for low-sugar recipes and follow that package’s instructions.
Choose the Right Pot
Use a large saucepan even if the ingredients look modest at first. Jelly foams and rises as it boils, and a too-small pot can turn your stovetop into a sticky lemon volcano. Stainless steel is a good choice because it is nonreactive and easy to clean. Avoid aluminum or cast iron, which can react with acidic ingredients and affect flavor or color.
Measure Before You Cook
Jelly moves quickly once it boils. Have the sugar measured, jars hot, lids ready, and tools within reach before turning on the burner. This is not the time to discover that your ladle is in the dishwasher or your jar lifter has vanished into the same household dimension that eats socks.
Flavor Variations for Lemon Jelly
The classic lemon jelly recipe is beautiful on its own, but it also welcomes small flavor twists. Keep additions modest so the jelly still sets properly and the lemon flavor stays clear.
Meyer Lemon Jelly
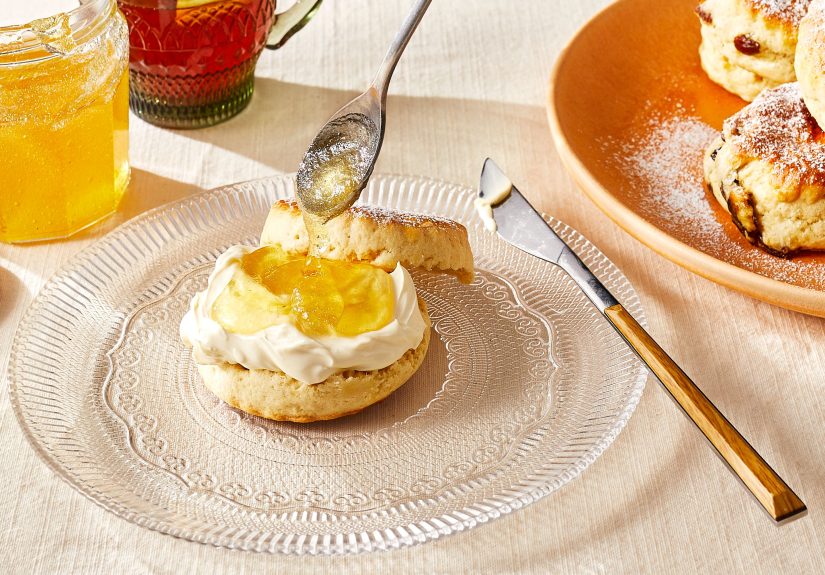
Replace regular lemons with Meyer lemons for a softer, sweeter flavor. Meyer lemons have a floral quality that makes the jelly taste almost like lemon blossom honey. Because they are less sharp than standard lemons, the finished jelly is especially good on scones, pound cake, and vanilla ice cream.
Lemon Thyme Jelly
Add 1 to 2 teaspoons of fresh thyme leaves to the lemon juice mixture before boiling. This version is lovely with goat cheese, roasted chicken, or a cheese board. It tastes fancy without requiring you to own a linen apron or say “herbaceous” at dinner.
Lemon Ginger Jelly
Add 1 teaspoon of freshly grated ginger for a warm, spicy edge. Lemon ginger jelly is excellent on toast, but it also works as a glaze for carrots, salmon, or chicken wings. Start with a small amount of ginger because it can quickly become the loud guest at the citrus party.
Lemon Vanilla Jelly
Add the seeds from half a vanilla bean after removing the jelly from the heat. Stir well before ladling into jars. This variation tastes like lemon custard in spreadable form and pairs beautifully with biscuits, shortbread, and pancakes.
How to Use Lemon Jelly
Lemon jelly is far more versatile than many people expect. Yes, it is wonderful on buttered toast, but that is only the beginning. Spoon it over Greek yogurt with granola for a bright breakfast. Spread it between cake layers instead of frosting for a lighter citrus filling. Warm it gently and brush it over fruit tarts to create a glossy bakery-style finish.
For savory dishes, lemon jelly can act like a quick glaze. Warm a few spoonfuls with a splash of water and brush it over roasted chicken during the last few minutes of cooking. Stir it into pan sauces for pork chops. Serve it with sharp cheddar, brie, cream cheese, or goat cheese. It also makes a charming edible gift because it looks cheerful, tastes special, and says, “I made this,” without requiring you to knit anyone a sweater.
Troubleshooting Lemon Jelly
Why Did My Lemon Jelly Not Set?
The most common reasons are undercooking, old pectin, inaccurate measuring, or reducing the sugar. Pectin loses strength over time, so check the date on the package. Also make sure the jelly returns to a full rolling boil after the sugar is added. A gentle simmer is not enough.
Why Is My Jelly Cloudy?
Cloudiness usually comes from pulp, squeezed jelly bags, or vigorous stirring after cooking. For clearer jelly, strain the lemon juice well and avoid pressing solids through the strainer. Cloudy jelly is still delicious, so unless you are entering it in a county fair, do not lose sleep over it.
Why Is My Jelly Too Firm?
Overcooking can make jelly too stiff. Too much pectin can also create a texture closer to citrus candy than spread. Measure carefully and boil hard for the recommended time. If your jelly is firm but still spreadable, call it “artisan texture” and move forward confidently.
Why Is There Foam on Top?
Foam is normal when jelly boils. A small amount of butter can reduce it, and any remaining foam can be skimmed off before filling the jars. Foam affects appearance more than flavor, though a clear jar of lemon jelly does look especially satisfying in the pantry.
Storage and Food Safety Notes
Properly processed and sealed lemon jelly should be stored in a cool, dark, dry place. For best quality, use it within one year. Once opened, refrigerate the jar and use it within several weeks. If you ever see mold, smell fermentation, notice bubbling, or find a lid that has lost its seal during storage, discard the jelly. Scraping off mold is not considered safe for jams and jellies.
If you do not want to can the jelly, you may refrigerate it instead. Pour the hot jelly into clean jars or containers, cool, cover, and refrigerate. Refrigerator lemon jelly should be treated as a fresh spread, not a shelf-stable preserve.
Experience Notes: What Making Lemon Jelly Teaches You
Making lemon jelly is one of those kitchen projects that looks simple on paper and then quietly teaches you five different lessons before lunch. The first lesson is patience. Juicing lemons takes longer than you think, especially if the lemons are stubborn little rocks pretending to be fruit. A good citrus juicer helps, but the real trick is choosing lemons that feel heavy for their size. Heavy lemons usually carry more juice, and more juice means fewer lemons sacrificed to the cause.
The second lesson is that measuring matters. In everyday cooking, a little extra onion or a casual splash of broth usually works out fine. Jelly is different. Jelly has opinions. Too little sugar, too much water, weak pectin, or a lazy boil can change the final texture. Once you understand that, the process becomes less intimidating. You stop guessing and start setting up your ingredients like a tiny cooking show: lemon juice strained, sugar ready, pectin measured, jars hot, towel waiting. Organization turns jelly-making from chaos into choreography.
The third lesson is that the kitchen will smell incredible. Lemon jelly has a clean, sparkling aroma that fills the room without feeling heavy. It is sharper than lemon cake, fresher than candy, and less fussy than marmalade. When the mixture hits a rolling boil, the scent becomes bright enough to wake up the whole house. If someone walks into the kitchen at that moment, they will probably ask what you are making. Try to answer modestly, even though you will feel like a citrus genius.
The fourth lesson is not to panic during the cooling stage. Hot jelly often looks loose when it goes into jars. That does not mean it failed. Many jellies continue to set as they cool, and some need a full day to reach their final texture. Do not shake the jars every ten minutes like a nervous scientist. Let them rest. Listen for the small ping of sealing lids. That sound is one of the great little rewards of home preserving.
The final lesson is that lemon jelly disappears faster than expected. One jar goes to toast. Another becomes a glaze. A third gets handed to a neighbor, because homemade jelly has a way of turning ordinary people into gift-givers. By the time you realize how useful it is, you may already be planning the next batch. That is the charm of this recipe: it is practical, cheerful, and just fancy enough to make everyday food feel special.
Conclusion
This lemon jelly recipe is a bright, reliable way to preserve fresh citrus flavor in a smooth homemade spread. With lemon juice, sugar, water, and pectin, you can make a glossy jelly that works for breakfast, desserts, cheese boards, and savory glazes. The key is respecting the balance of acid, sugar, and pectin, preparing your jars before you cook, and processing the jelly correctly if you want it shelf-stable.
Whether you use classic lemons for a bold tart flavor or Meyer lemons for a softer floral note, the result is a jar of edible sunshine. It is simple enough for beginners, useful enough for experienced canners, and cheerful enough to rescue even the saddest piece of toast. Homemade lemon jelly may not solve every problem, but it does make breakfast significantly more optimistic.